


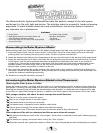

Introducing the Solar System Model in the Classroom
Assembling the Solar System Model
Includes:
• central tower
• eight planet orbs plus one dwarf planet orb
with identifying planetary symbols*
• nine metal rods, one for each of the eight planets
plus one for Pluto
• sun sphere (with symbol)
• Northern Hemisphere
star dome
• krypton bulb**
The Motorized Solar System and Planetarium takes the abstract concept of the solar system
and brings it to life with light and motion. The activities make for a powerful, hands-on learning
experience. To teach students about stars and constellations, use the star dome to transform
any classroom into a planetarium.
Before starting, place four C-size batteries in the battery compartment. See back cover of this guide for instructions.
1. Insert the krypton bulb into the center tower’s inner socket. Place the white plastic casing over the bulb,
pushing down and rotating the casing until it locks. Fit the sun sphere over the bulb.
2. Attach the shortest rod to Mercury, the closest planet to the sun. Insert this rod into the top ring of the central tower.
3. Attach the next shortest rod to Venus, and insert the rod and planet into the second ring from the top. Continue
in this fashion until all rods and planets have been assembled and attached to the tower. If you choose to
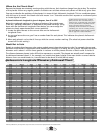
include Pluto, it should be at the bottom of the tower with the longest rod. Each planet is printed with its own
planetary symbol. For correct order, refer to the first three columns of the chart on page 4. They list each
planet’s name, symbol, and position in relation to the sun.
4. Once you have assembled the model, position the planets within their orbits by following the directions in
the section “Where Are the Planets Now?” While you may wish to arrange them yourself for your initial lesson, the
process also makes an excellent group activity.
For directions on using the star dome, see page 5.
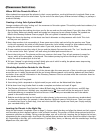
Observing the Solar System in Action
Seeing the model in action—revolving, with the light on—is a good starting point for students to learn about the
solar system. If looking over the model from the sun’s north pole, the planets orbit in a counter-clockwise direction.
Dimming the classroom lights will make the demonstration more dramatic. In a darkened room, students will be able
to see the sun’s light illuminating the planets. In addition, the black support rods and tower will be less visible.
With younger students, talk about the basic concepts the model illustrates.
The sun is at the center of the solar system.
Earth is one of eight planets in our solar system.
The planets travel around the sun constantly.
The planets move in generally circular patterns called orbits.
The sun gives off energy. The planets absorb and reflect this energy.
All the planets move in the same direction and on the same plane as they orbit the sun.
Older students will be able to understand and discuss more advanced concepts.
Each planet orbits the sun within a flat “slice of space.” Each travels in a basically circular path, without going up
and down.
The planets, as a group, also travel within a fairly flat “slice of space.”
We see the universe from a particular location on Earth. Our view of the planets and stars is affected by our location.
*
see table on page 4
*
* instructions for use
o
n back cover
®