


Gr a s s Tr i m m e r /Br u s h Cu T T e r
Op e r a T O r 's ma n u a l
23
B
A
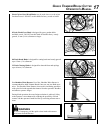
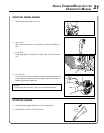
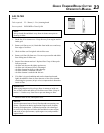
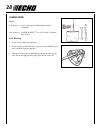
a I r f I l t e r
Level 1.
Tools required: 25 - 50mm (1 - 2 in.) cleaning brush
Parts required: REPOWER
TM
Tune-Up Kit
NOTE
Always brush dirt and debris away from air cleaner area prior to
cleaning air lter.
1. Brush dirt off air cleaner area. Keep dirt away from engine and air
intake grid.
2. Remove air lter cover (A). Brush dirt from inside cover and away
from edges of air lter.
3. Check air lter seal for tight t with air lter case.
4. Remove air lter (B) from case. Use care to prevent dirt and debris
from falling into air lter case.
5. Inspect lter element and seal. Replace lter if any of these prob-
lems are present:
•Air lter seal does not t tightly against case
•Air lter seal is distorted, worn, or damaged
•Air lter element has holes or other damage
•Air lter element is saturated with dirt
•Air lter element is soaked with fuel mix
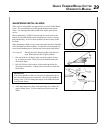
6. If air lter is in good condition and can be cleaned and reused,
lightly brush debris from air lter element, or blow lter element
clean using low pressure (40 psi or less) compressed air directed at
inside of lter.
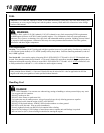
IMPORTANT
When using compressed air, always direct air stream at inside sur-
face of lter so dust and debris will be blown out of lter. Keep air
nozzle 6 - 8 inches away from lter to prevent damage to lter.
7. Install air lter in case, and replace cover.
NOTICE
Actual replacement interval for air lter depends on operating con-
ditions. Operation in dustier applications requires more frequent
cleaning and replacement. Continued operation with a damaged
or excessively dirty lter will allow dirt and debris to enter engine,
and result in poor performance, rapid engine wear, and premature
engine failure.