


14
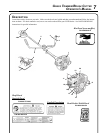
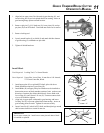
o p t I o n a l n y l o n h e a d I n s t a l l a t I o n
Tools Required: Locking Tool
Parts Required: Nylon Line Head.
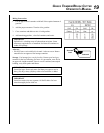
1. Align hole in upper plate with notch in gear housing, and insert
locking tool to prevent splined shaft from turning.
2. Thread line head onto PTO shaft by turning it counter-clockwise
until head is tight against upper plate.
3. Remove locking tool.
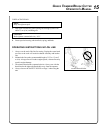
• Read the Operator’s Manual carefully. Be thoroughly familiar
with the controls and proper use of the trimmer.
Know how to stop the unit and disengage the controls.
• Never allow children to operate the trimmer.
• Never allow adults to use the trimmer unless they have received
proper instructions. Be sure the operator is properly attired and
wears the type of foot, leg, head, eye and ear protection recom-
mended both in your ECHO Operator’s Manual and by your
ECHO Servicing Dealer.
• Always wear eye protection that conforms to ANSI Z 87.
1-2000.1. Read the Operator’s Manual carefully. Be thoroughly
familiar with the controls and proper use of the trimmer.
Know how to stop the unit and disengage the controls.
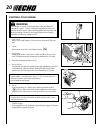
WARNING
Grass/weed trimmers can throw gravel, stone, wood chips, glass,
and plastic or metal objects. The debris shield behind the trimmer
head stops much of the debris, but cannot prevent the operator from
being struck by some debris. Read the rules for safe operation in the
operator’s manual that you received with your echo trimmer. Also,
follow all instructions in this instruction sheet.
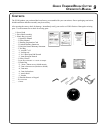
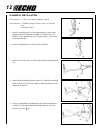
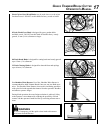
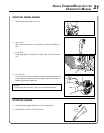
1. REPLACING LINE
A. Remove spool by turning knob clockwise, “right”, and separating
parts.
B. Thread a 6 m (20 feet) length of 2.4 mm (0.095 in) or 2.7 mm
(0.105 in) ECHO line through hole in spool so that ends are the
same length.
C. Wind both ends of line tightly and evenly clockwise (see arrows on
spool), and wind from side to side without twisting the lines.
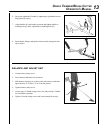
D. Secure ends of line temporarily with about 15 cm (6 in) extending
out.
11
1C
1D
HOUSING
BOLT
SPRING
KNOB
1B
2A
15 cm (6 in)
SPOOL
2B