


10
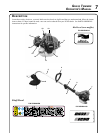
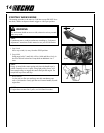
p l a s t I c s h I e l d I n s t a l l a t I o n
CAUTION
Wear Gloves or personal injury may result:
• Cutoff knife is sharp.
• Gearcase and surrounding area may be hot.
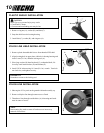
1. Remove wing nut (A), washer (B), and bolt (C).
2. Snap the shield over the bearing housing.
3. Install bolt (C), washer (B), and wing nut (A).
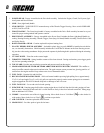
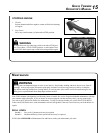
n y l o n l I n e h e a d I n s t a l l a t I o n
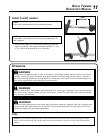
1. Remove plastic threaded shaft sleeve from threaded PTO shaft.
2. Align locating hole in upper plate with hole in bearing housing and
insert 5 mm (3/16 in.) diameter locking tool (A).
3. Place large washer (B) then line head (C) on threaded shaft, fol-
lowed by small metal washer (D) and locknut (E).
4. Install 3/8-24 locknut using 14.5 mm (9/16 in.) wrench. Turn lock-
nut clockwise, and tighten securely.
IMPORTANT
Remember to remove the locking tool.
C
A
B
A
B
C
D
E
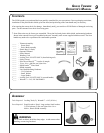
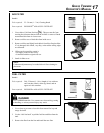
n y l o n l I n e I n s t a l l a t I o n
1. Shut engine off. Lay unit on the ground with head assembly up.
2. Remove old nylon line through center recess of head.
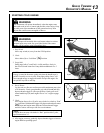
3. Thread new lines through outside holes (A) in housing until ends
meet in center of recess.
NOTE
Insert cutting line ends to center of head recess to insure easy
removal of used lines.
A