


9
1
009301
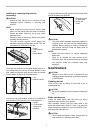
Take out the blade cover from the old shear blades and
fit it onto the new ones for easy handling during the
replacement of blades.
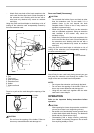
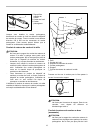
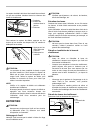
009302
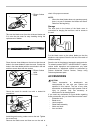
Place the new shear blades on the tool so that the oval
holes in the shear blades fit onto the crank. Overlap the
holes in the shear blades with the screw holes in the tool
and then secure them with two screws.
1
2
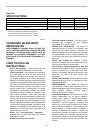
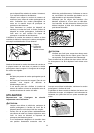
009303
Check the crank for smooth turn with a slotted bit
screwdriver.
1
009304
Install the gear housing, under cover on the tool. Tighten
the screw firmly.
Remove the blade cover and then turn on the tool to
check it for proper movement.
NOTE:
• When the shear blades does not operate properly,
there is a poor fit between the blades and crank.
Redo from the beginning.
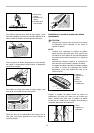
Storage
The hook hole in the bottom of the blade cover is
convenient for hanging the tool from a nail or screw on
the wall.
009305
Put the blade cover on the shear blades so that the
blades are not exposed. Store the tool out of the reach of
children carefully.
Store the tool in the place not exposed to water and rain.
To maintain product SAFETY and RELIABILITY, repairs,
carbon brush inspection and replacement, any other
maintenance or adjustment should be performed by
Dolmar Authorized Service Centers, always using
Dolmar replacement parts.
ACCESSORIES
CAUTION:
• These accessories or attachments are
recommended for use with your Dolmar tool
specified in this manual. The use of any other
accessories or attachments might present a risk of
injury to persons. Only use accessory or
attachment for its stated purpose.
If you need any assistance for more details regarding
these accessories, ask your local Dolmar service center.
• Extension cord
• Blade cover
• Hook complete
• Shear blade assembly
• Waist cord hook
• Arm cord hook
1. Crank
1. Ellipse of shear
blade
2. Crank
1. Ellipse of shear
blade