


6
English
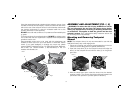
4. Close the clamp lever (G) to secure the tuckpoint shroud on the
gear case. Do not operate the grinder with a loose tuckpoint
shroud or the clamp lever in open position.
5. To remove the tuckpoint shroud, open the clamp lever, rotate the
tuckpoint shroud to align the slots and tabs and pull up on the
tuckpoint shroud.
NOTE: The tuckpoint shroud is pre-adjusted to the diameter of the
gear case hub at the factory. If, after a period of time, the tuckpoint
shroud becomes loose, tighten the clamp adjusting screw (B) with
clamp lever in the closed position.
NOTICE: Do not tighten the clamp adjusting screw with the clamp
lever in open position. Undetectable damage to the tuckpoint shroud
or the mounting hub may result.
NOTICE: If tuckpoint shroud cannot be tightened by the clamp
adjusting clamp, do not use tool. Take the tool and tuckpoint shroud
to a service center to repair or replace the tuckpoint shroud.
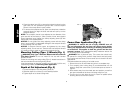
Mounting Cutting (Type 1) Wheels (Fig. 1)
WARNING: Only Type 1 Diamond Wheels shall be used with
Tuck-Point Shroud. Do not cut metal. Do not use with bonded
abrasive wheels.
Follow the mounting and using cutting (Type 1) wheels instructions in
the tool manual and mount the grinding wheel.
It may be necessary to open the cornering door to install 6" (152.4mm)
tuckpointing wheels, see Cornering Door Application.
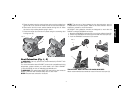
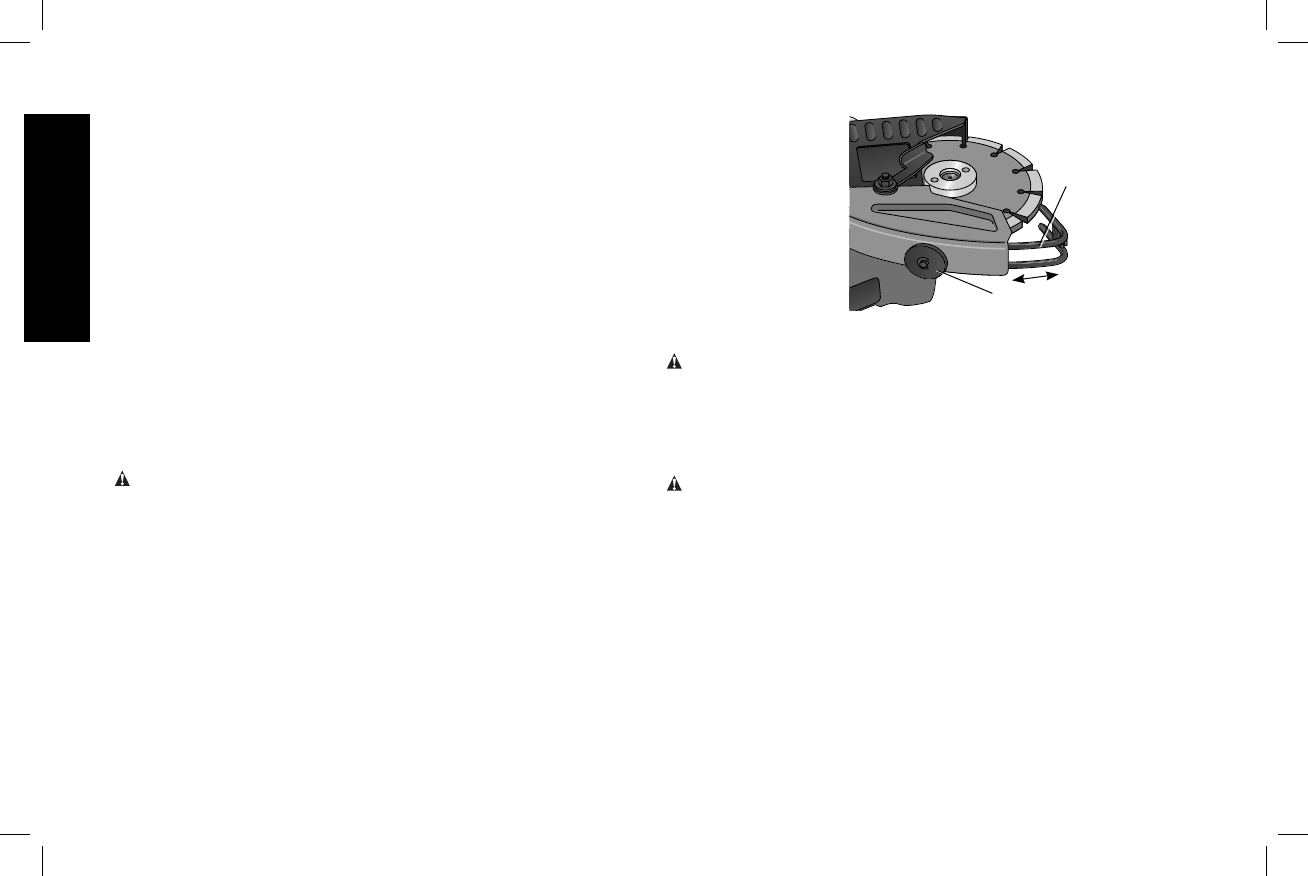
Depth of Cut Adjustment (Fig. 3)
1. Loosen the depth of cut shoe locking knob (D).
2. Slide the depth of cut shoe (C) to the desired position.
3. Tighten depth of cut shoe locking knob.
FIG. 3
C
D
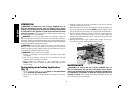
Corner Door Application (Fig. 4)
WARNING: To reduce the risk of injury, ALWAYS turn off
tool and disconnect the tool from the power source before
making any adjustments or removing or installing attachments
or accessories. This applies to both the grinder and the dust
extractor vacuum. Such preventative safety measures reduce the
risk of starting the tool accidentally.
WARNING: Risk of personal injury. The corner door should only
be opened for cutting inside corners. Keep hands and body away
from cutting area at all times. Ensure corner door is closed in all other
applications.
This feature allows the cutting of an inside corner.
1. Ensure the tool is off and wheel has come to a complete stop.
2. Turn cornering door locking lever (E) counterclockwise one full
rotation. Grasp the corner door (F) and rotate open as shown in
Figure 4.
3. Place hands away from the wheel area and position yourself so
the open underside of the shroud is facing away from you.
4. Turn the tool on and allow the tool to reach full speed before
touching the tool to the work surface.