


10- ENG
D25572
FOR GBE4010 AND GBFE6010
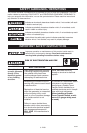
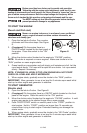
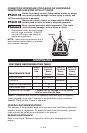
5. Remove the nut from the solenoid
post with the panel assembly wire
harness. Place one end of the posi-
tive (red) battery cable onto this
post with the panel assembly wire.
Reassemble nut and tighten
securely. See Figure 4.
FOR GBV7000, GBV7010,
GBVE8000
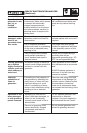
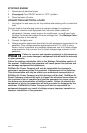
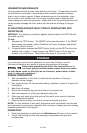
5. Remove the nut from the solenoid
post and place one end of the posi-
tive (red) battery cable onto the
post. Reassemble nut and tighten
securely. See Figures 5.
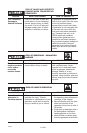
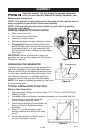
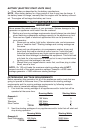
Lawn & Garden
batteries can come in
two terminal configurations. The
Positive (+) and Negative (-) terminals
can be oriented so that they are +/- or
-/+. See Figure 6. In the unlikely event
that the battery terminals are un-
marked, we recommend that you
return the battery to the retailer for
exchange for a properly marked
battery or let an authorized service
center install the battery for you.
Failure to connect the battery
properly can possibly cause bodily
injury. In addition, extensive engine
electrical damage not covered under
warranty can result.
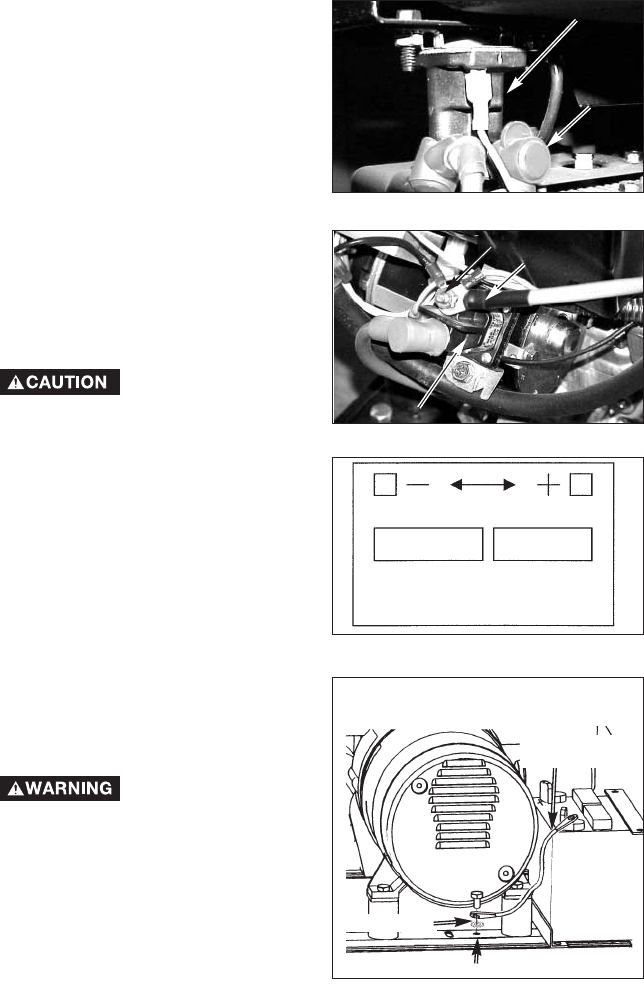
6. Attach the other end of the positive
(red) battery cable to the positive (+)
terminal on the battery.
To Prevent sparks
connect the red
(positive) cable to the positive (+)
terminal before connecting the black
negative cable.
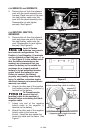
7. Attach one end of the negative
(black) cable to the negative (-)
terminal on the battery.
8. Attach the other end of the negative
(black) cable to the frame as
shown. Install the star washer be-
tween the cable and the frame. See
Figure 7.
Panel
Assembly
Wire
Harness
Solenoid
Figure 4
Positive (+)
Battery Cable
Solenoid
Figure 5
Figure 6
Figure 7
Nuts
(-) Negative Battery Cable Connection
Star Washer
Negative (-)
Battery Cable
IMPORTANT: See Figure 6 caution
before connecting cable to battery.
Negative (-)
Battery Cable