


107396
For more information, visit www.desatech.com
For more information, visit www.desatech.com
6
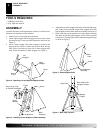
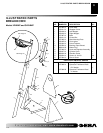
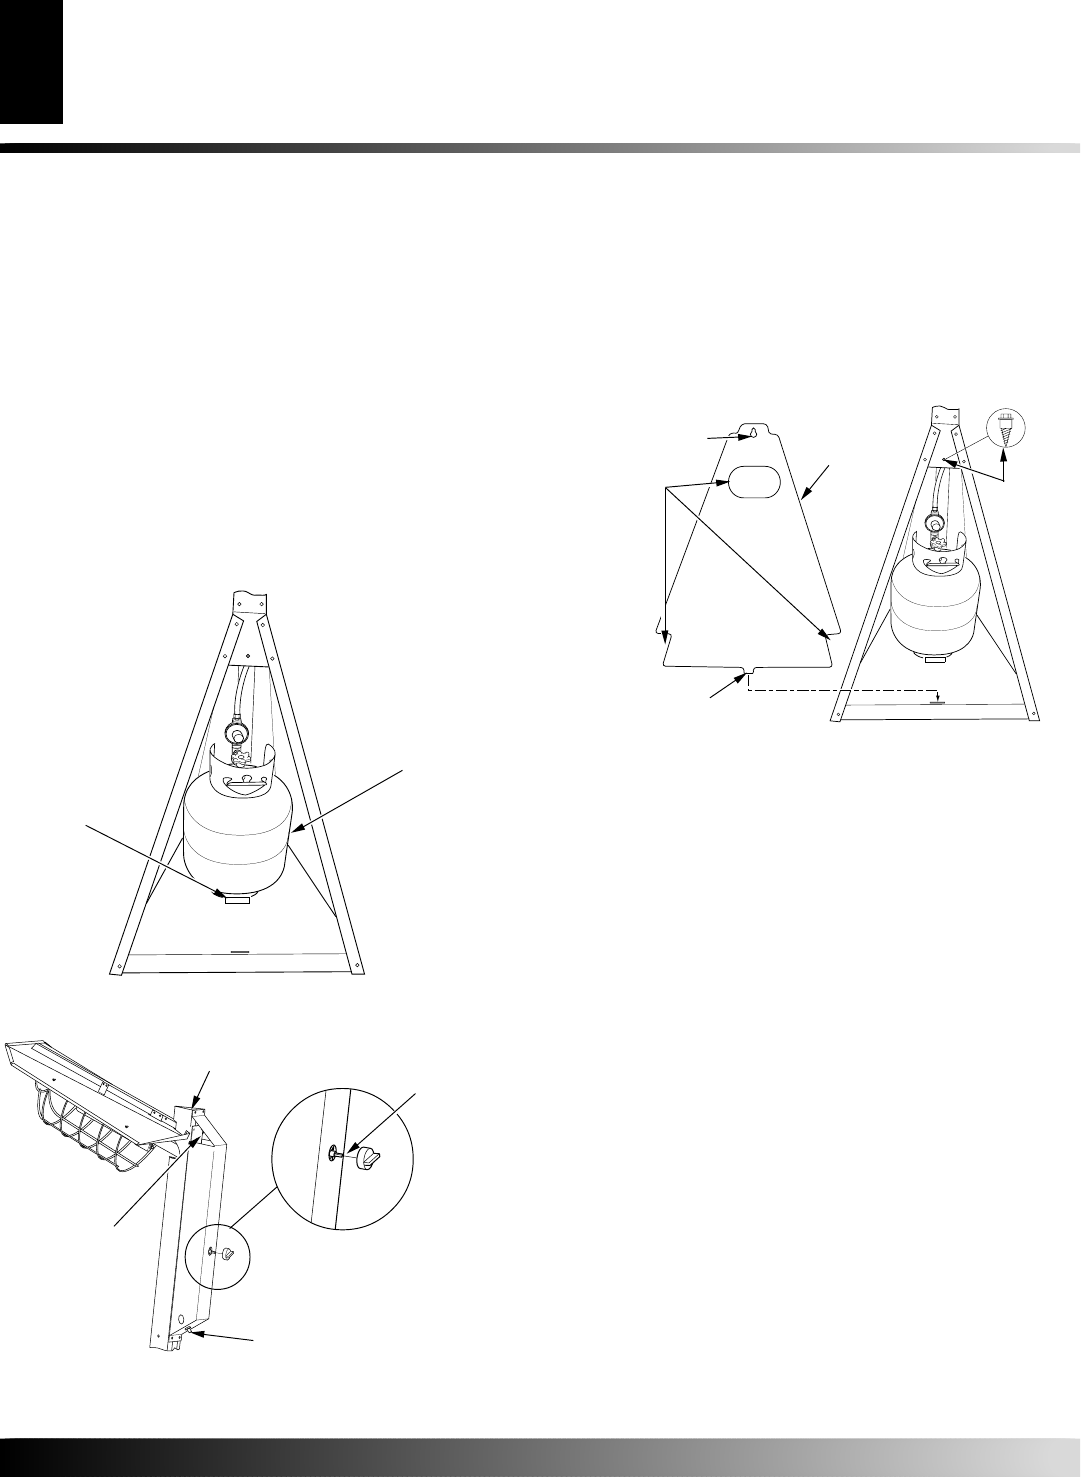
Figure 13 - Installing Cylinder Cover
Shoulder
Screw
Cylinder
Cover
Slide Over
Shoulder Screw
Tab
OPERATION
LIGHTING INSTRUCTIONS
1. Remove cylinder cover by lifting up and out.
2. Using only a 20 lb. propane/LP cylinder, not included (see
safety information for proper cylinder selection), connect the
hose/regulator assembly to the cylinder (see Figure 10, page
5). The hose should already be connected to the heater. When
connecting regulator assembly to cylinder valve, hand tighten
nut clockwise to a positive stop. DO NOT use a wrench to
tighten. Use of a wrench may damage quick closing coupling
nuts and result in a hazardous condition.
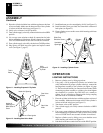
3. Place the cylinder inside the base with the regulator to front of
base assembly. Make sure the bottom collar of the cylinder is
in front of the tab in the base (see Figure 11).
4. Turn heater valve to OFF position.
5. Turn cylinder supply valve fully counter clockwise to OPEN
position.
6. Use a soapy water solution to check the connection. For leaks
before attempting to light heater. If leak is found, turn cylinder
valve to CLOSE and do not use until all leaks are corrected.
7. Replace cylinder cover by sliding cover over shoulder screw
while inserting tab in base (see Figure 13).
8. Push knob in and turn counter clockwise to the PILOT position.
Ventilation
Openings
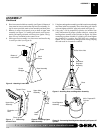
ASSEMBLY
Continued
Figure 11 - Installing Propane/LP Cylinder
20 lb.
Propane/LP
Cylinder
Tab in
Base
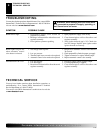
Gas Valve
Knob
Figure 12 - Installing Gas Valve Knob
Piezo Ignitor
ASSEMBLY
OPERATION
Gas Valve
Stem
Intake Air Opening
Intake Air
Openings on
Both Sides of
Cover
11. Place the cylinder inside the base with the regulator to the front
of base assembly. Make sure the bottom collar of the cylinder
is in front of the tab in the base (see Figure 11).
12. Verify valve on heater is in OFF position.
13. Turn cylinder supply valve fully counterclockwise to the OPEN
position.
14. Use a soapy water solution to check all connections for leaks
before attempting to light heater. If leak is found, turn cylinder
valve to CLOSE and do not use until all leaks are corrected.
15. Turn cylinder supply valve fully clockwise to CLOSE position.
16. Plug ignitor wire back into piezo ignitor and replace control
cover (see Figure 7, page 5).
17. Install knob onto gas valve stem aligning “d-flat” (see Figure 13).
18. Install shoulder screw, provided, into center hole at bottom of
back plate (see Figure13).
19. Place cylinder cover over this screw while inserting tab in base
(see Figure 13).