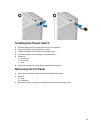
Installing the Power Supply
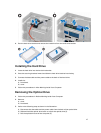
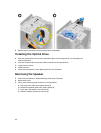
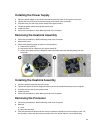
1. Place the power supply in the chassis and slide towards the back of the system to secure it.
2. Tighten the screws to secure the power supply to the back of the computer.
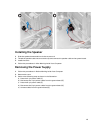
3. Connect the 4-pin and 8-pin power cables to the system board.
4. Thread the power cables through the chassis clips.
5. Install the cover.
6. Follow the procedures in
After Working Inside Your Computer
.
Removing the Heatsink Assembly
1. Follow the procedures in
Before Working Inside Your Computer
.
2. Remove the cover.
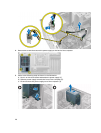
3. Perform the following steps as shown in the illustration:
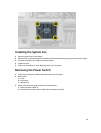
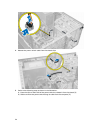
a) Press the fan cable [1].
b) Disconnect the fan cable from the system board [2].
c) Loosen the captive screws in diagonal order and lift the heat-sink assembly away from the
computer.
Installing the Heatsink Assembly
1. Place the heatsink assembly into the chassis.
2. Tighten the captive screws in diagonal order to secure the heatsink assembly to the computer.
3. Connect the fan cable to the system board.
4. Install the cover.
5. Follow the procedures in
After Working Inside Your Computer
.
Removing the Processor
1. Follow the procedures in
Before Working Inside Your Computer
.
2. Remove:
a) cover
b) heat-sink assembly
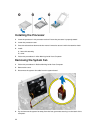
3. Press the release lever down and then move it outward to release it from the retention hook. Lift
the processor cover and remove the processor from the socket. Place it in an antistatic bag.
21


