


18 Section 7— Service
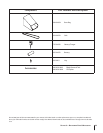
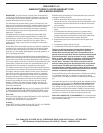
NOTE: The battery you have may differ slightly from the
one shown in Fig. 7-6. Refer to the Parts List.
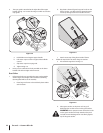
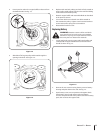
IMPORTANT: When replacing battery pack in handle panel,
battery pack must be positioned with the positive terminal
to the left side and the negative terminal to the right side
of panel (Positive terminal is closest to the key switch).
See Fig. 7-6. Replacing battery pack incorrectly will cause
serious damage.
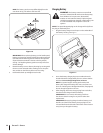
4. Reattach battery cover to battery housing by securing with
the two screws removed earlier, making sure to snap the
wire conduit on the left into place on the housing.
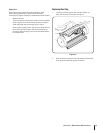
5. Fold handles back up and tighten star knobs.
Charging Battery
WARNING: The battery contains corrosive fluid
and toxic material; handle with care and keep away
from children. Do not puncture, disassemble,
mutilate or incinerate the battery. Explosive gases
could be vented during charging or discharging. Use
in a well ventilated area, away from sources of
ignition.
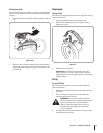
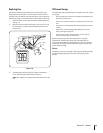
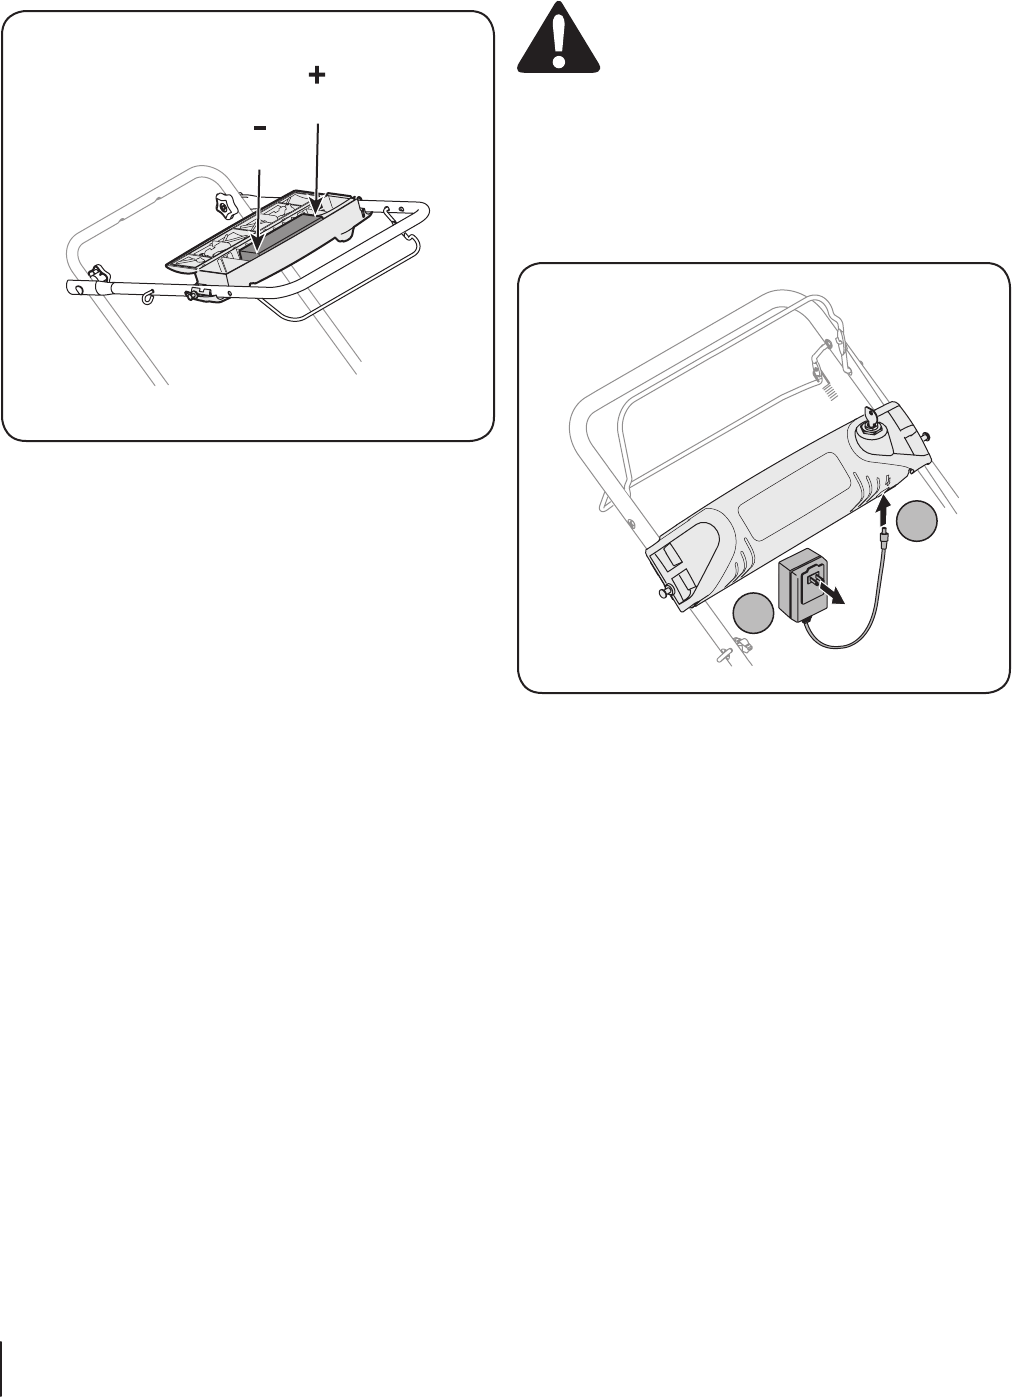
NOTE: The special designed plug on the charger will only fit into
the plug on the battery box.
1. Plug the battery charger into the port on the underside of
the battery housing. See Fig. 7-7.
2. Insert the battery charger plug into a standard 120 volt
household outlet. Charge battery for 8 to 10 hours before
initial use. Do not charge longer than 12 hours.
NOTE: For optimal engine starting performance and
battery life, charge the battery after every use for 8 to 10
hours or until the green LED light illuminates (If equipped).
Do not charge longer than 12 hours.
3. After charging, disconnect charger plug from outlet first,
then disconnect charger lead from battery.
IMPORTANT: Do not remove the battery pack from
the electric starter housing for any reason other than
replacement.
IMPORTANT: Always plug charger lead into battery pack
lead first, and then insert battery charger plug into 120
volt standard household outlet. Follow this order of action
every time you charge the battery.
1
2
Figure 7-7
Negative
Terminal
Positive
Terminal
Figure 7-6