


Starting and Stopping the Engine
Refer to the Engine Operator’s Manual packed with your snow
thrower for instructions on starting and stopping the engine.
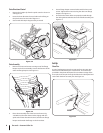
To Engage Drive
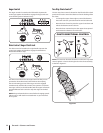
1. With the throttle control in the Fast (rabbit) position, move
shift lever into one of the six forward (F) positions or two
reverse (R) positions. Select a speed appropriate for the
snow conditions and a pace you’re comfortable with.
NOTE: Use slower speeds in higher snow and/or until you
are familiar with the snow thrower operation.
2. Squeeze the drive control against the handle the snow
thrower will move. Release it and drive motion will stop.
CAUTION: NEVER move the shift lever without first
releasing the wheel drive control. Doing so will
cause premature wear on the drive system’s friction
wheel
3. To turn the snow thrower to the left or right, squeeze the
respective wheel steering control. Refer to the Controls &
Features section for location of the steering controls.
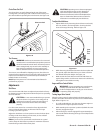
To Engage Augers
1. To engage augers and start throwing snow, squeeze the
auger control against the left handle. Release to stop augers.
2. While the auger control is engaged, squeeze the drive
control to engage the interlock mechanism and to drive
the snow thrower. The interlock mechanism locks the
auger control so you can turn the chute control without
interrupting the snow throwing process.
3. Release the auger control; the interlock mechanism keeps
the auger control engaged until the drive control is released.
4. Release the drive control to stop both the augers and the
wheel drive. To stop auger, both levers must be released.
Operating Tips
NOTE: Allow the engine to warm up for a few minutes. The
engine will not develop full power until it reaches operating
temperature.
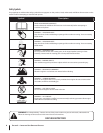
WARNING: The temperature of the muffler and
the surrounding areas may exceed 150° F. Avoid
these areas.
1. If possible, remove snow immediately after it falls.
2. Discharge snow downwind whenever possible.
3. Slightly overlap each previous path.
4. Set the skid shoes 1/4” below the shave plate for normal
usage. Adjust them upward for hard-packed snow and
downward when using on gravel or crushed rock.
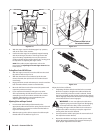
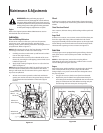
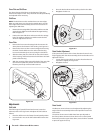
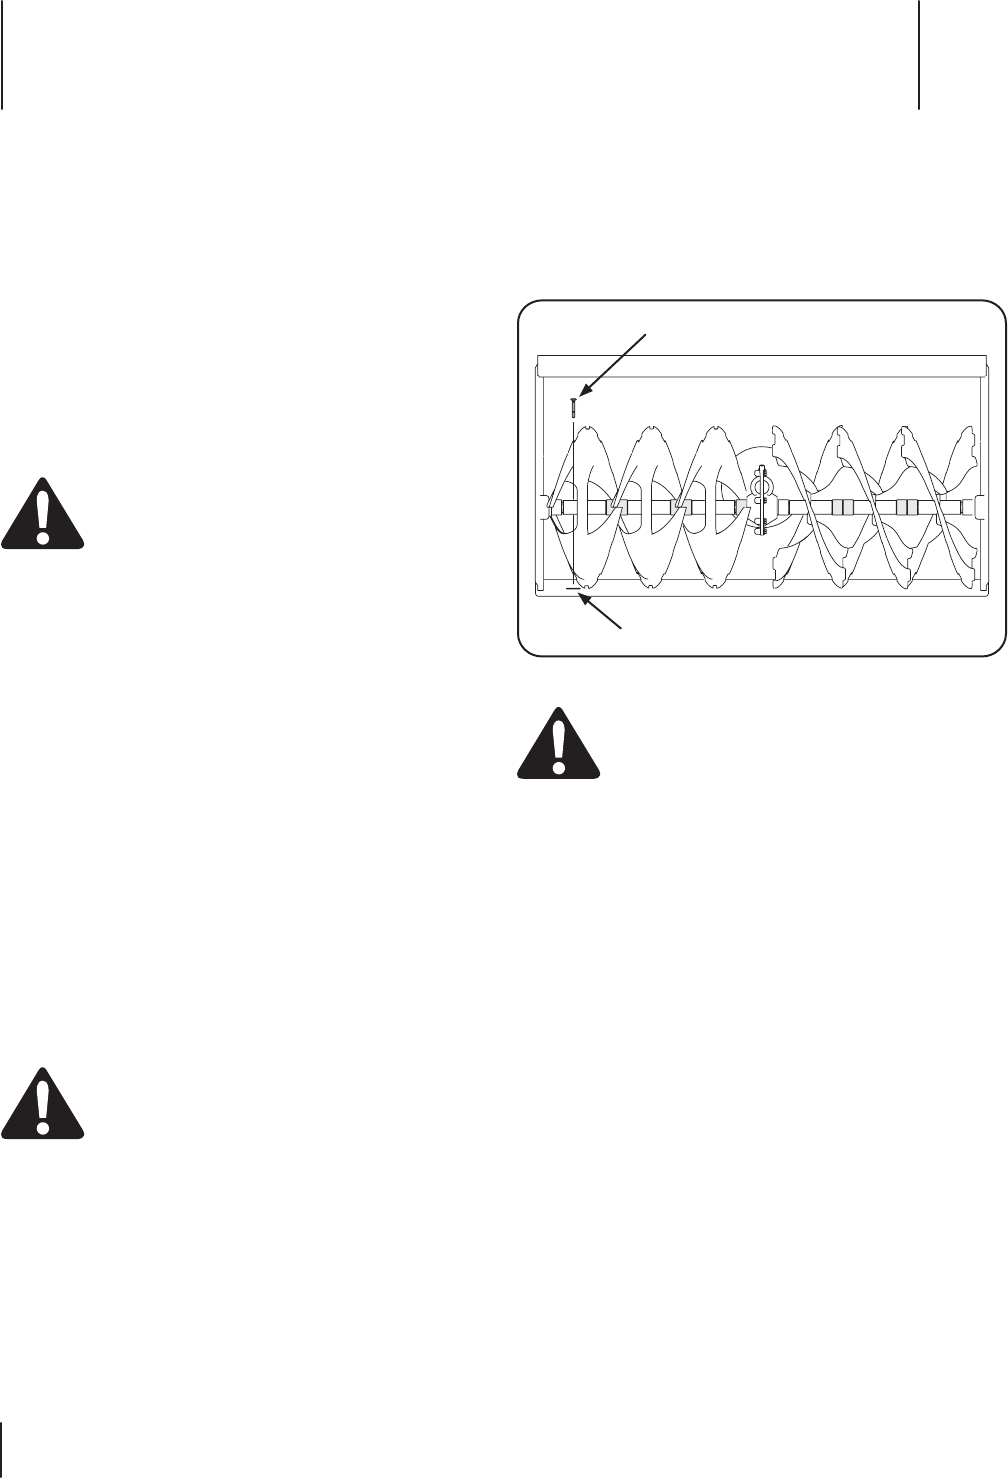
Replacing Shear Pins
Each of the auger spiral assemblies are secured to the spiral shaft
with a shear pin and bow-tie cotter pin. If the auger should strike
a foreign object or ice jam, the snow thrower is designed so that
the pins may shear. If the augers will not turn, check to see if the
pins have sheared. See Figure 5-1.
Bow-tie Cotter Pin
Shear Pin
Figure 5-1
CAUTION: NEVER replace the auger shear pins
with anything other than OEM Part No. 738-04155
replacement shear pins. Any damage to the auger
gearbox or other components as a result of failing to
do so will NOT be covered by your snow thrower’s
warranty.
Operation
5
14