


If replacing the entire assembly, put the new friction wheel 6.
assembly in place and follow the steps in reverse to re-
assemble. Repeat the drive control test on page 18.
If you only want to replace the friction wheel rubber,
continue with step 7.
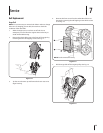
NOTE: Make sure to install the gear shaft through the
sprocket shown in Fig. 7-7. If the sprocket fell from the snow
thrower while removing the hex shaft, place the sprocket
on the hex shaft. Position the hex hub of the sprocket
toward the friction wheel when sliding the sprocket onto
the shaft. See Fig. 7-7.
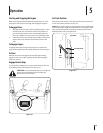
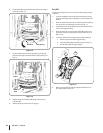
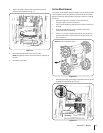
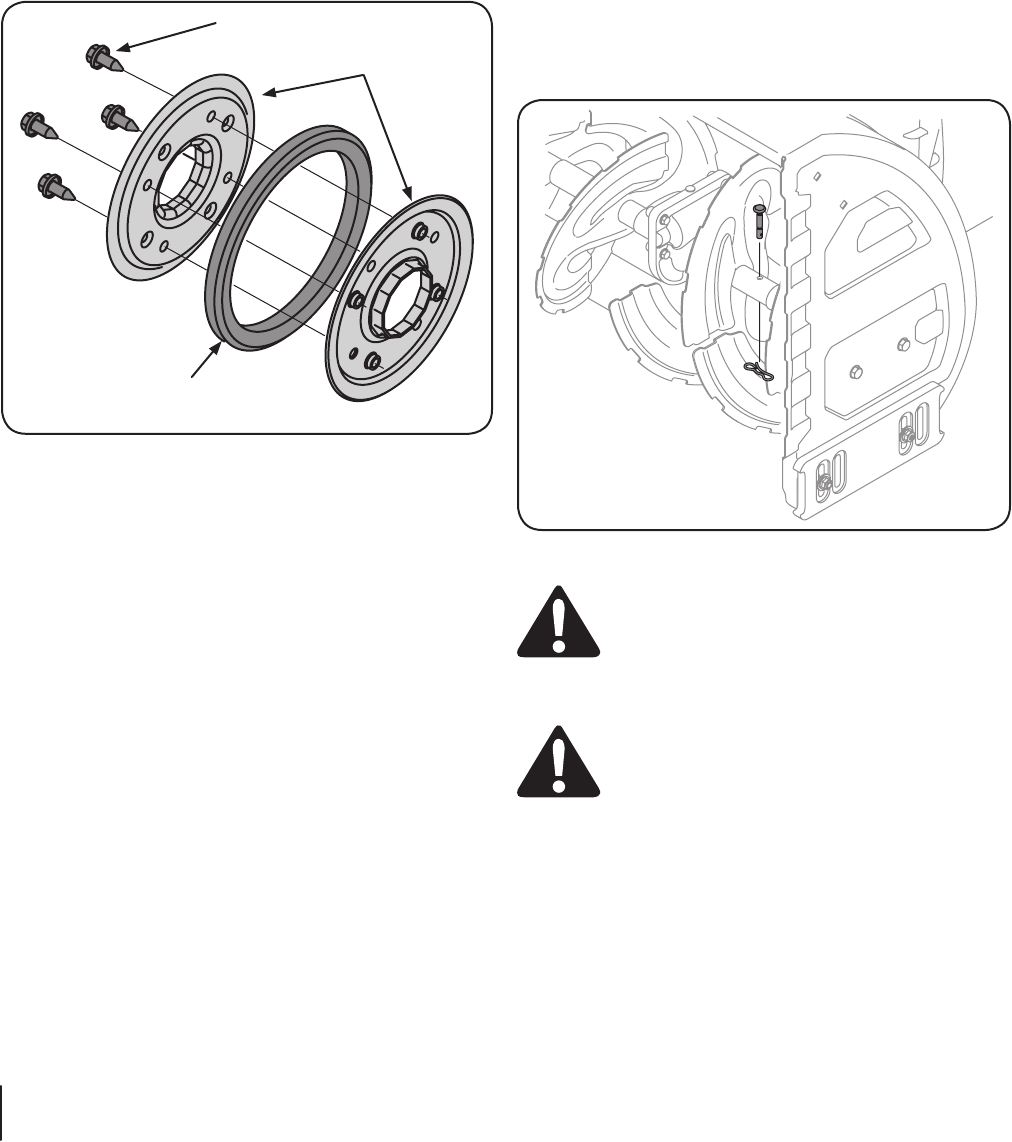
Remove the four screws from the friction wheel assembly. 7.
See Fig. 7-10.
Remove the friction wheel rubber from between the 8.
friction wheel plates.
Reassemble new friction wheel rubber to the friction wheel 9.
plates and hub, tightening the four screws in rotation and
with equal force (between 6 ft.-lbs. and 9 ft.-lbs.).
NOTE: When reassembling the friction wheel assembly,
make sure that the rubber ring is centered and seated
properly between the side plates. Tighten each screw
only one rotation before turning the wheel clockwise
and proceeding with the next screw. Repeat this process
several times to ensure the plates are secured with equal
force (between 6 ft-lbs and 9 ft-lbs).
NOTE: Make sure the shift lever pin is in place in the
bearing housing. See Fig. 7-9 inset.
Position the friction wheel assembly up onto the pin of 10.
the shift rod assembly, and slide the shaft through the
assembly. See Fig. 7-9. Reassemble in reverse order.
NOTE: Make sure to install the gear shaft through the
sprocket shown in Fig. 7-7. If the sprocket fell from the snow
thrower while removing the hex shaft, place the sprocket
on the hex shaft. Position the hex hub of the sprocket
toward the friction wheel when sliding the sprocket onto
the shaft. See Fig. 7-7.
Repeat the drive control test on page 18.11.
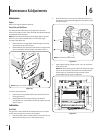
Replacing Shear Pins
The augers are secured to the spiral shaft with shear pins and
bow-tie cotter pins. If the auger should strike a foreign object or
ice jam, the snow thrower is designed so that the pins may shear.
If the augers will not turn, check to see if the pins have sheared.
See Fig. 7-11.
CAUTION: NEVER replace the auger shear pins with
anything other than OEM Part No. 738-04124A
replacement shear pins. Any damage to the auger
gearbox or other components as a result of failing to
do so will NOT be covered by your snow thrower’s
warranty.
WARNING! Always turn off the snow thrower’s
engine and remove the key prior to replacing shear
pins.
Screws
Side Plates
Rubber
Ring
Figure 7-10
Figure 7-11
22 se c t i O n 7 — se r v i c e