


9
Attaching Blades
(Model 190-678 only)
Remove the blades from your tractor’s cutting deck as
follows.
• Remove the cutting deck from beneath the tractor,
(refer to Deck Removal in the Maintenance section of
your tractor’s operator’s manual for detailed
instructions) then gently flip the deck over to
expose its underside.
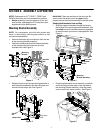
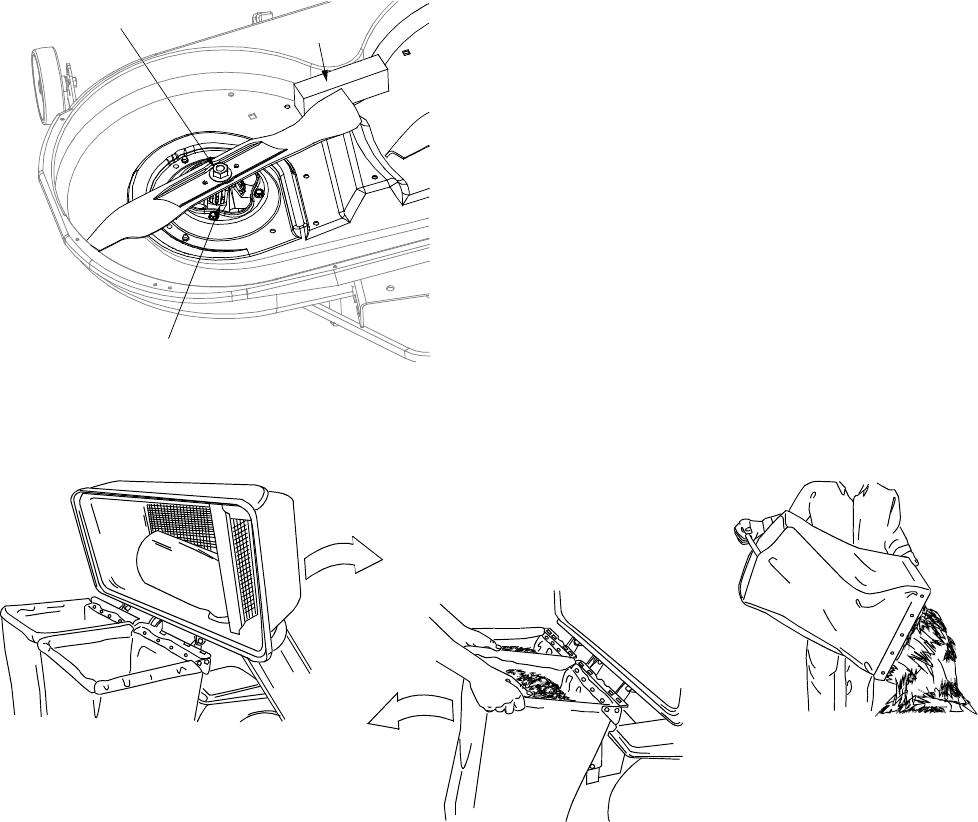
• Place a block of wood between the center deck
housing baffle and the cutting blade to act as a
stabilizer. See Figure 10.
• Use a 15/16" wrench to remove the hex flange nut
that secures the blade to the spindle assembly. See
Figure 10.
Figure 10
NOTE: The hex flange nut has a right-handed thread
pattern. Do NOT attempt to force the nut in the incorrect
direction. Doing so may damage the nut and create a
safety hazard.
Attach the new blades from the bagger kit as follows:
• Install the new blades packed with the bagger. Be
sure to install the blade with the side of the blade
marked ‘‘Bottom’’ (or with a part number stamped in
it) facing the ground when the mower is in the
operating position.
• Mount the smaller of the three blades to the center
spindle. The remaining two blades are
interchangeable.
IMPORTANT:
Use a torque wrench to tighten the blade
spindle hex flange nut to between 70 foot-pounds and
90 foot-pounds.
• Re-mount the cutting deck.
Operation
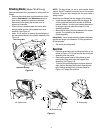
• Open the grass bag cover by lifting the cover up as
shown in Figure 11A. Do not remove the chute tube
assembly from the tractor.
• Remove the grass bags by lifting these up and
moving the bags away from the support tube
assembly. See Figure 11B.
• To empty the grass clippings at a proper disposal
sight, use the handle at the bottom of each grass
bag. Holding the bag firmly as shown below in
Figure 11C, empty the contents
Figure 11
Spindle Assembly
Hex Flange Nut
Wood Block
A. Open cover
B. Remove bag
C. Empty bag