


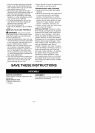
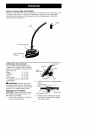


INSTALLING ATTACHMENT
1. Remove the shaft cap from the at-
tachment (if present) and discard.
2. Position locking/release button of
attachment into guide recess of up-
per shaft coupler.
Coupler Primary Hole
Guide Recess
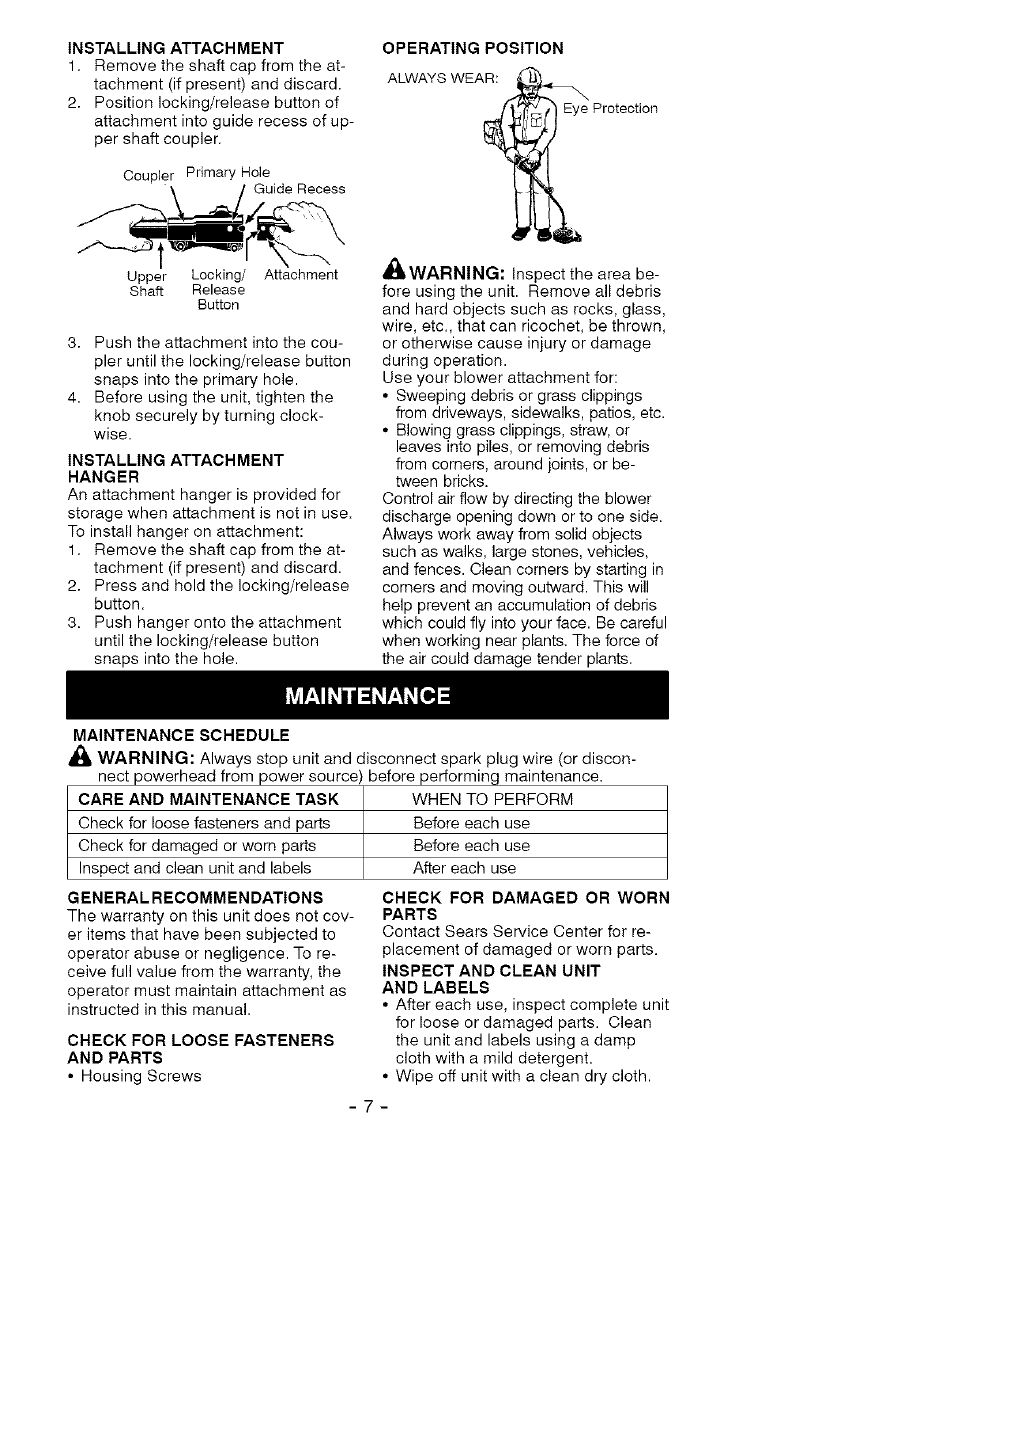
OPERATING POSITION
ALWAYS WEAR:
Eye Protection
Upper Locking/ Attachment
Shaft Release
Button
3. Push the attachment into the cou-
pler until the locking/release button
snaps into the primary hole.
4. Before using the unit, tighten the
knob securely by turning clock-
wise.
INSTALLING ATTACHMENT
HANGER
An attachment hanger is provided for
storage when attachment is not in use.
To install hanger on attachment:
1. Remove the shaft cap from the at-
tachment (if present) and discard.
2. Press and hold the locking/release
button.
3. Push hanger onto the attachment
until the locking/release button
snaps into the hole.
_b WARNING: Inspect the area be-
fore using the unit. Remove all debris
and hard objects such as rocks, glass,
wire, etc., that can ricochet, be thrown,
or otherwise cause injury or damage
during operation.
Use your blower attachment for:
• Sweeping debris or grass clippings
from driveways, sidewalks, patios, etc.
• Blowing grass clippings, straw, or
leaves into piles, or removing debris
from corners, around joints, or be-
tween bricks.
Control air flow by directing the blower
discharge opening down or to one side.
Always work away from solid objects
such as walks, large stones, vehicles,
and fences. Clean corners by starting in
corners and moving outward. This will
help prevent an accumulation of debris
which could fly into your face. Be careful
when working near plants. The force of
the air could damage tender plants.
MAINTENANCE SCHEDULE
WARNING: Always stop unit and disconnect spark plug wire (or discon-
nect powerhead from power source) before performing maintenance.
CARE AND MAINTENANCE TASK WHEN TO PERFORM
Check for loose fasteners and parts Before each use
Check for damaged or worn parts Before each use
Inspect and clean unit and labels After each use
GENERAL RECOMMEN DATIONS
The warranty on this unit does not cov-
er items that have been subjected to
operator abuse or negligence. To re-
ceive full value from the warranty, the
operator must maintain attachment as
instructed in this manual.
CHECK FORLOOSEFASTENERS
ANDPARTS
• HousingScrews
CHECK FOR DAMAGED OR WORN
PARTS
Contact Sears Service Center for re-
placement of damaged or worn parts.
INSPECT AND CLEAN UNIT
AND LABELS
• After each use, inspect complete unit
for loose or damaged parts. Clean
the unit and labels using a damp
cloth with a mild detergent.
• Wipe off unit with a clean dry cloth.
-7-