


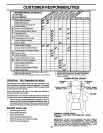
CUSTOMER RESPONSIBILITIES
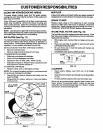
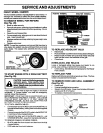
TO CLEAN BATTERY AND TERMINALS
Corresionanddirtonthe batteryand terminalscan cause the
battery to "leak" power.
• Disconnect BLACK batterycable first then RED battery
cable and remove battery from tractor.
• Rinse the battery with plain water and dry,
• Clean terminals and battery cable ends with wire brush
untilbright.
• Coat terminals with grease or petroleum jelly.
• Reinstall battery (See "CONNECT BAI-IERY" in the
Assembly section of this manual).
V-BELTS
Check V-belts for deterioration and wear after 100 hours of
operation and replace if necessary. The belts are not
adjustable. Replace belts ifthey begin to slip from wear.
TRANSAXLE COOLING
The transmission fan and cooling fins should be kept clean
toassure proper cooling.
Do not attempt to clean fan or transmission while engine is
runningorwhile the transmission ishot.To prevent possible
damage to seals, do not use high pressure water or steam
to clean transaxle.
• Inspectcooling fan to be sure fan blades are intact and
clean.
• Inspect cooling fins for dirt, grass clippingsand other
materials. To prevent damage to seals, do not use
compressed airor highpressuresprayertoclean cooling
fins.
TRANSAXLE PUMP FLUID
The transaxle was sealed at the factory and fluid mainte-
nance isnotrequired forthe lifeof thetransaxle. Should the
transexle everleakor requireservicing,contactyour nearest
authodzed service center/department.
ENGINE
LUBRICATION
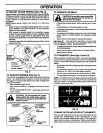
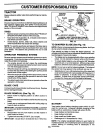
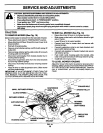
Only use high quality detergent oil rated with API service
classification SF-SJ. Select the oil's SAE viscosity grade
according to your expected operating temperature.
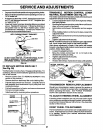
SAE VISCOSITY GRADES
-20 0 30 60 80
TEMPERATURE RANGE ANTICIPATED BEFORE NEXT OIL CHANGE
FIG. i5
Change the oil after every 50 hours ofoperation or at least
once a year ifthe tractor isnot used for 50 hoursinone year.
Check the crankcase oillevel beforestartingtheengine and
after each eight (8) hours ofoperation. Tighten oilfill cap/
dipstick securely each time you check the oil level.
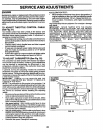
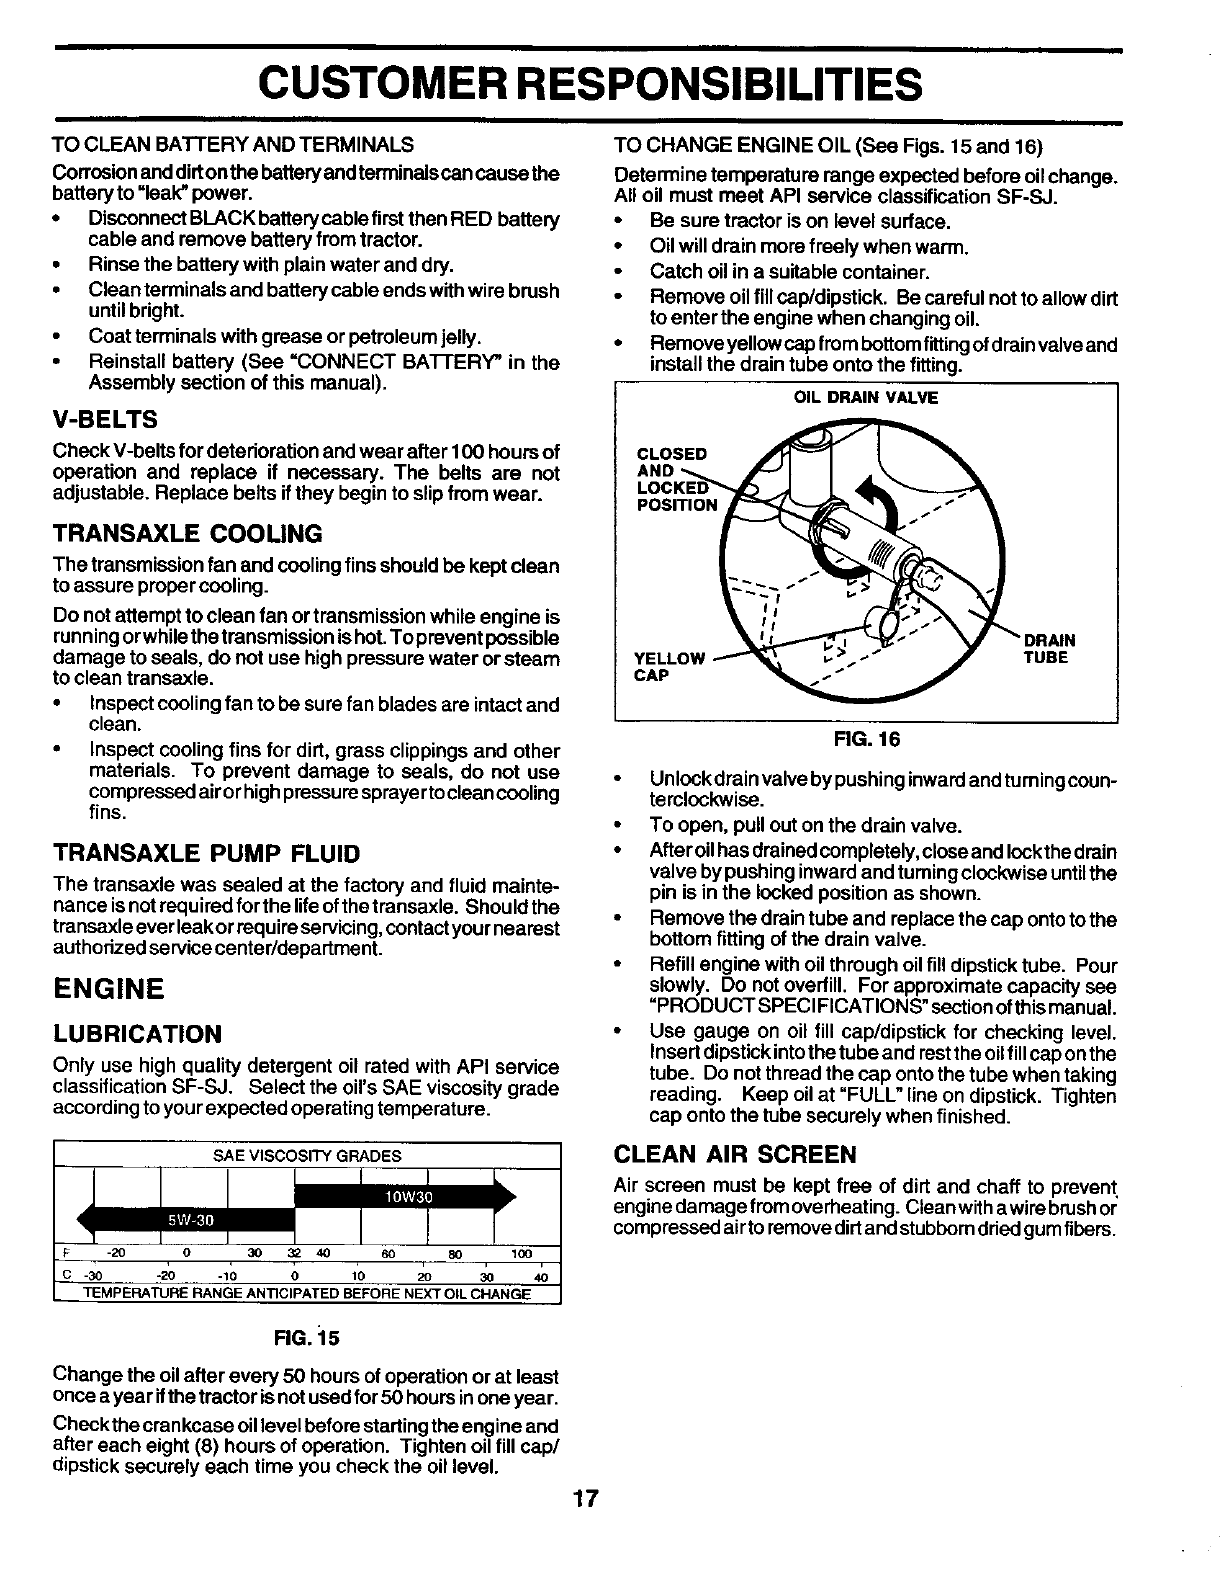
TO CHANGE ENGINE OIL (See Figs. 15 and 16)
Determine temperature range expected before oilchange.
All oil must meet API service classification SF-SJ.
• Be sure tractor is on level surface.
• Oil will drain more freely when warm.
• Catch oil in a suitable container.
• Remove oilfill cep/dipstick. Be careful not toallow dirt
toenter the engine when changing oil.
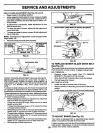
• Remove yellowcap frem bottomfitting ofdrain valveand
install the drain tube onto the fitting.
OIL DRAIN VALVE
CLOSED
AND
POSITION
CAP
TUBE
FIG. 16
• Unlock drain valve by pushing inwardand tuming coun-
terclockwise.
• To open, pull out on the drain valve.
• Affer oilhas drainedcompletely,closeand Iockthe drain
valve bypushing inward and turningclockwise untilthe
pin is in the locked position as shown.
• Remove the drain tube and replace the cap ontoto the
bottom fitting of the drain valve.
• Refill engine with oilthrough oil fill dipsticktube. Pour
slowly. Do not overfill. For approximate capacity see
"PRODUCT SPECIFICATIONS" sectionof thismanual.
• Use gauge on oil fill cap/dipstick for checking level.
Insertdipstick intothe tube and restthe oilfill cap onthe
tube. Do not thread the cap ontothe tube when taking
reading. Keep oil at "FULL" line on dipstick. Tighten
cap onto the tube securely when finished.
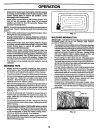
CLEAN AIR SCREEN
Air screen must be kept free of dirt and chaff to prevent
engine damage from overheating. Clean withawire brush or
compressed airto removedirtand stubbemdriedgum fibers.
17