


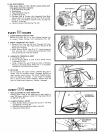


ENGINE
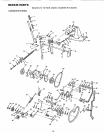
PIVOT SHAFT
SECONDARY
BELT (REARI
IATOR
S,BELT KEEPER
PRIMARY
IDL
V
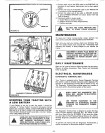
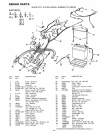
FIGURE 34
WASH E R
WASHER
KLIP RiNG
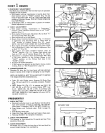
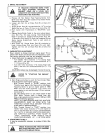
FIGURE 35
BOLT
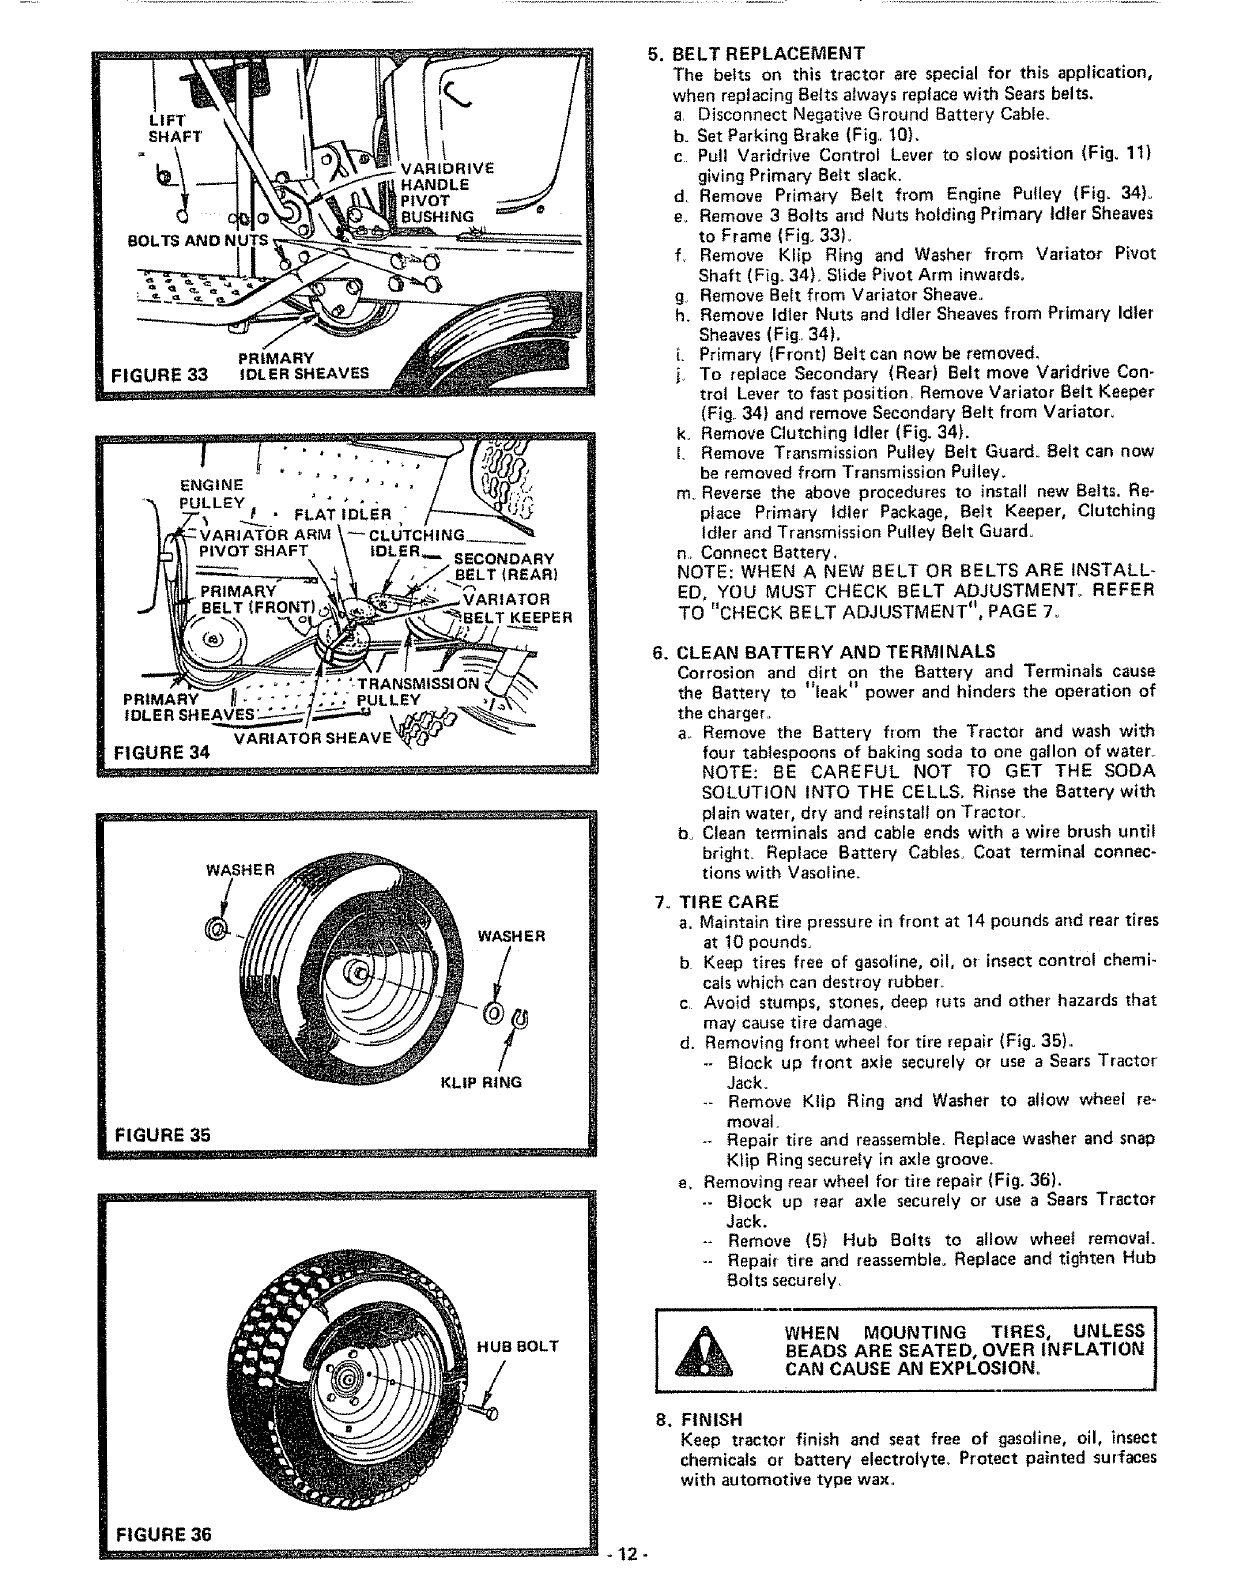
5o BELT REPLACEMENT
The belts on this tractor are special for this application,
when replacing Belts always replace with Sears belts.
a, Disconnect Negative Ground Battery Cable_
b. Set Parking Brake (F_g, 10).
c Pull Varidrive Control Lever to slow position (Fig. 11)
giving Primary Belt slack.
d Remove Primary Belt from Engine Putley (Fig. 34)_
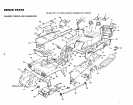
e,, Remove 3 Bolts and Nuts holding Primary Idler Sheaves
to Frame (Fig. 33).
f_ Remove Klip Ring and Washer from Variator P_vot
Shaft (Fig° 34)_ Slide Pivot Arm inwards.
g, Remove Belt from Variator Sheave.
h_ Remove Idler Nuts and Idler Sheaves from Primary Idier
Sheaves (Fig, 34}.
L Primary (Front) Belt can now be removed,
j. To replace Secondary (Rear) Belt move Varidrive Con-
trol Lever to fast position, Remove Variator Belt Keeper
(Fig. 34) and remove Secondary Belt from Variatoro
ko Remove Clutching Idler (Fig. 34).
I. Remove Transmission Pulley Belt Guard Belt can now
be removed from Transmission Pulley.
m_ Reverse the above procedures to install new Belts. Re-
place Primary Idler Package, Belt Keeper, Clutching
Idler and Transmission Pulley Belt Guard°
n, Connect Battery,
NOTE: WHEN A NEW BELT OR BELTS ARE INSTALL-
ED, YOU MUST CHECK BELT ADJUSTMENT'. REFER
TO "CHECK BELT ADJUSTMENTtI0 PAGE 7o
6. CLEAN BATTERY AND TERMINALS
Corrosion and dirt on the Battery and Terminals cause
the Battery to "leak *' power and hinders the operation of
the charger,,
a,, Remove the Battery from the Tractor and wash with
four tablespoons of baking soda to one gallon of water..
NOTE: BE CAREFUL NOT TO GET THE SODA
SOLUTION INTO THE CELLS, Rinse the Battery with
plain water, dry and reinstall on Tractor_
bo Clean terminals and cable ends with a wire brush until
bright Replace Battery Cables, Coat terminal connec-
tions with Vasoline.
7_ TIRE CARE
a,, Maintain tire pressure in front at 14 pounds and rear tires
at 10 pounds.
b Keep tlres free of gasoline, oil, or insect control chemi-
cals which can destroy rubber,,
c, Avoid stumps, stones, deep ruts and other hazards that
may cause tire damage,
d. Removing front wheel for tire repair (Fig= 35),,
-- Block up front axle securely or use a Sears Tractor
Jack.
.- Remove Klip Ring and Washer to allow wheel re-
moval.
.- Repair tire and reassemble. Replace washer and snap
Klip Ring securely in axle groove.
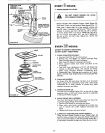
e_ Removing rear wheel for tire repair (Fig. 36),
.- Block up rear axle securely or use a Sears Tractor
Jack.
-- Remove (5) Hub Bolts to allow wheel removal.
-- Repair tire and reassemble. Replace and tighten Hub
Bolts securely_
WHEN MOUNTING TIRES, UNLESS
BEADS ARE SEATED, OVER INFLATION
CAN CAUSE AN EXPLOSION°
8. FINISH
Keep tractor finish and seat free of gasoline, oil, insect
chemicals or battery electrolyte,_ Protect painted surfaces
with automotive type wax.
:IGURE 36