


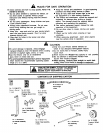
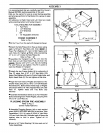
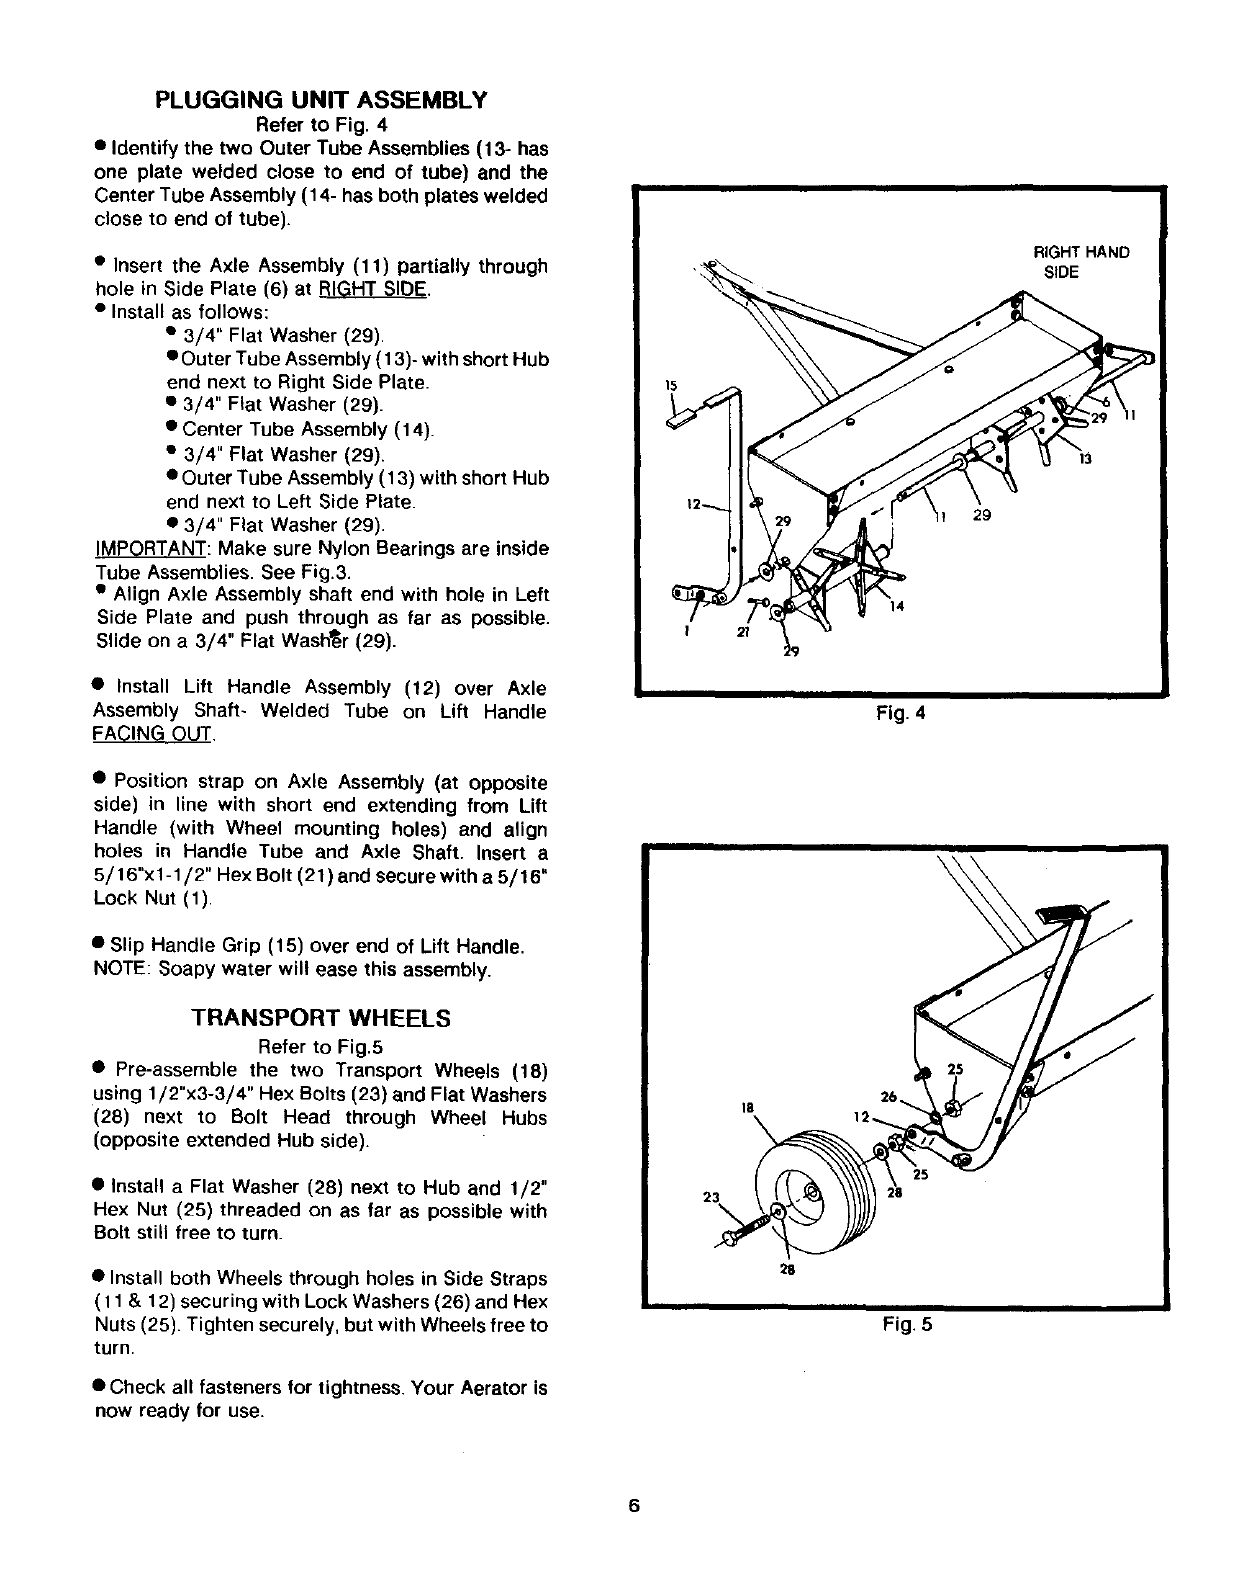
PLUGGING UNIT ASSEMBLY
Refer to Fig. 4
• Identify the two Outer Tube Assemblies (13- has
one plate welded close to end of tube) and the
Center Tube Assembly (14- has both plates welded
close to end of tube).
• Insert the Axle Assembly (11) partially through
hole in Side Plate (6) at RI.._HTSIDE.
• Install as follows:
• 3/4" Flat Washer (29),
eOuter Tube Assembly (13)- with short Hub
end next to Right Side Plate.
• 3/4" Flat Washer (29).
• Center Tube Assembly (14).
• 3/4" Flat Washer (29).
• Outer Tube Assembly (13) with short Hub
end next to Left Side Plate.
• 3/4" Flat Washer (29).
_: Make sure Nylon Bearings are inside
Tube Assemblies. See Fig.3.
• Align Axle Assembly shaft end with hole in Left
Side Plate and push through as far as possible.
Slide on a 3/4" Flat Washer (29).
• Install Lift Handle Assembly (12) over Axle
Assembly Shaft- Welded Tube on Lift Handle
FACING OUT.
• Position strap on Axle Assembly (at opposite
side) in line with short end extending from Lift
Handle (with Wheel mounting holes) and align
holes in Handle Tube and Axle Shaft. Insert a
5/16"x1-1/2" Hex Bolt (21) and secure with a 5/16"
Lock Nut (1).
• Slip Handle Grip (15) over end of Lift Handle.
NOTE: Soapy water will ease this assembly.
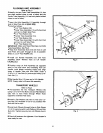
TRANSPORT WHEELS
Refer to Fig.5
• Pre-assemble the two Transport Wheels (18)
using 1/2"x3-3/4" Hex Bolts (23) and Flat Washers
(28) next to Bolt Head through Wheel Hubs
(opposite extended Hub side).
• Install a Flat Washer (28) next to Hub and 1/2"
Hex Nut (25) threaded on as far as possible with
Bolt still free to turn.
• Install both Wheels through holes in Side Straps
( 11 & 12) securing with Lock Washers (26) and Hex
Nuts (25). Tighten securely, but with Wheels free to
turn.
• Check all fasteners for tightness. Your Aerator is
now ready for use.
23
28
Fig. 4
28
Fig. 5