


ASSEMBLY
It is recommended that you carefully read this Owner's
Manual BEFORE starting assembly of this unit.
Fold out the carton for use as a pad during assembly
and arrange each kind of hardware into a group to ease
assembly.
All reference to Right Hand and Left Hand are made
while standing behind unit facing forward,
TOOLS REQUIRED FOR ASSEMBLY
1 - Pair Pliers
2 - 1/2" Wrenches
2 - 3/4" Wrenches
OR
2 - 10" Adjustable wrenches
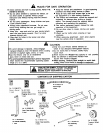
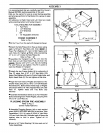
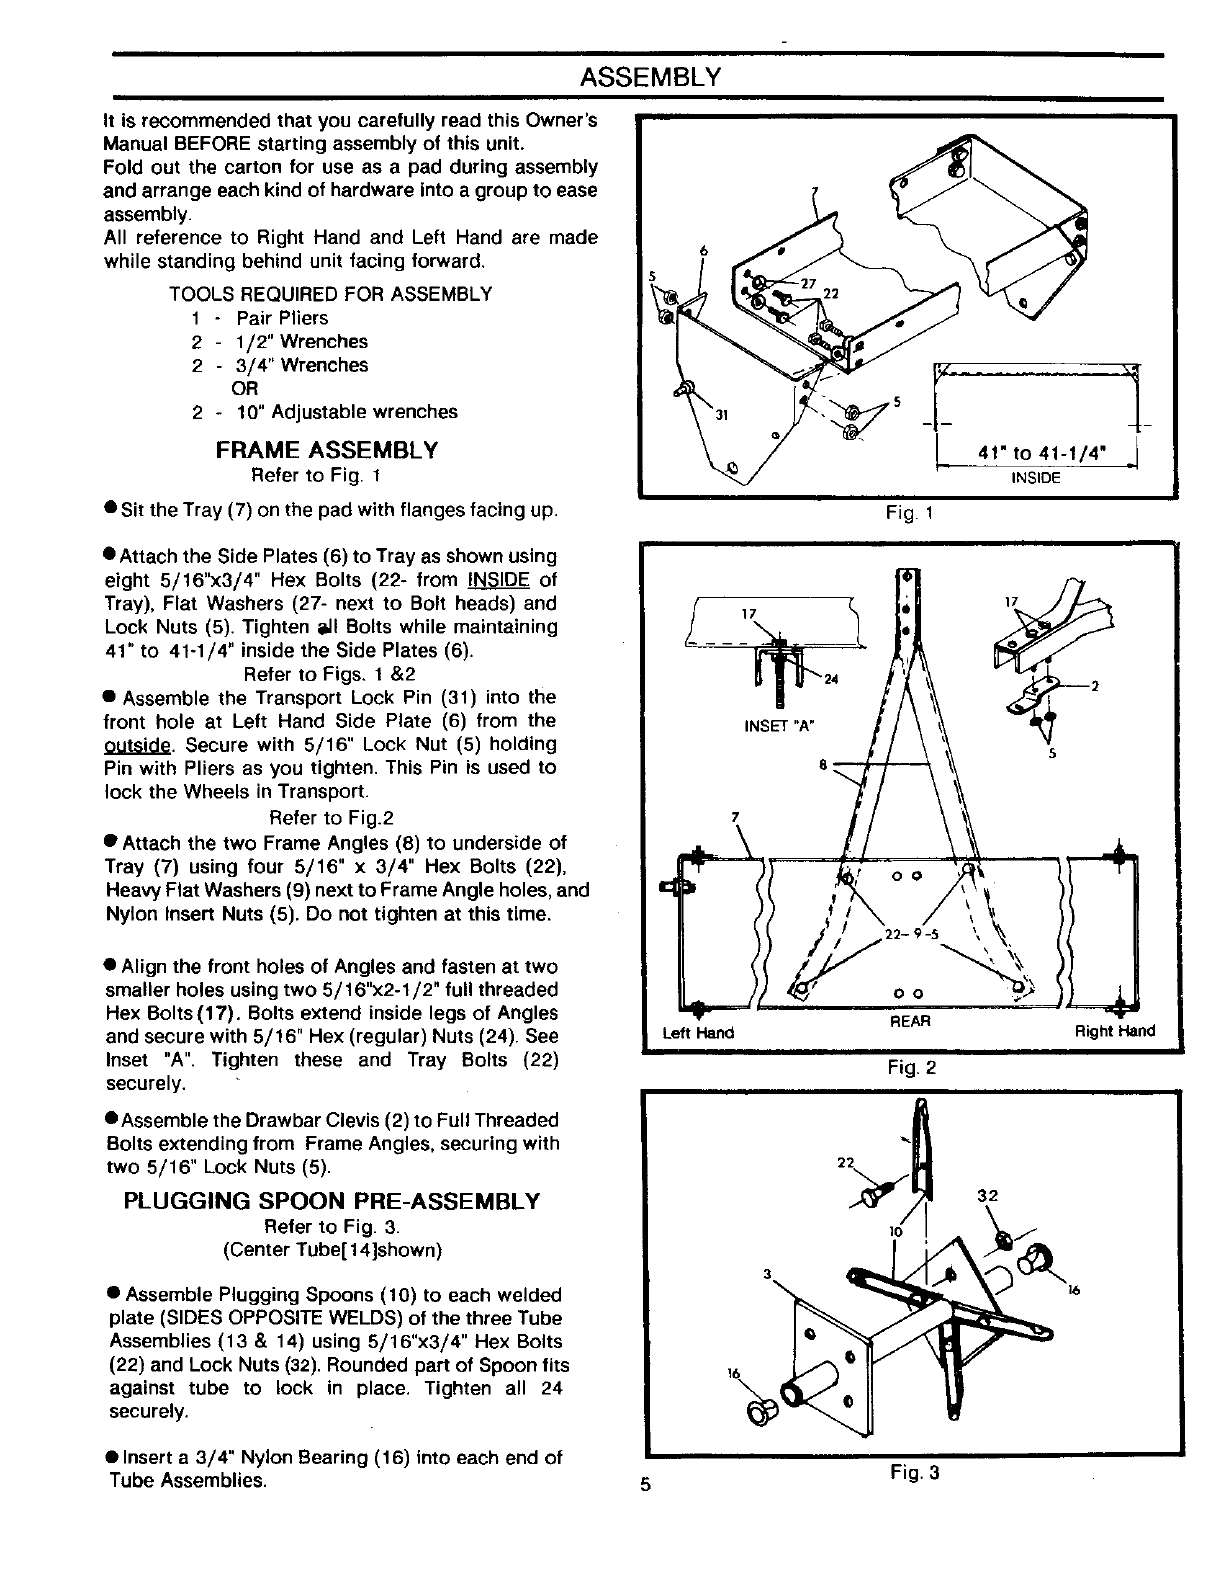
FRAME ASSEMBLY
Refer to Fig. t
• Sit the Tray (7) on the pad with flanges facing up.
Fig. 1
• Attach the Side Plates (6) to Tray as shown using
eight 5/16"x3/4" Hex Bolts (22- from INSIDE of
Tray), Flat Washers (27- next to Bolt heads) and
Lock Nuts (5). Tighten _11Bolts while maintaining
41" to 41-1/4" inside the Side Plates (6).
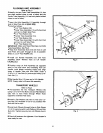
Refer to Figs. 1 &2
• Assemble the Transport Lock Pin (31) into the
front hole at Left Hand Side Plate (6) from the
outside. Secure with 5/16" Lock Nut (5) holding
Pin with Pliers as you tighten. This Pin is used to
lock the Wheels in Transport.
Refer to Fig.2
• Attach the two Frame Angles (8) to underside of
Tray (7) using four 5/16" x 3/4" Hex Bolts (22),
Heavy Flat Washers (9) next to Frame Angle holes, and
Nylon Insert Nuts (5). Do not tighten at this time.
• Align the front holes of Angles and fasten at two
smaller holes using two 5/16"x2-1/2" full threaded
Hex Bolts (17). Bolts extend inside legs of Angles
and secure with 5/16" Hex (regular) Nuts (24). See
Inset "A". Tighten these and Tray Bolts (22)
securely.
eAssemble the Drawbar Clevis (2) to Full Threaded
Bolts extending from Frame Angles, securing with
two 5/16" Lock Nuts (5).
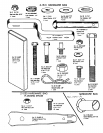
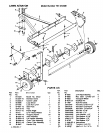
PLUGGING SPOON PRE-ASSEMBLY
Refer to Fig. 3.
(Center Tube[ 14]shown)
• Assemble Plugging Spoons (10) tO each welded
plate (SIDES OPPOSITE WELDS) of the three Tube
Assemblies (13 & 14) using 5/16"x3/4" Hex Bolts
(22) and Lock Nuts (32). Rounded part of Spoon fits
against tube to lock in place. Tighten all 24
securely.
Left Hand
|7
o O
REAR
Fig. 2
22
32
Right Hand
• Insert a 3/4" Nylon Bearing (16) into each end of
Tube Assemblies. 5 Fig. 3