


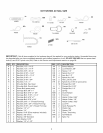
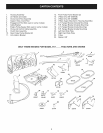

IDENTIFYYOUR TRACTOR iNSTALL SIDE PLATES
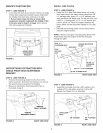
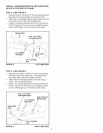
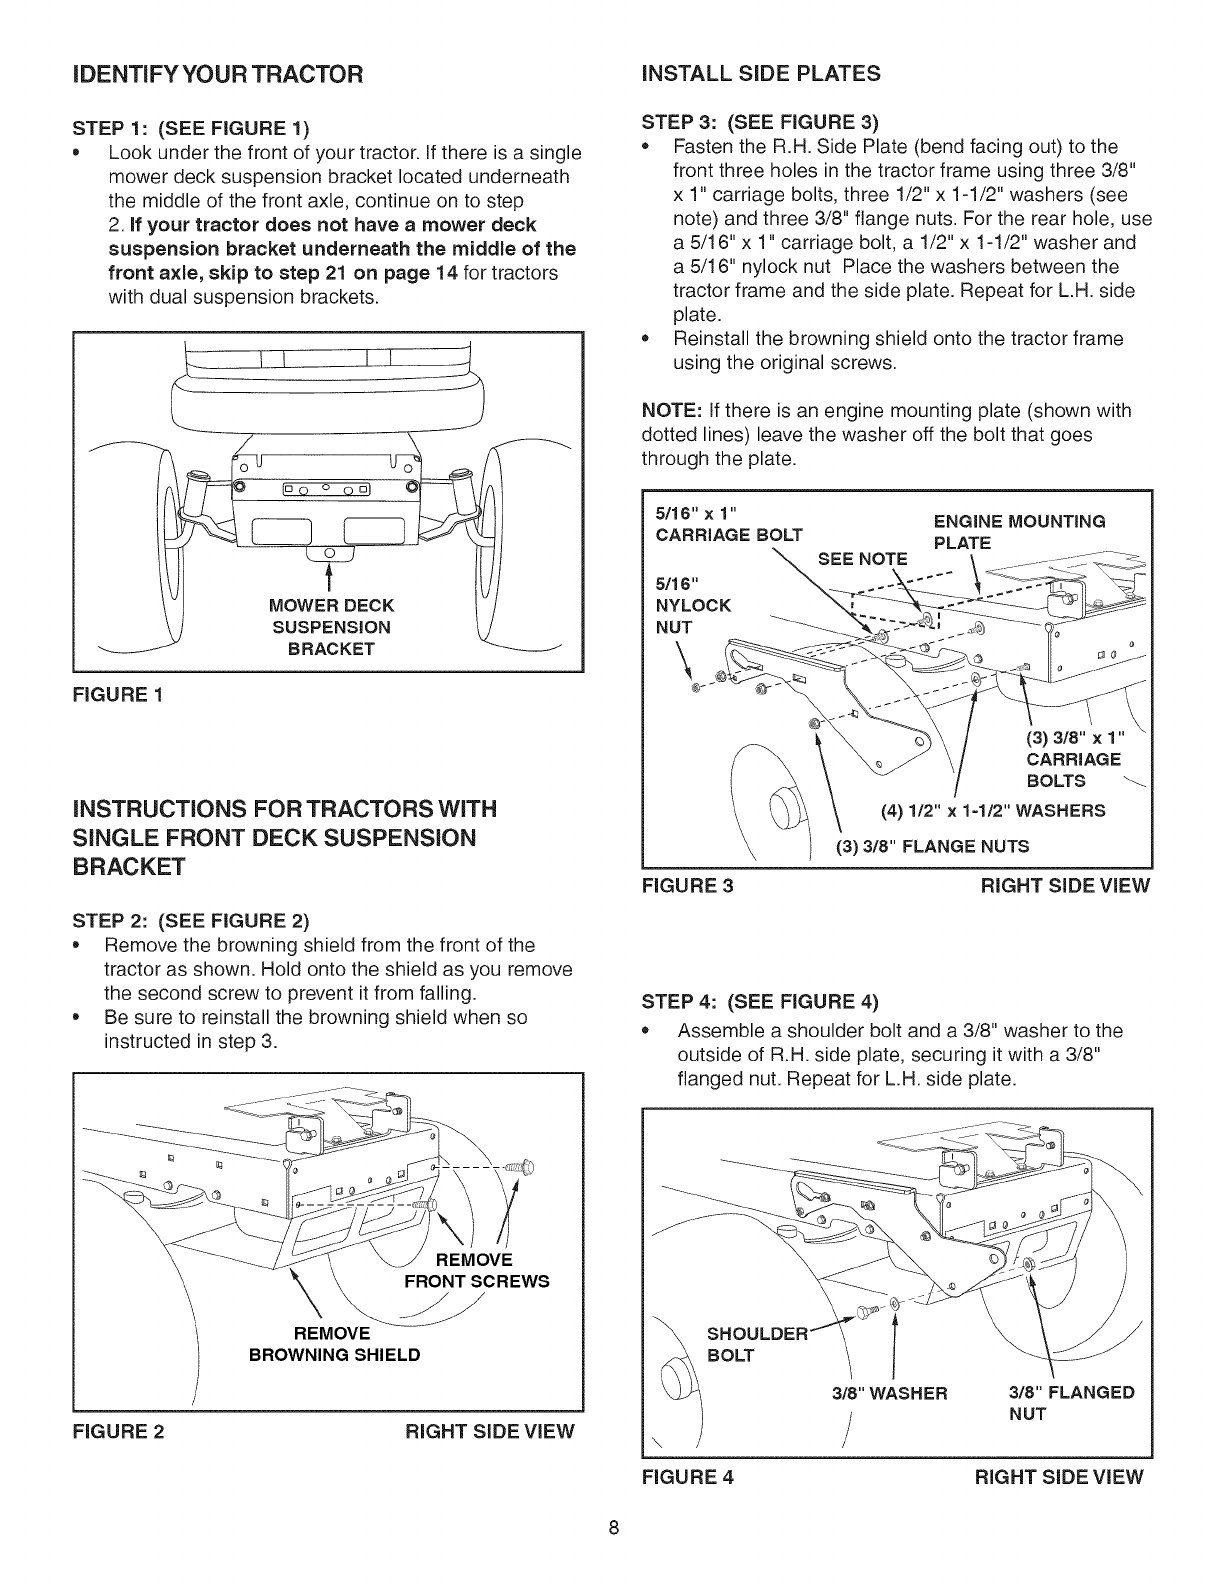
STEP 1: (SEE FIGURE 1)
o Look under the front of your tractor. If there is a single
mower deck suspension bracket located underneath
the middle of the front axle, continue on to step
2. if your tractor does not have a mower deck
suspension bracket underneath the middle of the
front axle, skip to step 21 on page 14 for tractors
with dual suspension brackets.
FIGURE 1
iNSTRUCTiONS FOR TRACTORS WITH
SINGLE FRONT DECK SUSPENSION
BRACKET
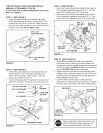
STEP 2: (SEE FIGURE 2)
Remove the browning shield from the front of the
tractor as shown. Hold onto the shield as you remove
the second screw to prevent it from falling.
Be sure to reinstall the browning shield when so
instructed in step 3.
REMOVE
FRONT SCREWS
REMOVE
BROWNING SHIELD
FIGURE 2 RIGHT SIDE VIEW
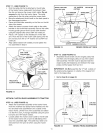
STEP 3: (SEE FIGURE 3)
Fasten the R.H. Side Plate (bend facing out) to the
front three holes in the tractor frame using three 3/8"
x 1" carriage bolts, three 1/2" x 1-1/2" washers (see
note) and three 3/8" flange nuts. For the rear hole, use
a 5/16" x 1" carriage bolt, a 1/2" x 1-1/2" washer and
a 5/16" nylock nut Place the washers between the
tractor frame and the side plate. Repeat for L.H. side
plate.
• Reinstall the browning shield onto the tractor frame
using the original screws.
NOTE: If there is an engine mounting plate (shown with
dotted lines) leave the washer off the bolt that goes
through the plate.
5/16" x 1"
CARRIAGE BOLT
5/16"
NYLOCK
NUT
SEE NOTE
ENGINE MOUNTING
PLATE
FIGURE 3
(3) 3/8" x 1"
CARRIAGE
BOLTS
(4) 1/2" x 1-1/2" WASHERS
(3) 3/8" FLANGE NUTS
RIGHT SIDE VIEW
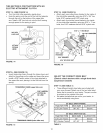
STEP 4: (SEE FIGURE 4)
Assemble a shoulder bolt and a 3/8" washer to the
outside of R.H. side plate, securing it with a 3/8"
flanged nut. Repeat for L.H. side plate.
BOLT
3/8" WASHER 3/8" FLANGED
NUT
FIGURE 4 RIGHT SIDE VIEW