


6
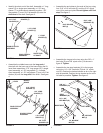
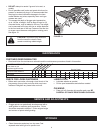
FIGURE 7
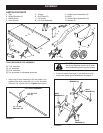
• Assemble the hitch bracket to the tongue using two
3/8" x 1" hex bolts (D), and two 3/8" nylock nuts (I).
Tighten. See gure 7.
• Assemble the hitch pin (G) through the hitch bracket
and the tongue. Secure the hitch pin with the large
hairpin cotter (F). See gure 7.
3/8" NYLOCK
NUT (I)
3/8" x 1"
HEX BOLT (D)
LARGE HAIRPIN
COTTER (F)
HITCH
PIN (G)
HITCH
BRACKET
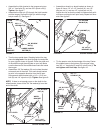
• Turn the tray upside down. Standing behind the tray,
place the long end of the shaft through the end plate
on your right as shown in gure 8. Place the other end
of the shaft through the end plate on your left. Make
sure the bent end of the middle brace rests at inside
the tongue.
• Assemble a 3/4" at washer (N) and a wheel bracket
onto each end of the shaft. Turn each wheel bracket
to point in the opposite direction from the lift lever.
Secure each wheel bracket with a 1/4" x 1-3/4" hex
bolt (B) and 1/4" nylock nut (K). Tighten. See gure 8.
NOTE: If there is not enough room on the shaft for the
wheel bracket, leave off the 3/4" at washer(s) from that
end of the shaft.
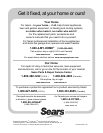
FIGURE 8 UPSIDE DOWN VIEW
3/4" FLAT
WASHER (N)
WHEEL
BRACKET
1/4" x 1-3/4"
HEX BOLT (B)
1/4" NYLOCK
NUT (K)
LIFT LEVER
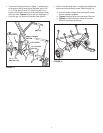
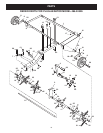
FIGURE 9 UPSIDE DOWN VIEW
• Assemble a wheel to a wheel bracket as shown in
gure 9. Use a 1/2" x 3-1/2" hex bolt (A), one 1/2"
hex jam nut (L), and one 1/2" nylock jam nut (H).
Adjust the nuts so that the wheel is held securely with
minimum end play but will spin freely. Repeat on other
side. See gure 9.
1/2" JAM NUT (L)
1/2" x 3-1/2"
HEX BOLT (A)
1/2" NYLOCK
JAM NUT (H)
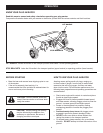
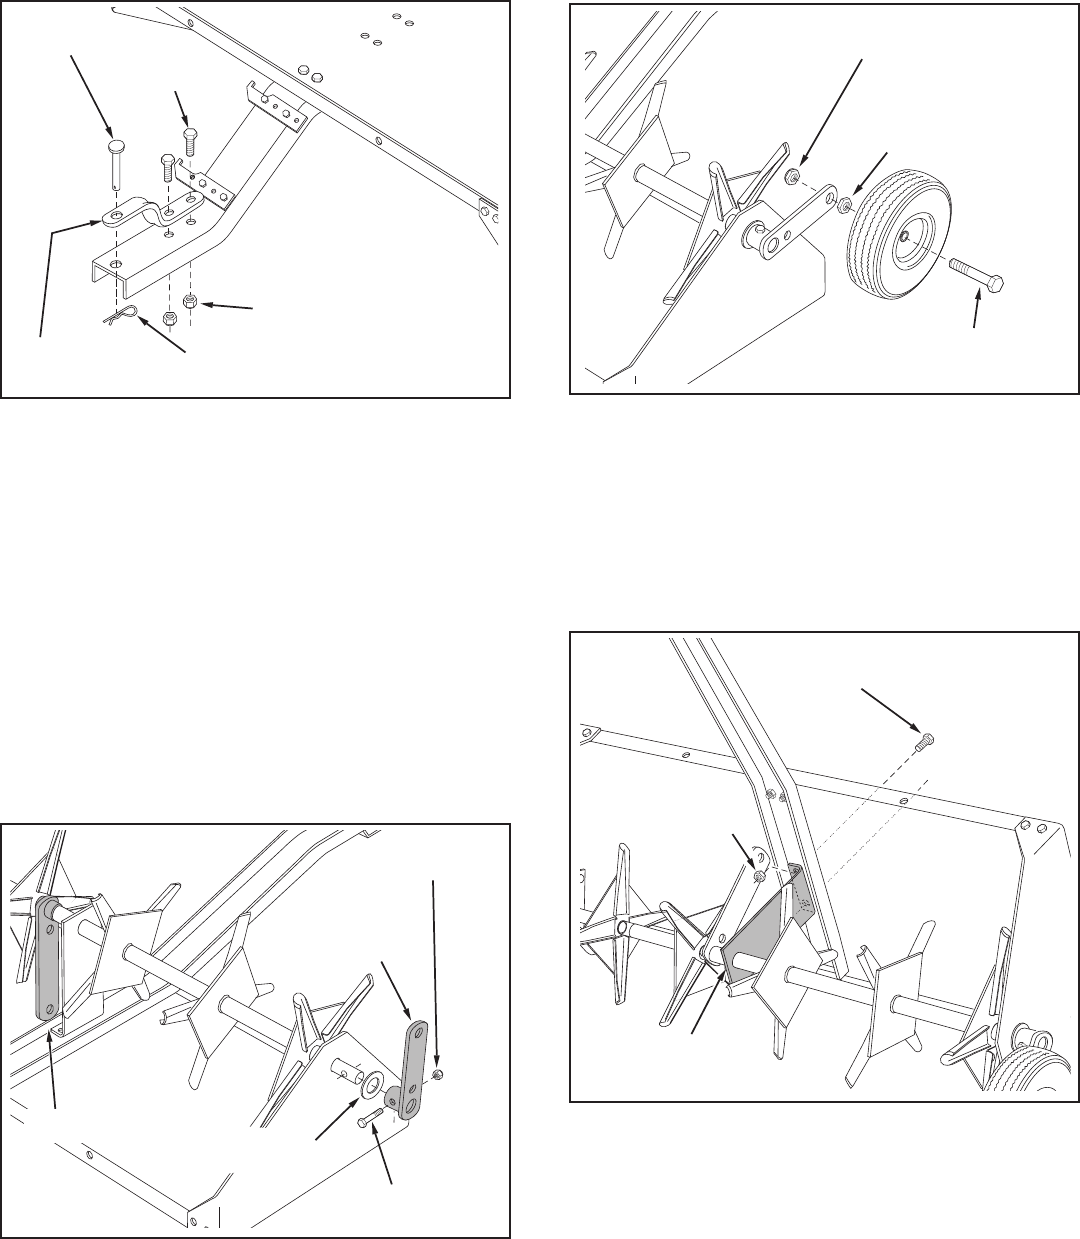
• Tip the aerator onto the back edge of the tray. Fasten
the middle brace to the bottom of the tongue using
two 3/8" x 1" hex bolts (D) and 3/8" nylock nuts (I). Do
not tighten until nal step. See gure 10.
FIGURE 10
3/8" x 1"
HEX BOLT (D)
3/8" NYLOCK
NUT (I)
MIDDLE
BRACE