


7
MAINTENANCE
WHEEL GEARS/PAWL SERV
ICE
I
MPORTANT:
Do not remove both wheels at the same
time to avoid mixing parts. (The R.H. and L.H. ratchet
gears are not interchangeable.) Make notes on the position
of washers and snap rings during disassembly.
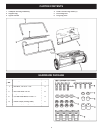
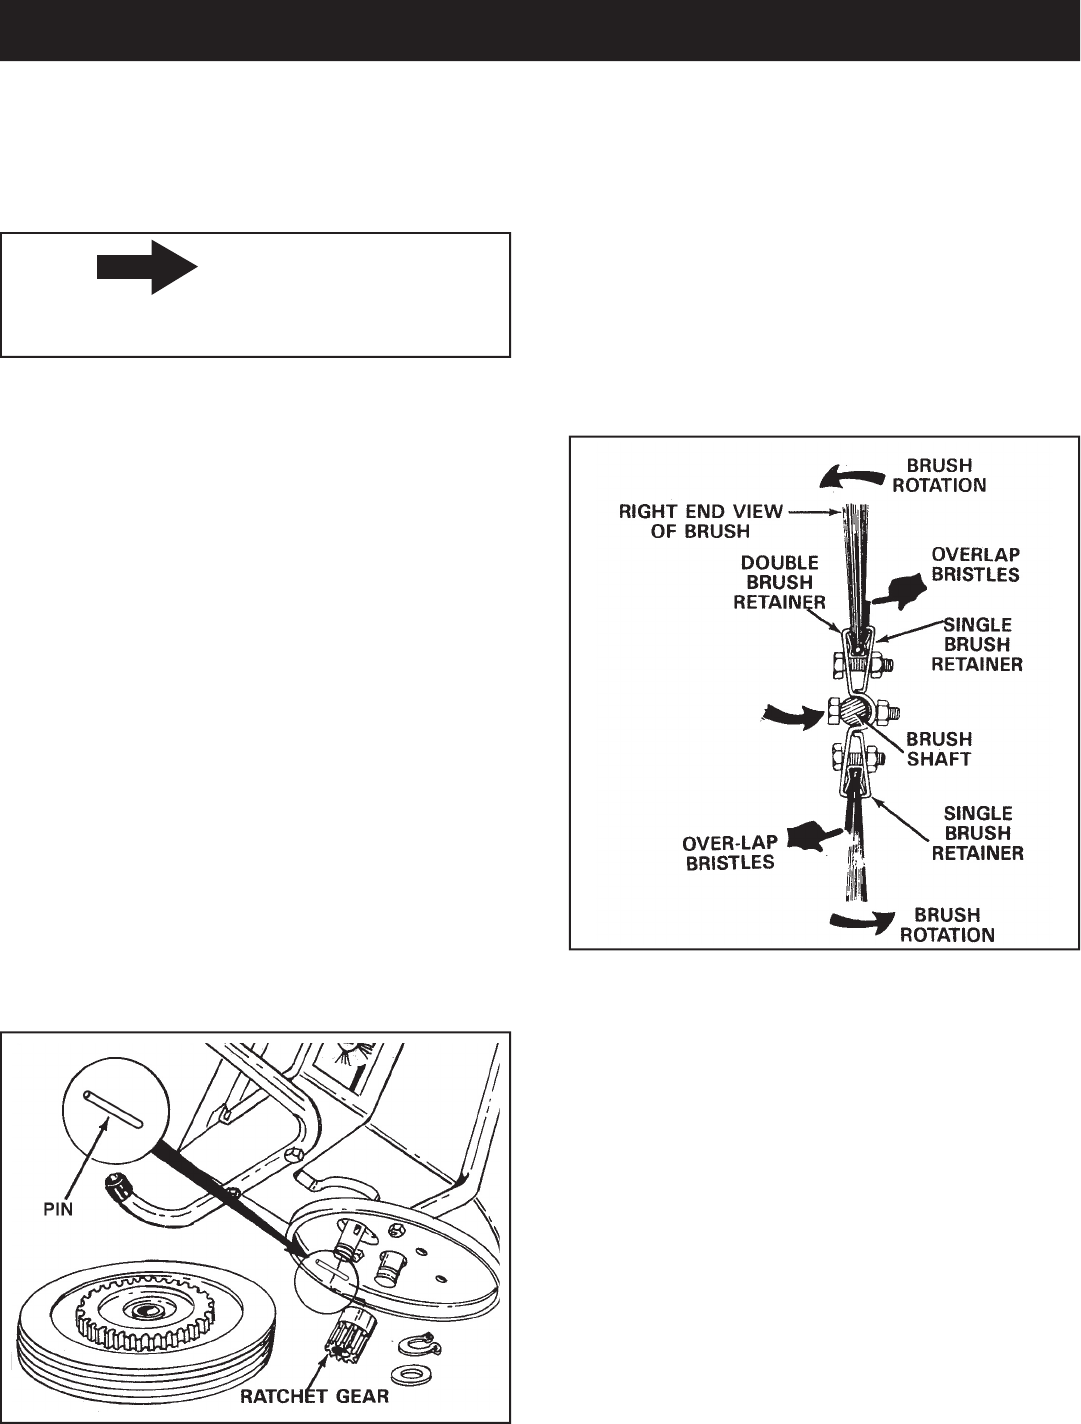
1.
Remove only on
e wheel from the sweeper.
2. Remove the retaining rings and washers which hold
the ratchet gear onto the brush shaft.
3. Remove the gear by sliding it off the brush shaft. (Look
for the drive pin, which may fall out of the brush shaft
when the ratchet gear is removed.
4. To reass
emble, inse
rt the drive pin through the hole
near the end of the brush shaft. Make sure the pin
slides back and forth easily in the shaf
t.
5. Lightly grease the shaft and fi ll the ratchet gear with
grease. Assemble the ratchet gear back
onto the shaft.
6. Lightly grease the axle and the gear teeth on the
wheel
and then reass
emble the wheel. The brushes
should rotate only during forward movement. If the
brushes rotate by both forward and revers
e moveme
nt,
the drive pin is j
amming in the rat
chet gear. Dissamble
,
clean and lubricate the drive pin and rat
chet gear and
then reassmble wheel.
7. Remove opposite wheel
and repeat
steps 1-6 for that
wheel.
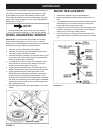
The bearings in the sweep
er have been prelubricated at
the
factory. It is recommended that a few drops of light
oil be added t
o the brush shaft bearings twice a year.
The wheels should be removed to clean gears every two
years. After cleaning, apply an even coat of light grease.
See fi gures 11
and 12.
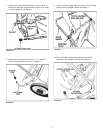
NOTE:
To remove the wheel, pop off hub cap with a screw
driver and remove ret
aining
"E" ring and fl at was
her.
FIGURE
1
1
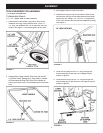
BRUSH REPLACEMENT
1.
R
emove the hopper bag from lawnsweeper.
2.
Br
ush replacement should be done one brush at a
time.
3. Tip the sweeper forward on housing for ease of brush
replacement. Do not remove hex
bolt from double
brush retainers through brush shaft.
4. Loosen hex bolts and hex lock nuts fro
m
single brush
retainers. See fi gure 12. Slide brush out of retainers,
making not of over-lap bristles position.
5. Install new brush
, making su
re over-lap bristles are
postioned the same as before and as shown in
fi gure
12.
FIGURE
1
2