


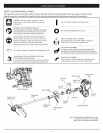
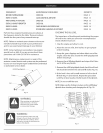

FREQUENCY MAINTENANCE REQUIRED REFERTO
EVERY10HOURS CLEANAND RE-OILAIRFILTER PAGE 13
EVERY25HOURSTHEREAFTER CHECKOIL PAGE 13
L%/ERY25HOURS CHECKSPARKPLUGPOSIT1ONGAP PAGE 4
EVERY2SHOURS ROCKERARMCLEARANCEADJUSTMENT PAGE 16
Perform these required maintenance procedures at
the frequency stated in the table. These procedures
should also be a part of any seasonal tune-up.
NOTE: Failure to maintain your trimmer at the recom-
mended schedule may result in poor performance
and/or cause permanent damage to your trimmer
NOTE: Some maintenance procedures may require
special tools or skills. If you are unsure about these
procedures call 1-800-235-5878 for assistance.
NOTE: Maintenance, replacement, or repair of the
emission control devices and system may be performed
by any non-road engine repair establishment, individual
or authorized service dealer.
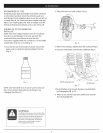
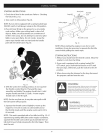
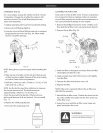
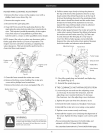
Oil Fill Plug/Dipstick_._._
CHECKING THE OIL LEVEL
The importance of checking and maintaining the proper
oil level in the crankcase cannot be overemphasized.
Check oil before each use:
1. Stop the engine and allow to cool.
2. Place the unit on a fiat, level surface to get a proper
oil level reading.
3. Keep dirt, grass clippings and other debris out of the
engine. Clean the area around the oil fill plug/dipstick
before removing it.
4. Remove the oil fill plug/dipstick and wipe offoil. Rein-
sert it all the way back in.
S.Remove the oil fill plug/dipstick and check the oil level.
Oil should be between the add and fill marks (Fig. 16).
6. If the level is low, add a small amount ofoil to the oil
fill hole (Fig.17) and recheck. Repeat this procedure
until the oil level reaches the full mark of the dipstick.
NOTE: Do not overfill the unit.
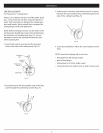
Add
Fig. 16
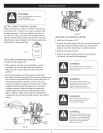
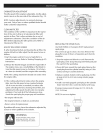
WARNING:
When servicing, use only identical
replacement parts. Use of any
other parts may create a hazard
or cause product damage.
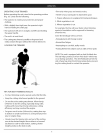
WARNING:
To prevent extensive engine wear and
damage to the unit, always maintain the
proper oil level in the crankcase. Never
operate the unit with the level below the
bottom of the dipstick.
J
NOTE:Make sure the O-Ring is in place on the oil fill plug/
dipstick when checking and changing the oil (Fig. 16).
Oil Fill Plug!
Dipstick
/
Oil Fill Hole
Fig. 17
12