


8
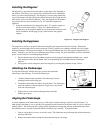
3 Center your target in the main optics of the telescope. You may have to move the telescope slightly to
center it.
4 Adjust the screw on the side of the finder bracket until the cross hairs are centered horizontally on the target
seen through the telescope.
5 Adjust the screw on the top of the finder bracket until the cross hairs are centered vertically on the target
seen through the telescope.
A
A
t
t
t
t
a
a
c
c
h
h
i
i
n
n
g
g
t
t
h
h
e
e
S
S
k
k
y
y
S
S
c
c
o
o
u
u
t
t
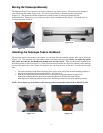
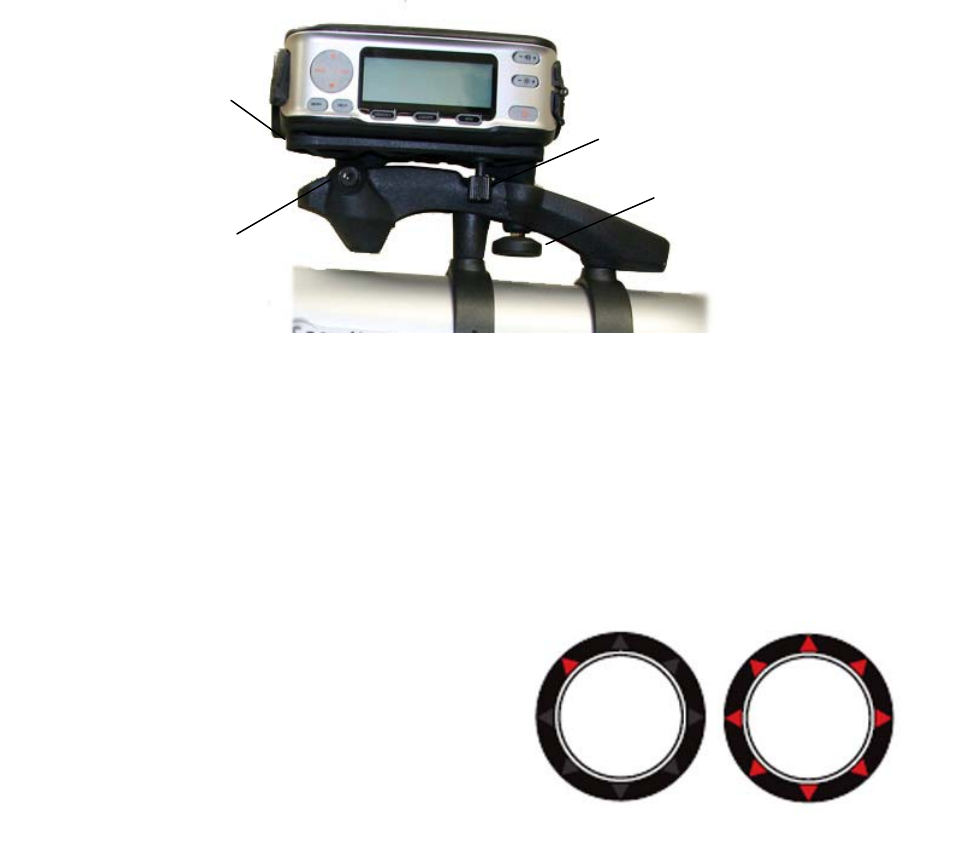
Before using the telescope to find your first object, your SkyScout Personal Planetarium must be attached and
aligned with the telescope’s eyepiece.
To attach the SkyScout to the bracket:
1. Hold the SkyScout with the larger targeting window towards the front (objective lens) end of the telescope.
2. Align the holes at the bottom of the SkyScout with the alignment pins on the bracket mounting platform.
3. Place the holes over the pins and press the SkyScout down until it is firmly seated on the bracket.
4. For added security, thread the mounting screw into the SkyScout’s tripod mounting hole.
A
A
l
l
i
i
g
g
n
n
i
i
n
n
g
g
t
t
h
h
e
e
S
S
k
k
y
y
S
S
c
c
o
o
u
u
t
t
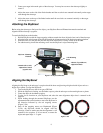
Aligning the SkyScout to the telescope’s eyepiece should be done at night using a bright celestial object such as a
bright star or planet. To align the SkyScout:
1. Turn on the SkyScout so that it can get a GPS link.
2. While the SkyScout is linking, use the finder scope to point the telescope at a known bright star or planet.
3. Center the object in the 40mm eyepiece.
4. Use the Locate function on your SkyScout and select the same alignment object that is centered in the
eyepiece.
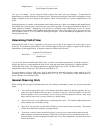
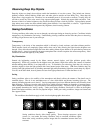
5. While looking through the mounted SkyScout, use the
adjustment knobs on the bracket to move the SkyScout in
the direction indicated by the red targeting arrows
(Figure 2.15a).
6. Once all the targeting arrows are illuminated (Figure
2.15b)., the SkyScout should be aligned with the
telescope. Check to make sure that the alignment is still
centered in the eyepiece. If it has moved, re-center the
object and repeat steps 4 – 5 again.
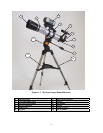
Figure 2-14 SkyScout Bracket
Figure 2-15a Figure 2-15b
¼-20 Mounting
Screw
Altitude (Up and Down)
Adjustment Knob
Azimuth (side to side)
Adjustment Control
(opposite side)
SkyScout Mounting
P
latform