


5
This section covers the assembly instructions for your SkyScout Scope. Your telescope should be set up indoor the
first time so that it is easy to identify the various parts and familiarize yourself with the correct assembly procedure
before attempting it outdoor.
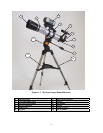
Each SkyScout Scope includes – optical tube with attached SkyScout bracket , Alt-Az mount with attached pan
handle, 10mm eyepiece – 1.25”, 40mm eyepiece – 1.25”, erect image diagonal - 1.25” .
S
S
e
e
t
t
t
t
i
i
n
n
g
g
u
u
p
p
t
t
h
h
e
e
T
T
r
r
i
i
p
p
o
o
d
d
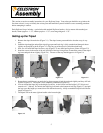
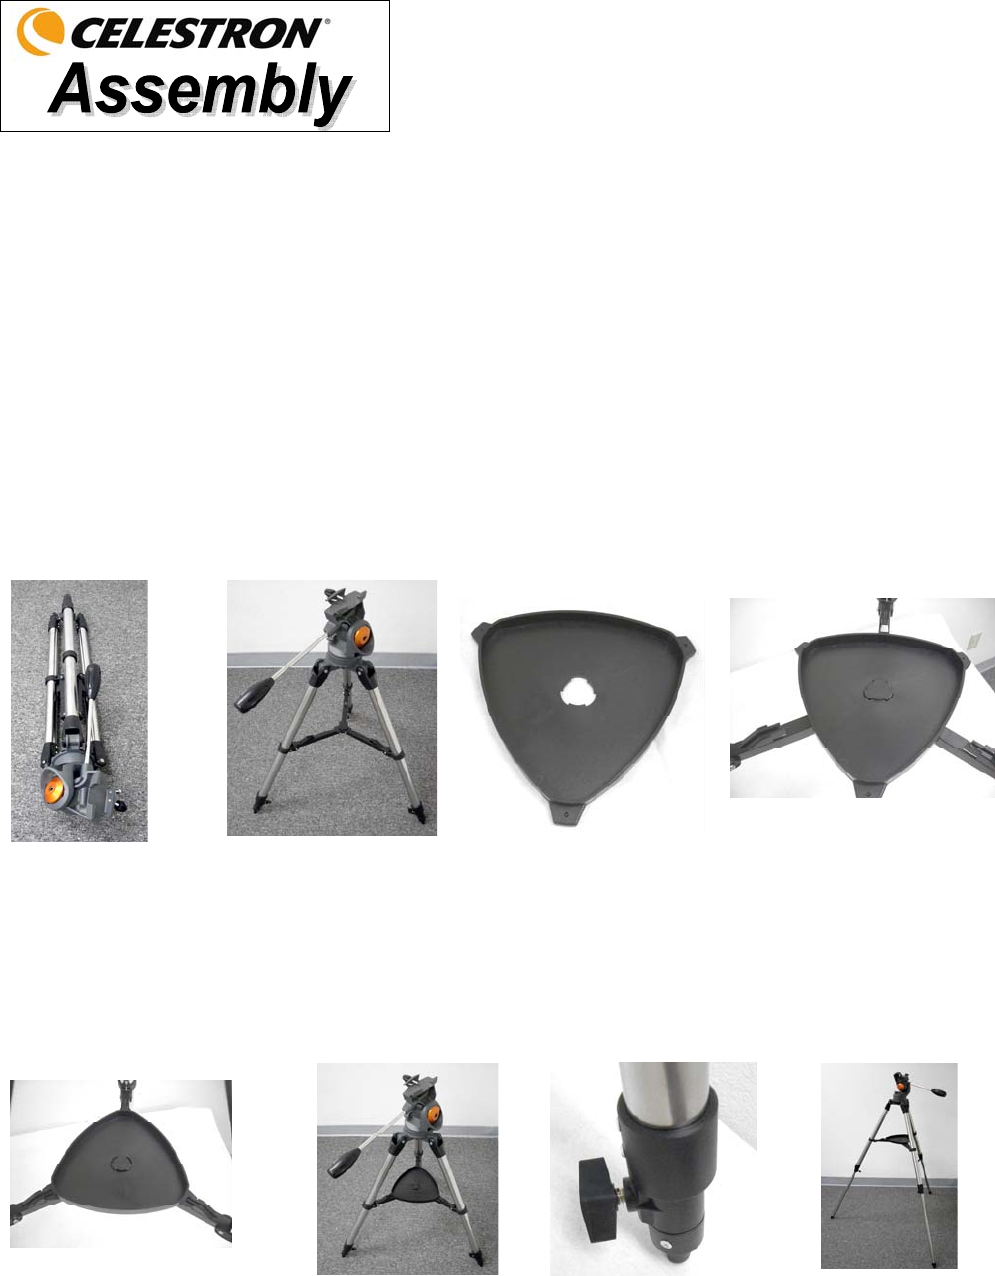
1. Remove the tripod from the box (Figure 2-1). The tripod comes preassembled so that the set up is very
easy.
2. Stand the tripod upright and pull the tripod legs apart until each leg is fully extended and then push down
slightly on the tripod leg brace (Figure 2-2). The very top of the tripod is called the tripod head.
3. Next, we will install the tripod accessory tray (Figure 2-3) onto the tripod leg brace (center of Figure 2-2).
4. Insert the cut-out in the center of the tray (flat side of the tray facing down) to match the center of the tripod
leg brace and push down slightly (Figure 2-4). The ears of the tray should appear as in Figure 2-4
Figure 2-1 Figure 2-2 Figure 2-3 Figure 2-4
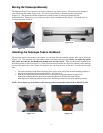
5. Rotate the tray until the ears are under the leg brace support of each leg and push slightly and they will lock
in place (Figure 2-5). The tripod is now completely assembled (Figure 2-6).
6. You can extend the tripod legs to the height you desire. At the lowest level the height is 24” (61cm) and
extends to 41” (104cm). You unlock the tripod leg lock knob at the bottom of each leg (Figure 2-7) and pull
the legs out to the height you want & then lock the knob securely. A fully extended the tripod looks like the
image in Figure 2-8.
7. The tripod will be the most rigid and stable at the lowest height.
Figure 2-5 Figure 2-6 Figure 2- 7 Figure 2-8