


Slew Limits – Sets the limits in altitude that the telescope can slew without displaying a warning message. The slew limits prevent the
telescope tube from slewing to an object below the horizon. The slew limits can be customized depending on your needs. For example, if
you would like to slew to an object that is close to the zenith but you have a camera attached that prevents it from pointing straight up, you
can set the maximum altitude to 80 or 85 degrees to prevent the tube from ever pointing straight up.
Filter Limits – When an alignment is complete, the NexStar automatically knows which celestial objects are above the horizon. As a
result, when scrolling through the database lists (or selecting the Tour function), the NexStar hand control will display only those objects
that are known to be above the horizon when you are observing. You can customize the object database by selecting altitude limits that are
appropriate for your location and situation. For example, if you are observing from a mountainous location where the horizon is partially
obscured, you can set your minimum altitude limit to read +20º. This will make sure that the hand control only displays objects that are
higher in altitude than 20º.
If you want to explore the entire object database, set the maximum altitude limit to 90º and the minimum limit to –90º. This
will display every object in the database lists regardless of whether it is visible in the sky from your location or not.
Observing
Tip!
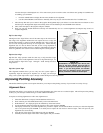
Direction Buttons –The direction a star moves in the eyepiece varies depending on the accessories being used. This can create confusion
when guiding on a star using an off-axis guider versus a straight through guide scope. To compensate for this, the direction of the drive
control keys can be changed. To reverse the button logic of the hand control, press the MENU button and select Direction Buttons from
the Utilities menu. Use the Up/Down arrow keys (10) to select either the Azimuth buttons (left and right) or Altitude buttons (up and
down) and press ENTER. Pressing ENTER again will reverse the direction of the hand control buttons from their current state. Direction
Buttons will only change the eyepiece rates (rate 1-6) and will not affect the slew rates (rate 7-9).
Goto Approach
- lets the user define the direction that the telescope will approach when slewing to an object. This allows the user the
ability to minimize the affects of backlash For example, if your telescope is back heavy from using heavy optical or photographic
accessories attached to the back, you would want to set your altitude approach to the negative direction. This would ensure that the
telescope always approaches an object from the opposite direction as the load pulling on the scope. Similarly, if using the telescope while
polar aligned, you would want to set the azimuth approach to the direction that allows the scope to compensate for different load level on
the motors and gears when pointing in different parts of the sky.
To change the goto approach direction, simply choose Goto Approach from the Scope Setup menu, select either Altitude or Azimuth
approach, choose positive or negative and press Enter.
Autoguide Rates- Allows the user to set an autoguide rate as a percentage of sidereal rate. This is helpful when calibrating your telescope
to a CCD autoguider for long exposure photography.
Cordwrap
- – Cord wrap safeguards against the telescope slewing more than 360º in azimuth and wrapping accessory or power cables
around the base of the telescope. This is useful any time that cables are plugged into the base of the telescope. By default, the cord wrap
feature is turned off when the telescope is aligned in altazimuth and turn on when aligned on a wedge.
U
U
t
t
i
i
l
l
i
i
t
t
y
y
F
F
e
e
a
a
t
t
u
u
r
r
e
e
s
s
Scrolling through the MENU options will also provide access to several advanced utility functions such as anti-backlash compensation and
slew limits.
GPS On/Off
- Allows you to turn on\off the GPS module when using the optional CN16 GPS accessory. When aligning the telescope,
the NexStar still receives information, such as current time, from the optional GPS accessory. If you want to use the hand control database
to find the coordinates of a celestial object for a future date you would need to turn the GPS module off in order to manually enter a date
and time other than the present.
Light Control – This feature allows you to turn off both the red key pad light and LCD display for daytime use to conserve power and to
help preserve your night vision.
Factory Setting – Returns the NexStar hand control to its original factory setting. Parameters such as backlash compensation values,
initial date and time, longitude/latitude along with slew and filter limits will be reset. However, stored parameters such as user defined
objects will remain saved even when Factory Settings is selected. The hand control will ask you to press the "0" key before returning to the
factory default setting.
Version - Selecting this option will allow you to see the version number of the hand control software.
Get Axis Position - Displays the relative altitude and azimuth for the current position of the telescope.
22