


Telescope Basics • 23
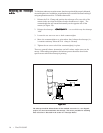
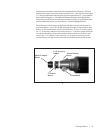
Figure 4-2Figure 4-2
Figure 4-2Figure 4-2
Figure 4-2
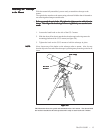
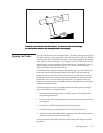
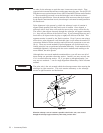
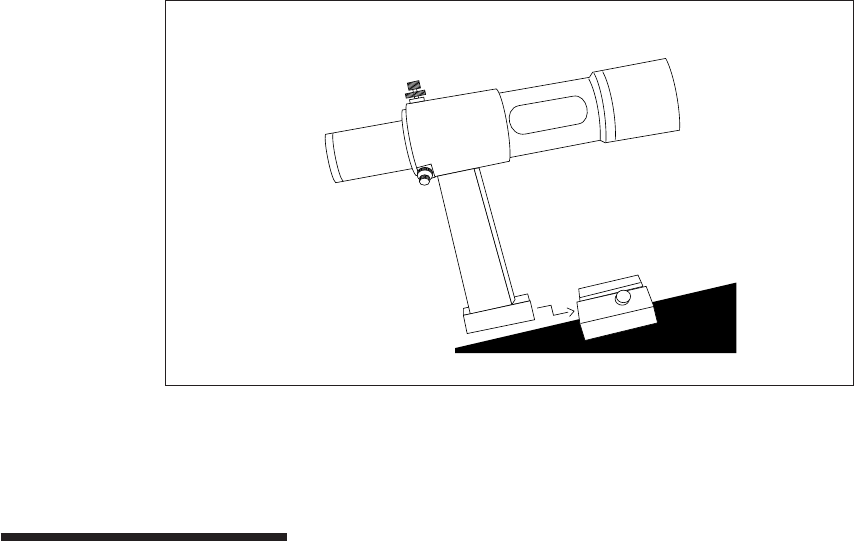
The finder comes mounted in the finder bracket. To mount the finder to the telescope,The finder comes mounted in the finder bracket. To mount the finder to the telescope,
The finder comes mounted in the finder bracket. To mount the finder to the telescope,The finder comes mounted in the finder bracket. To mount the finder to the telescope,
The finder comes mounted in the finder bracket. To mount the finder to the telescope,
the finder bracket attaches to the mounting bracket on the telescope.the finder bracket attaches to the mounting bracket on the telescope.
the finder bracket attaches to the mounting bracket on the telescope.the finder bracket attaches to the mounting bracket on the telescope.
the finder bracket attaches to the mounting bracket on the telescope.
The CR-150 HD comes with a 9x50mm finder. The finder is designed to help you
find objects that are easily overlooked in the main optics of the telescope. The first
number used to describe the finder is the power. The second number is the diameter
of the objective lens in millimeters. For example, the CR-150 HD finder is 9x50
which means it is 9 power and has a 50mm objective lens. Incidentally, power is
always compared to the unaided human eye. So, a 9 power finder magnifies
images nine times more than the human eye.
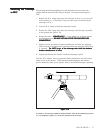
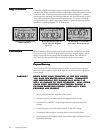
The 9x50mm finder is adjusted using two adjustment screws, located on the top and
on the right (when looking though the finder) of the finder bracket and a spring
loaded pivot screw (located on the left side of the bracket). This allows you to turn
the top adjustment screw to move the finderscope up and down, and turn the right
adjustment screw to move the finderscope right to left. The spring loaded pivot
screw puts constant pressure on the finder so that the adjustment screws are always
making contact with the finder.
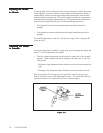
To make things a little easier, you should align the finder during the day when it is
easier to locate objects. To align the finder:
1. Choose a conspicuous object that is over 500 yards away. This will eliminate
any possible parallax effect.
2. Point your telescope at the target and center it in the main optics of the telescope
(the eyepiece).
3. Lock the R.A. and DEC clamps to hold the telescope in place.
4. Check the finder to see where the object is located in the field of view.
5. Adjust the screws on the finder bracket, tightening one while loosening another,
until the cross hairs are centered on the target.
Accurate alignment of the finder will make it much easier to find objects in the main
optical tube.
Aligning the Finder