


24 • Telescope Basics
Your Celestron CM-1100 can be used for both terrestrial and astronomical
photography. Your Celestron CM-1100 has a fixed aperture and, as a result, a
fixed f/ratio. To properly expose your subjects photographically you need to
set your shutter speed accordingly. Most 35mm single lens reflex (SLR)
cameras offer through-the-lens metering which lets you know if your picture is
under or overexposed. This is more of a consideration when doing terrestrial
photography, where exposure times are measured in fractions of a second. In
astrophotography, the exposures are much longer, requiring that you use the
“B” setting on your camera. The actual exposure time is determined by how
long you keep the shutter open.
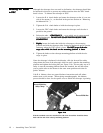
To reduce vibration when tripping the shutter, use a cable release. Releasing
the shutter manually can cause vibration, something that produces blurred
photos. A cable release will keep your hands clear of the camera and tele-
scope, thus reducing the possibility of shaking the telescope. Mechanical
shutter releases can be used, though air type releases are best.
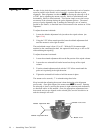
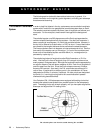
The Celestron CM-1100 comes with an 9x50mm finder which helps in aiming
the main telescope at distant objects that are hard to find in the narrow field of
the telescope. The first number used to describe the finder is the power while
the second number is the diameter of the objective lens in millimeters. This
means the 9x50 finder is 9 power and has a 50mm objective lens. Incidentally,
power is always compared to the unaided human eye. So a 9 power finder
magnifies images nine times more than the human eye.
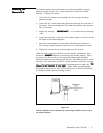
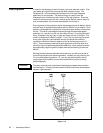
To make the alignment process a little easier, you should perform this task in
the daytime when it is easier to locate objects in the telescope without the
finder. To align the finder:
1. Choose a conspicuous object that is in excess of one mile away. This will
eliminate any possible parallax effect.
2. Point your telescope at the object you selected and center it in the main
optics of the telescope.
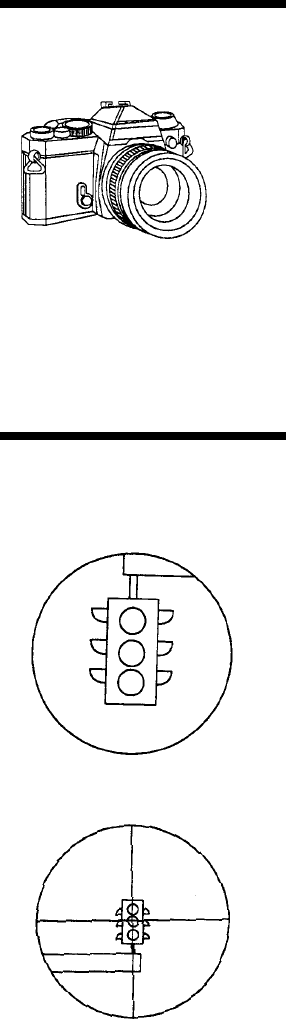
3. Check the finder to see where it is located in the field of view.
4. Adjust the screws on the finder bracket, tightening one while loosening
another, until the cross hairs are centered on the target.
5. Tighten each set screw a quarter of a turn to ensure that they will not
come loose easily.
General Photography
Hints
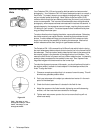
Aligning the Finder
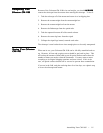
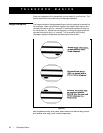
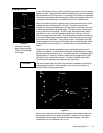
Figure 3-3
TOP: The image as seen
through the telescope. BOT-
TOM: The image as seen
through the finder.