


16 • Assembling Your CM-1100
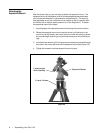
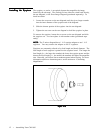
In order for the clock drive to track accurately, the telescope’s axis of rotation
must be parallel to the Earth’s axis of rotation, a process known as polar
alignment. Polar alignment is achieved
NOTNOT
NOTNOT
NOT by moving the telescope in R.A.
or DEC, but by adjusting the mount vertically, which is called altitude, and
horizontally, which is called azimuth. This section simply covers the correct
movement of the telescope during the polar alignment process. The actual
process of polar alignment, that is making the telescope’s axis of rotation
parallel to the Earth’s, is described later in this manual in the section on “Polar
Alignment.”
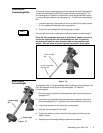
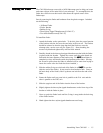
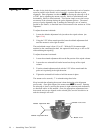
To adjust the mount in altitude:
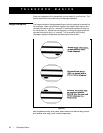
1. Locate the altitude adjustment bolt just above the tripod column (see
figure 2-14).
2. Using the 7/32" Allen wrench provided, turn the altitude adjustment bolt
until the mount is at the right elevation.
The total altitude range is from 13° to 65°. With the 23 lb counterweight
attached to the counterweight shaft, the equatorial head can go as low as 20°
without hitting the tripod leg.
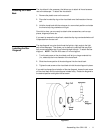
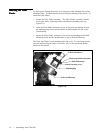
To adjust the mount in azimuth:
1. Locate the azimuth adjustment bolt on the flat portion of the tripod column.
2. Loosen the two azimuth lock knobs located on the top of the tripod
column.
3. Turn the azimuth adjustment bolt with the 7/32" Allen wrench until the
polar axis is pointing in the right direction.
4. Tighten the azimuth lock knobs to hold the mount in place.
The mount can be moved ± 7° in azimuth using these bolts.
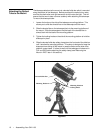
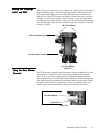
Keep in mind that adjusting the mount is done during the polar alignment
process only. Once polar aligned, the mount must
NOTNOT
NOTNOT
NOT be moved. Pointing
the telescope is done by moving the mount in right ascension and declination,
as described earlier in this manual. Once the appropriate adjustments have
been made and you are aligned on the celestial pole, turn the clock drive on
and the telescope will track.
Adjusting the MountAdjusting the Mount
Adjusting the MountAdjusting the Mount
Adjusting the Mount
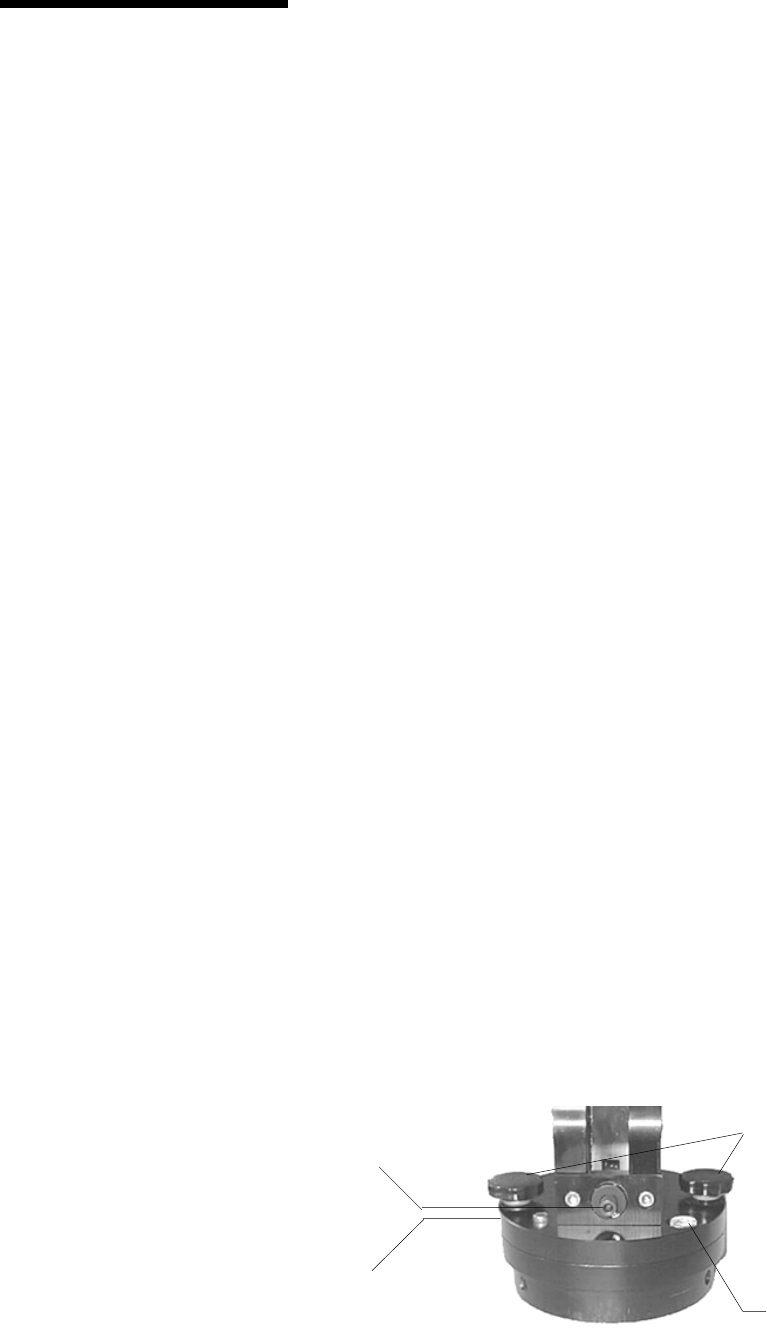
Figure 2-14
Altitude Adjustment Bolt
Azimuth Adjustment Bolt
Bubble Level
Azimuth Lock Screws