


10
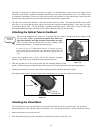
The knob is a tension fit, so sliding it on holds it in place. As mentioned above, there are two R.A. shafts, one on
either side of the mount. It makes no difference which shaft you use since both work the same. Use whichever one
you find more convenient. If, after a few observing sessions, you find the R.A. slow motion knob is more accessible
from the other side, pull firmly to remove the knob, then install it on the opposite side.
5. The DEC slow motion knob attaches in the same manner as the R.A. knob. The shaft that the DEC slow motion
knob fits over is toward the top of the mount, just below the telescope mounting platform. Once again, you have
two shafts to choose from. Use the shaft that is pointing toward the ground. This makes it easy to reach while
looking through the telescope, something which is quite important when you are observing.
A
A
t
t
t
t
a
a
c
c
h
h
i
i
n
n
g
g
t
t
h
h
e
e
O
O
p
p
t
t
i
i
c
c
a
a
l
l
T
T
u
u
b
b
e
e
t
t
o
o
t
t
h
h
e
e
M
M
o
o
u
u
n
n
t
t
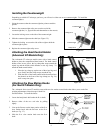
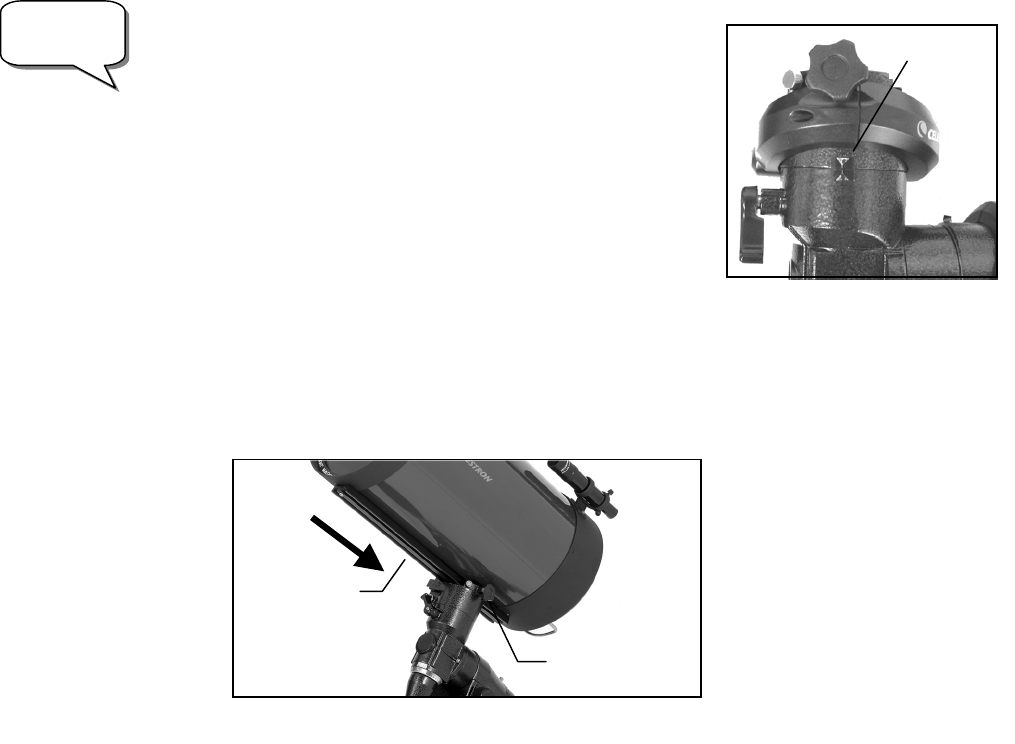
The telescope attaches to the mount via a dovetail slide bar which is mounted along the bottom of the
telescope tube. Before you attach the optical tube, make sure
that the declination and right ascension clutch knobs are tight.
This will ensure that the mount does not move suddenly while
attaching the telescope. To mount the telescope tube:
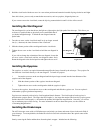
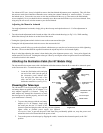
In order for the GT computerized mount to function properly,
before installing the optical tube, the mounting platform must be
positioned so that the Declination Index Marks are aligned (see Fig
2-8).
1. Loosen the mounting screw on the side of the telescope mounting
platform. This allows you to slide the dovetail bar onto the mount.
2 Slide the dovetail bar on the telescope tube into the mounting platform of the
mount. Slide the telescope so that the back of the dovetail bar is close to the back of the mounting platform.
3 Tighten the mounting screw on the side of the mounting platform to hold the telescope in place.
Now that the optical tube is securely in place, the visual accessories can now be attached to the telescope.
A
A
t
t
t
t
a
a
c
c
h
h
i
i
n
n
g
g
t
t
h
h
e
e
V
V
i
i
s
s
u
u
a
a
l
l
B
B
a
a
c
c
k
k
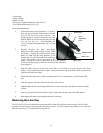
The visual back is the accessory that allows you to attach all visual accessories to the telescope. The Advanced
Series optical tubes come with the visual back installed. If it is not already on the tube it can be attached as follows:
1. Remove the rubber cover on the rear cell.
2. Place the knurled slip ring on the visual back over the threads on the rear cell (Fig 2-10).
Advanced
GT Users!
Dovetail Bar
Telescope
Mounting Screw
Declination
Index Marks
Figure 2-8
Figure 2-9