26 • Telescope Basics
Nighttime Observing
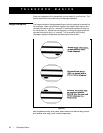
Looking at objects in the sky is quite different than looking at objects on Earth.
For one, many objects seen in the daytime are easy to see with the naked eye
and can be located in the telescope by using landmarks. In the night sky
many objects are not visible to the naked eye. To make things easier, you are
better off starting with a bright object like the Moon or one of the planets.
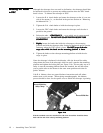
1. Orient the telescope so that the polar axis is pointing as close to true
north as possible. You can use a landmark that you know faces north to
get you in the general direction.
2. Adjust the tripod legs until the mount is level.
3. Adjust the mount until the latitude indicator points to the latitude of the site
from which you are observing.
4. Insert a low power eyepiece (i.e., one with a large focal length) into the
telescope to give you the widest field possible.
5. Turn the clock drive on.
6. Loosen the right ascension and declination clutch knobs and point the
telescope at the desired target. The Moon or one of the brighter planets is
an ideal first target.
7. Locate the object in the finder, center it, and then look through the tele-
scope.
8. Turn the focus knob until the image is sharp.
9. Take your time and study your subject. If observing the Moon, look for
small details in the craters.
That’s all there is to using your Celestron CM-1100. However, don’t limit your
view of an object to a single eyepiece. After a few minutes, try using a different
optional eyepiece, a more powerful one. This gives you an idea of how the field
of view changes. Center your target and focus. Once again, if observing the
Moon you will be looking at a few craters at the same time.
NOTE: If not using the clock drive, the stars will appear to drift out of the field of view.
This is due to the Earth’s rotation. In fact, anything in the sky, day or night,
will drift out unless the telescope has been polar aligned and the clock drive is
running. There is more on this in the section on “Polar Alignment.”


