


14
M
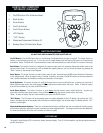
ALIGNING NORTHSTAR FOR THE FIRST TIME (Continued)
STEP 2: SET THE TIME
By using the SCROLL UP and SCROLL DOWN buttons and the ENTER button, the time can easily be set as well as the time
zone. Each flashing option will need to be changed to read the appropriate number. Once the appropriate number is
displayed, accept the number by pressing ENTER. Then set the next flashing option until the time and time zone
are set.
STEP 3: SET THE DATE
Again by using the SCROLL UP and SCROLL DOWN buttons and the ENTER button, the date can easily be set. Each flashing
option will need to be changed to read the appropriate number or month. Once the appropriate number is displayed, accept
the number by pressing ENTER. Then set the next flashing option until the day, month and year
are set.
STEP 4: SET THE LOCATION
The next screen will display:
ALIGN EARTH
CITY ][
CITY will be flashing. By pressing the ENTER button, the display will change to:
COUNTRY
U.S.A.][
The country will be flashing.
Again by using the SCROLL UP and SCROLL DOWN buttons and the ENTER button, the COUNTRY can be chosen.
When the appropriate Country is found and the ENTER button is pushed, choose the city that you are closest to by pressing
ENTER when it is displayed.
NOTE: CHOOSE THE CITY CLOSEST TO YOUR VIEWING LOCATION. THIS IS NOT A CRITICAL STEP AND THE ALIGNMENT
WILL BE REFINED AUTOMATICALLY AS WE PROGRESS.
After four simple criteria that any consumer should know, the telescope now knows where over 20,000 astronomical objects
are in the night sky to a relative precision. With just two more steps, you will zero in on pinpoint accuracy.
Now the telescope will lead you through a simple two star alignment process. YOU DO NOT NEED TO KNOW WHERE ANY
STARS ARE. You just simply follow the directions.
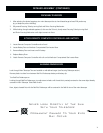
A scrolling message indicates to CENTER STAR 1 THEN PRESS ENTER
Then the display will read:
CENTER STAR 1
{120 ]52 MIZAR
Push the “GO” button and the telescope will automatically move to the general vicinity of the first guide star--in this
case MIZAR
The guide stars will be the brightest stars found in that area of the sky. Northstar will automatically “zero out” the guide star
and the display will read:
CENTER STAR 1
0◊0 0◊0 MIZAR
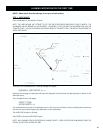
Note as you move from greater than 10 degrees away from an object to under ten degrees, the display moves into tenths of
degrees with the arrows acting as decimal points (Example
8]5=8.5 degrees below the object).
After getting the star zeroed in, you need to do as the screen told you—CENTER STAR 1. In other words, the star might
appear in the lower left corner of your telescope’s eyepiece.
By looking through the eyepiece, center the star in the field of view by using the Motorized Movement Buttons or move
the telescope by hand and press ENTER.