Assembly
Prepare the Engine
NOTE: The engine was shipped from the factory filled
with oil. Check the level of the oil. Add oil as needed.
NOTE: The operation of a new engine will sometimes
result in a slight amount of smoke. This smoke is
caused by paint or oil on or around the muffler. This is
normal and only expected during initial operation.
A seperate engine manual is also included with the
unit. See this engine manual for the manufacturer’s in-
structions for the type of petrol and oil to use. Before
you use the unit, read the information on safety, opera-
tion, maintenance, and storage.
WARNING
Follow the engine manufacturer’s instructions for
the type of petrol and oil to use. Always use a safety
petrol container. Do not smoke when adding petrol
to the engine. When inside an enclosure, do not fill
with petrol. Before you add petrol, stop the engine.
Let the engine cool for several minutes.
Important! Before You Start Mowing
• Check the engine oil.
• Fill the fuel tank with petrol.
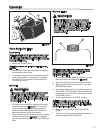
• Check the air pressure of the tires.
• Check the level of the mower housing.
• Attach the battery cables.
• Make sure the wire is attached to the spark plug.
13
C
heck the Tires
NOTE: Actual sustained horsepower will likely be lower
due to operating limitations and environmental factors.
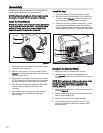
Check the air pressure in the tires. Tires with too much
air pressure will cause the unit to ride rough. Also, the
wrong air pressure will keep the mower housing from
cutting level. The correct air pressure is shown on the
side of the tires.
Check the Level of the Mower Housing
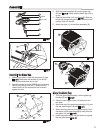
Make sure the level of cut is still correct. After you mow
a short distance, look at the area that was cut. If the
mower housing does not cut level, see “Level the
Mower Housing”.
Charge the Battery
WARNING
When you charge the battery, do not smoke. Keep
the battery away from any sparks. The fumes from
the battery acid can cause an explosion.
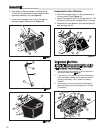
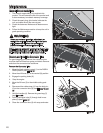
1. Remove the battery (1) and battery tray (3) (see
Figure 12).
2. Remove the protective caps from the battery
terminals.
3. Use a 12 volt battery charger to charge the battery.
Charge at a rate of 6 amps for one hour. If you do
not have a battery charger, have an authorized
service center charge the battery.
4. Install the battery (1) and battery tray (3). Make
sure the positive (+) terminal (4) is on the left side.
Install the Battery Cables
WARNING
To prevent sparks, fasten the red cable to the
positive (+) terminal before you connect the black
cable.
1. Remove the protective caps from the battery
terminals (see Figure 12).
2. Slide the terminal cover (2) onto the red cable (5).
Fasten the red cable to the positive (+) terminal (4)
with the fasteners (6) and (7).
3. Fasten the black cable (8) to the negative (-) termi-
nal with the fasteners (6) and (7).


