


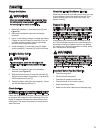


Assemble the Steering Wheel
1. Make sure the front wheels point forward.
2. Slide the cover (3) over the steering post (2)
(see F
Figure 3
). Make sure the collar of the cover is
on top.
NOTE: Before attachment of the steering wheel, make
sure that the front wheels point forward and are
st
raight. See Figure 4 for proper alignment of the
steering wheel (1).
3. Slide the steering wheel (1) onto the steering post
(2) (see F
Figure 3
).
4. Attach the steering wheel to the steering post with
screw (4) and washer (6).
5. Attach the cover (3) to the steering wheel.
6. Some models have an optional insert (7) in the
parts bag. Attach the insert to the center of the
s teering wheel.
Figure 2
3
2
1
5
4
(17x47)
(1001054)
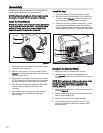
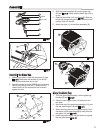
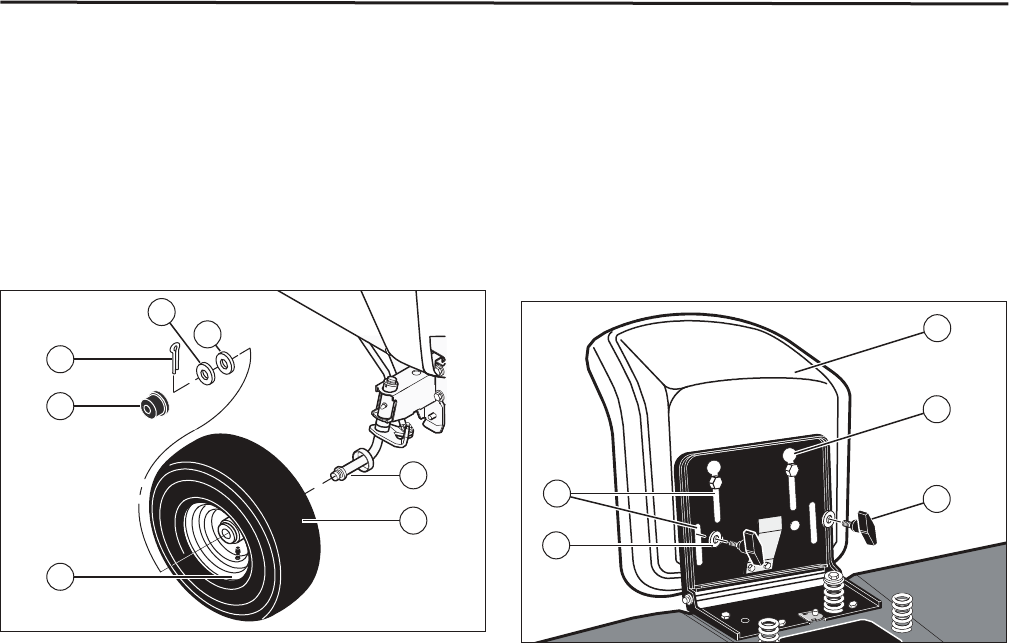
Install the Front Wheels
NOTE: Use a piece of wood about 4 feet (1.25 meters)
long to raise the front of the tractor. If a piece of wood
cannot be found, get another person to help lift the
tractor. Be careful, do not let the tractor fall.
1. Raise the front of the tractor. Set a support (block
of wood) under the tractor.
2. Slide the front wheel (1) on the spindle (3) (see
Figure 1
). Install the front wheel so the tire is offset
away from the tractor.
3. Fasten each front wheel with washer (4), washer
(7), and cotter pin (5). Bend the ends of the cotter
pin apart to keep the front wheel on the spindle.
4. After the front wheels are installed, lift the tractor
from the support. Roll the tractor off of the
container.
5. If your tractor has hub caps (6), install the hub
caps. Make sure the washers hold the hub
caps in place.
Figure 1
Assembly
(17x195)
7
(17x192)
4
5
(30x49)
6
2
3
1
All fasteners are in the parts bag. Do not discard any
parts or material until the unit is assembled.
NOTE: In this Instruction Book, left and right describe
the location of a part with the operator on th
e seat.
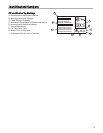
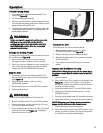
Install the Seat
1. Carefully remove the plastic bag from the seat.
2. Align the holes in the seat hinge (2) to the holes in
the seat (1) (see F
Figure 2
). Fasten the seat to the
seat hinge (2) with the fasteners (4) and (5).
3. Check the operating position of the seat (1). If the
seat needs to be adjusted, loosen the two wing
bolts (5). Slide the seat forward or backward along
the seat adjusting holes (3). Tighten the wing bolts.
10