


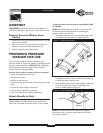

Pressure Washer
7
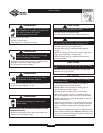
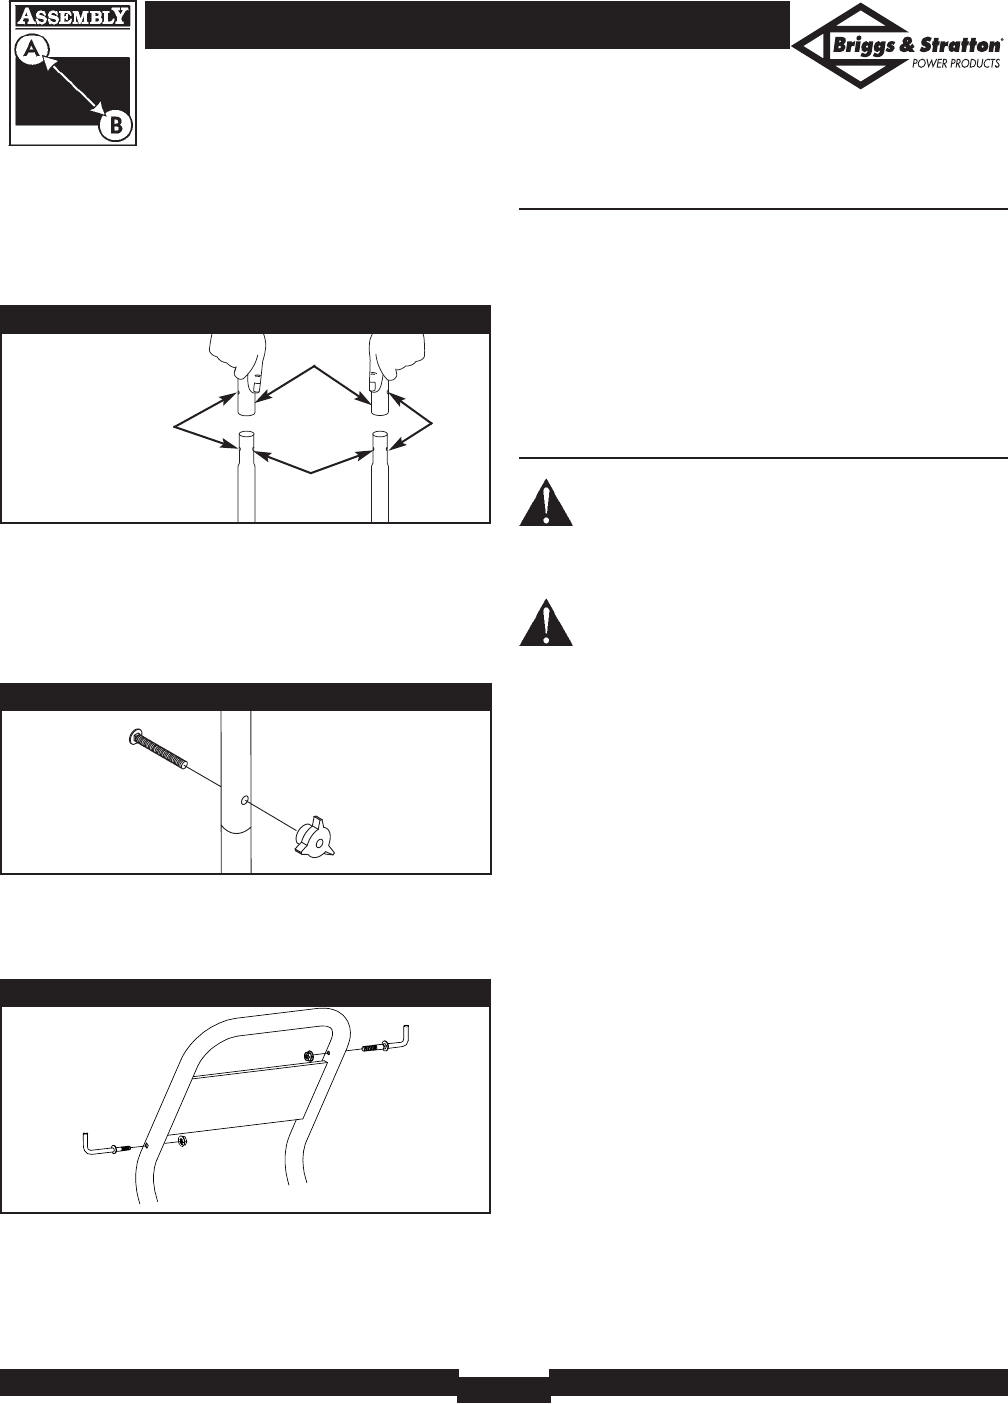
To attach handle supplied with two “L” hooks
(Model 01936):
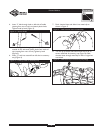
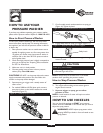
1. Place handle assembly onto handle supports connected
to main unit. Make sure holes in handle align with holes
on handle supports (Figure 7).
NOTE: It may be necessary to move the handle supports
from side to side in order to align the handle so it will slide
over the handle supports.
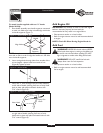
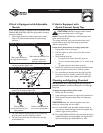
2. Insert carriage bolts through holes from outside of the
unit and attach a plastic knob from inside of unit
(Figure 8).Tighten by hand.
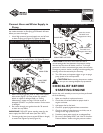
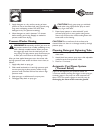
3. Insert one “L” hook through hole just under billboard
on left side of handle (viewing from rear of unit). Hold
hook in place with pliers and attach locknut with
7/16” wrench (Figure 9).
4. Insert other “L” hook through hole just above billboard
on right side of handle (viewing from rear of unit).
Hold hook in place with pliers and attach locknut with
7/16” wrench (Figure 9).
Add Engine Oil
IMPORTANT: Any attempt to crank or start the engine
before it has been properly serviced with the
recommended oil may result in an engine failure.
• Place pressure washer on a level surface.
• Refer to engine owners manual to add recommended oil
to engine.
NOTE: Check Oil Often During Engine Break–in.
Add Fuel
WARNING! NEVER fill fuel tank indoors. NEVER
fill fuel tank when engine is running or hot.Allow unit
to cool for two minutes before refueling. DO NOT
light a cigarette or smoke when filling the fuel tank.
WARNING! DO NOT overfill the fuel tank.
Always allow room for fuel expansion.
• Place pressure washer on a level surface.
• Refer to engine owners manual to add recommended
fuel to engine.
Hose Hook
Spray Gun
Hook
Figure 9 — Attach “L” Hooks to Handle
Align Holes
Handle
Handle
Supports
Figure 7 — Attach Handle to Base
Figure 8 — Secure Handle