


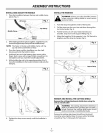


STARTING/STOPPING INSTRUCTIONS
[A
_, WARNING: Avoid accidental starting• Make sure you
are in the starting position when pulling the starter
rope (Fig• 17). To avoid serious injury, both the operator
and unit must be in a stable position while starting.
STARTING INSTRUCTIONS
1 •
2•
4•
5•
Mix petrol with oil• Fill petrol tank with petrol/oil mixture•
See 0ii and Petrol Mixing Instructions.
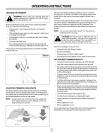
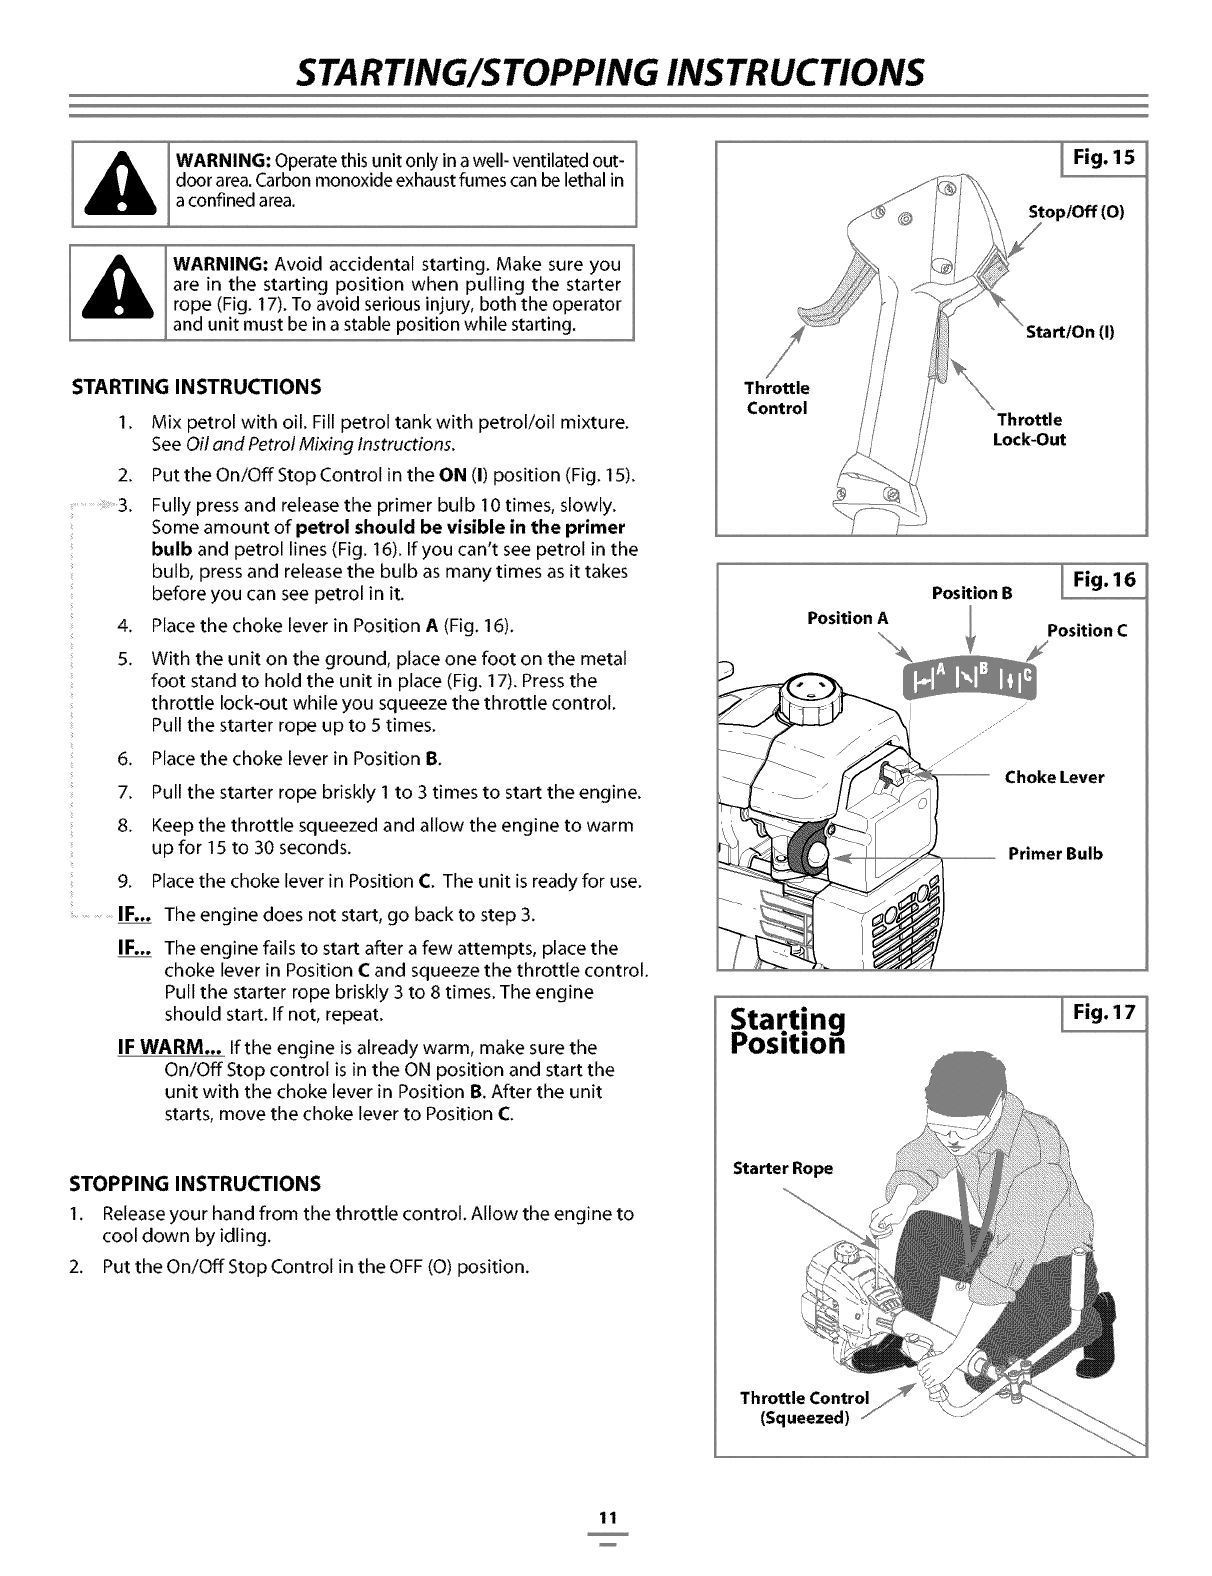
Put the On/Off Stop Control in the ON (I) position (Fig. 15).
Fully press and release the primer bulb I0 times, slowly.
Some amount of petrol should be visible in the primer
bulb and petrol lines (Fig. 16). Ifyou can't see petrol in the
bulb, press and release the bulb as many times as it takes
before you can see petrol in it•
Place the choke lever in Position A (Fig. 16).
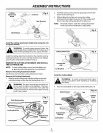
With the unit on the ground, place one foot on the metal
foot stand to hold the unit in place (Fig. 17)• Press the
throttle lock-out while you squeeze the throttle control.
Pull the starter rope up to 5times.
6• Place the choke lever in Position B•
7• Pull the starter rope briskly I to 3 times to start the engine.
8• Keep the throttle squeezed and allow the engine to warm
up for 15 to 30 seconds.
9. Place the choke lever in Position C. The unit is ready for use•
.............IF... The engine does not start, go back to step 3•
IF... The engine fails to start after a few attempts, place the
choke lever in Position C and squeeze the throttle control.
Pull the starter rope briskly 3 to 8 times. The engine
should start• If not, repeat.
IF WARM... If the engine is already warm, make sure the
On/Off Stop control is in the ON position and start the
unit with the choke lever in Position B. After the unit
starts, move the choke lever to Position C
STOPPING INSTRUCTIONS
I• Release your hand from the throttle control. Allow the engine to
cool down by idling.
2. Put the On/Off Stop Control in the OFF (O) position.
Throttle
Control
Position A
Starting
osidon
Starter Rope
I Fig. 15
Stop/Off (O)
Start/On (I)
Throttle
Lock-Out
Position B
I Fig. 16
Position C
Primer Bulb
I Fig.17
11