


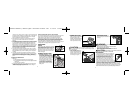
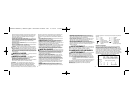
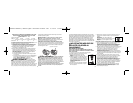
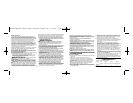
2. TRIMMING NEW GROWTH –
(Figure 6) A wide, sweeping
motion, feeding the blade teeth
through the twigs is most
effective. A slight downward tilt
of the blade, in the direction of
motion gives the best cutting.
CAUTION: Do not cut stems greater than 3/4 inch
(19mm). Use the trimmer only for cutting normal shrubbery around
houses and buildings.
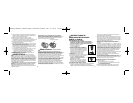
3. LEVEL HEDGES (Figure 7) –
To obtain exceptionally level
hedges a piece of string can
be stretched along the length
of the hedge as a guide.
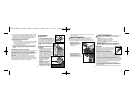
4. SIDE TRIMMING HEDGES
(Figure 8) – Hold the trimmer as
shown and begin at the bottom and
sweep up.
WARNING: TO GUARD AGAINST INJURY,
OBSERVE THE FOLLOWING:
• READ INSTRUCTION MANUAL BEFORE USING.
• SAVE INSTRUCTION MANUAL.
• KEEP HANDS AWAY FROM BLADES.
• KEEP HANDS ON HANDLES. DONʼT OVERREACH.
CAUTION: BLADE MAY COAST AFTER TURN OFF.
• DO NOT USE UNDER WET CONDITIONS
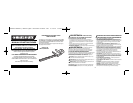
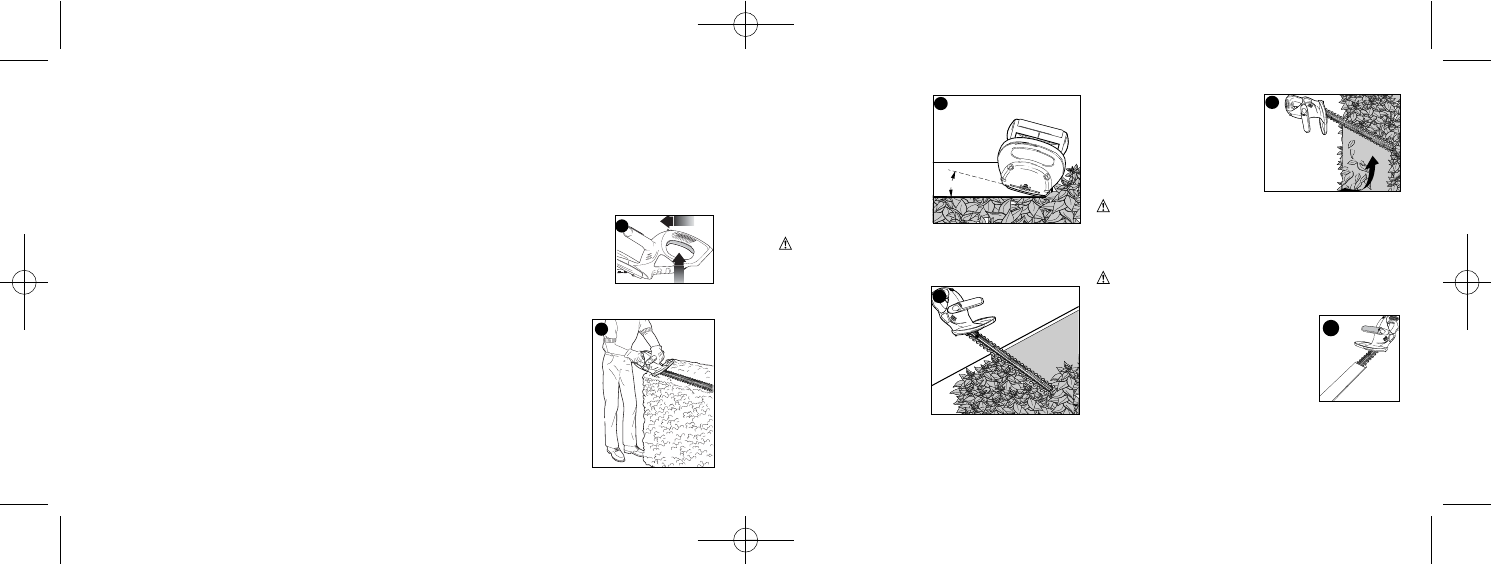
MAINTENANCE
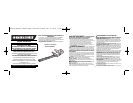
A vinyl sheath is supplied with your trimmer. Slip
the hedge trimmer into it, as shown in figure 9,
The cutting blades are made from high quality,
hardened steel and with normal usage, they will
not require resharpening. However, if you
accidentally hit a wire fence, stones, glass or
other hard objects, you may put a nick in the
blade. There is no need to remove this nick as
long as it does not interfere with the movement of
the blade. If it does interfere, remove the battery and use a fine
toothed file or sharpening stone to remove the nick.
If you drop the trimmer, carefully inspect it for damage. If the blade is
bent, housing cracked, or handles broken or if you see any other
condition that may affect the trimmerʼs operation contact your local
Black & Decker Service Center for repairs before putting it back intouse.
0-15
8
9
6
7
9
8
+40°F(+4.5°C), or above +105°F (+40.5°C). This is important and
will prevent serious damage to the battery pack. Longest life and
best performance can be obtained if battery pack is charged
when air temperature is about 75°F (24°C).
3. While charging, the charger may hum and become warm to
touch. This is a normal condition and does not indicate a
problem.
4. If the battery pack does not charge properly—(1) Check current
at receptacle by plugging in a lamp or other appliance. (2) Check
to see if receptacle is connected to a light switch which turns
power off when you turn out the lights. (3) Move charger and
battery pack to a surrounding air temperature of 40°F (+4.5°C) to
105°F (+40.5°C). (4) If the receptacle and temperature are OK,
and you do not get proper charging, take or send the battery
pack and charger to your local Black & Decker service center.
See Tools Electric in yellow pages.
5. The battery pack should be recharged when it fails to produce
sufficient power on jobs which were easily done previously. DO
NOT CONTINUE using unit with its battery pack in a depleted
condition.
6. The battery pack will reach optimum performance after being
cycled 5 times during normal usage. There is no need to run the
battery pack down completely before recharging. Normal usage
is the best method of discharging and recharging the battery
pack.
STORAGE RECOMMENDATION
1. Store tool:
a.) with the battery pack removed and on the charger.
b.)in a place that is cool and dry away from direct sunlight and excess
heat or cold.
c.) out of the reach of children.
2. For prolonged storage such as over the winter, the battery pack
should be fully charged and then removed from the charger. It
should be charged again just prior to use.
LEAVING THE BATTERY PACK IN THE CHARGER
It is OK to leave battery packs on charge for long periods of time. The
charger has a maintenance mode which gives the battery pack
enough charge to stay “topped off”. If however, the tool is not
expected to be needed for more than 30 days, unplug the charger
and store battery pack in a cool, dry location. NOTE: A battery pack
will lose its charge when kept off of the charger. If the battery pack
has not been kept on maintenance charge, it may need to be
recharged before use. A battery pack may also lose its charge if left in
a charger that is not plugged into an appropriate AC source.
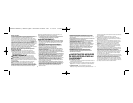
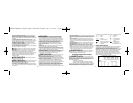
OPERATION
SWITCH
To turn the unit “ON”, slide the lock off button,
shown in figure 4, forward and, squeeze the
trigger switch. Once the unit is running, you
may release the lock off button. In order to
keep the unit running you must continue to
squeeze the trigger. To turn the unit “OFF”,
release the trigger.
TRIMMING INSTRUCTIONS
1. WORKING POSITION – Maintain
proper footing and balance and do
not overreach. Wear safety goggles,
non-skid footwear and rubber gloves
when trimming. Hold the unit firmly in
both hands and turn the unit ON.
Always hold the trimmer, as shown
in the illustrations in this manual,
with one hand on the switch handle
and one hand on the bail handle.
(figure 5) Never hold the unit by the
blade guard.
4
5
90560834 NHT518, NHT524.QXD: chainsaw booklet new 2/12/10 8:08 AM Page 8