Black & Decker CS1015 Chainsaw User Manual


7
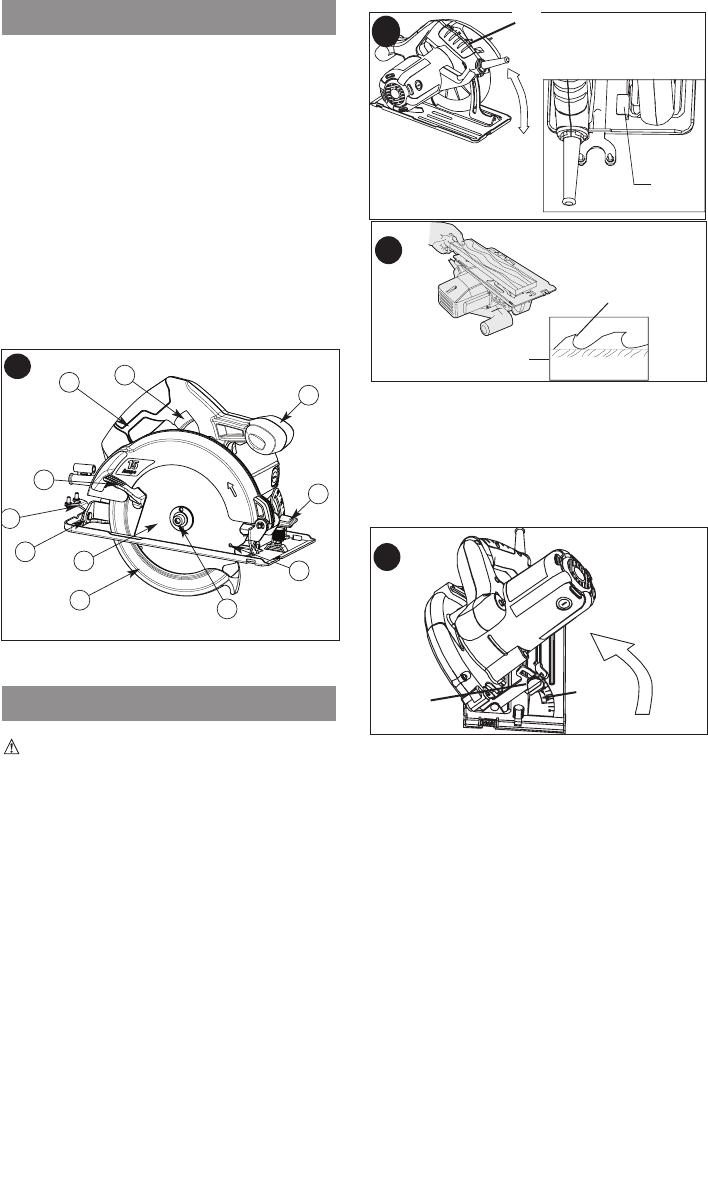
OVERVIEW (FIG. 5)

2. Main handle



6. Saw blade lower guard

8. Saw blade spanner wrench

10. Outer blade clamp washer
11. Blade retaining bolt




ASSEMBLY / ADJUSTMENT SET-P
WARNING: Always unplug saw from
power supply before any of the following
operations.
ADJUSTING THE DEPTH OF CUT (FIG. 6 & 7)
The depth of cut should be set according


shoe.

position. The corresponding depth of


in place.

one tooth of the blade projects below
gure7.
ADJUSTING THE BEVEL ANGLE (FIG. 8)
This tool can be set to bevel angles


the saw shoe.

position. The corresponding bevel


saw shoe in place.
ATTACHING THE BLADE (FIG. 9 & 10)




Loosen and remove the blade





the arrow on the blade points in the
same direction as the arrow on the upper
gaurd of the tool.
with
the larger flat surface against the blade.

into the hole in the spindle.
7
Tip of tooth
Surface of wood
6
12

8

5
1
2
6
8
10
11