


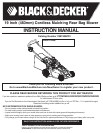

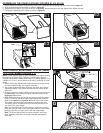
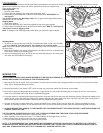
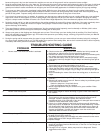
CHARGING PROCEDURE- FIGURES I, J
1
. To charge your mower remove the battery from the mower first.
2. Align the charger plug I-1 with the arrow on top and insert the charger
plug into the receptacle I-2 on the battery pack (blue terminal to blue
terminal, white terminal to white terminal). The charger connector can
only be plugged into the battery one way.
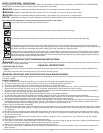
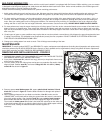
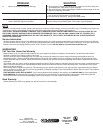
3. There are two charging rates to choose from when charging the bat-
tery. The charger will default to the “normal” or regular charging rate.
NORMAL CHARGING RATE - When in this mode, the red light J-1
on the charger should come on indicating you have power and the bat-
t
ery is being charged. Check the charger for the red light, if it is not on
check the charger connector for proper alignment (step 2). The red
light should extinguish and the green light J-1 will come on when
charging is complete (takes approximately 12 hours to charge a fully
discharged mower).
FAST CHARGING RATE - NOTE: Fast Charge mode is only on if the
fast charge button J-2 is depressed. Use this mode only when neces-
sary to improve task completion.
When in this mode, the red light J-1, will be flashing
on and off indicating that the battery is being charged at a
faster rate. After about 30 minutes the initial fast charge cycle is complete, and approximately 80% of full charge is
available. The light will change to a flashing green light.
After approximately 3 hours of fast charging the battery will be fully charged, and the light will change to a continu-
ous green light indicating a maintenance mode.
4. It is recommended to leave the battery on constant charge (between mowing uses) for optimum performance dur-
ing the mowing season.
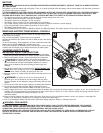
OPERATION
KNOW YOUR MOWER
READ THIS INSTRUCTION MANUAL AND SAFETY RULES BEFORE OPERATING YOUR MOWER. See
“Functional Description” to
familiarize yourself with the location of various controls and adjustments. Save this manual for future reference.
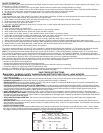
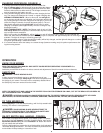
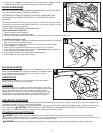
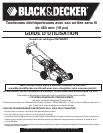
SAFETY KEY
DANGER : SHARP MOVING BLADE.
In order to prevent accidental start-up or unauthorized use of your
Cordless Mower, a removable safety keyK-1 has been incorporated into
the design of your mower. The mower will be completely disabled when
the Safety Key has been removed from the mower.
NOTE: THE SAFETY KEY HAS A HOLE IN THE CENTER TO ALLOW FOR STORAGE ON A NAIL, OUT OF THE REACH OF CHILDREN. DO
NOT TETHER SAFETY KEY TO MOWER.
DANGER: ROTATING BLADES CAN CAUSE SERIOUS INJURY. TO PREVENT SERIOUS INJURY, REMOVE SAFETY KEY WHEN
UNATTENDED, OR WHEN CHARGING, CLEANING, SERVICING, TRANSPORTING, LIFTING, OR STORING MOWER.
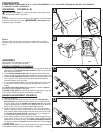
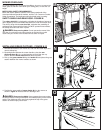
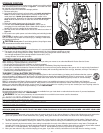
TO TURN MOWER ON
Insert safety key L-1 into the switch housing, until it is fully seated inside
housing. The mower is now operational.
DANGER: SHARP MOVING BLADE. NEVER ATTEMPT TO
OVERRIDE THE OPERATION OF THIS SWITCH AND SAFETY KEY
SYSTEM AS SERIOUS INJURY COULD RESULT.
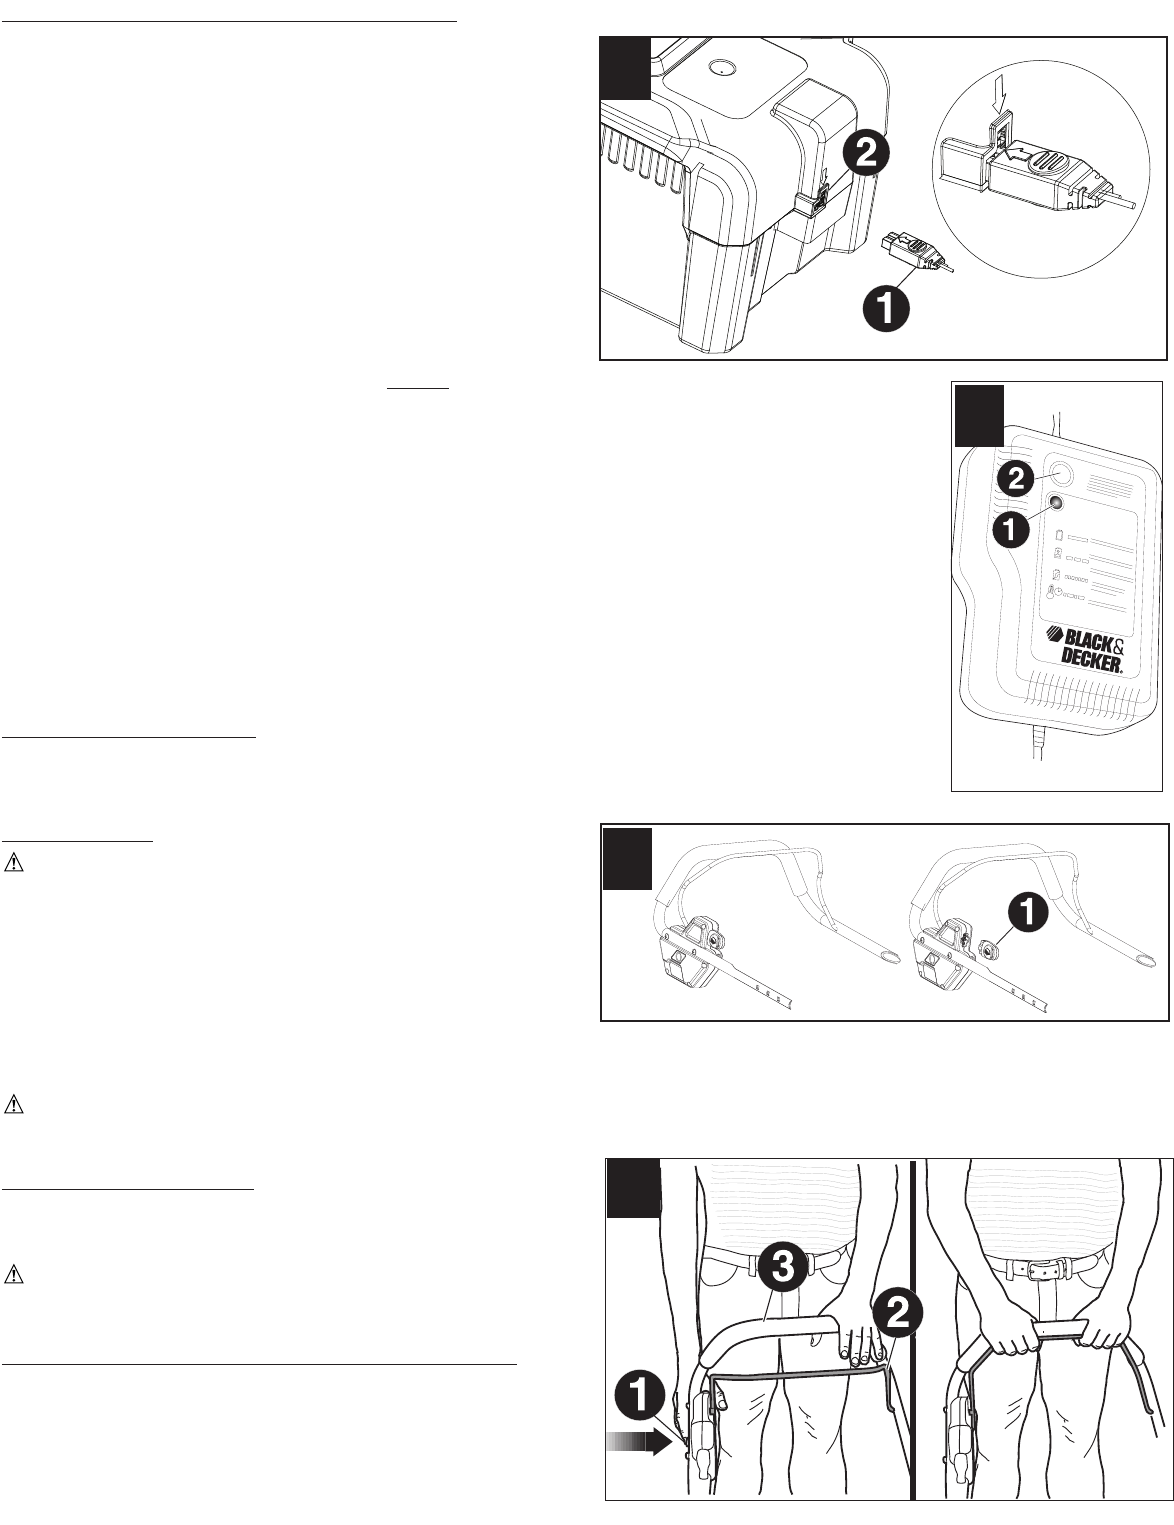
ON-OFF SWITCH (BAIL HANDLE) - FIGURE L
Your mower is equipped with a special on-off switch system. To operate
the system, first push button L-1 on side of switch housing, then pull the
bail handle (switch lever) L-2 to the handlebar L-3. To turn the mower
off, just release the bail handle.
Once the bail handle has returned to the original position it will activate the
“Automatic Braking Mechanism”. The motor is electrically braked and the
mower blade will stop rotating in 3 seconds or less.
88
I
K
J
L