6
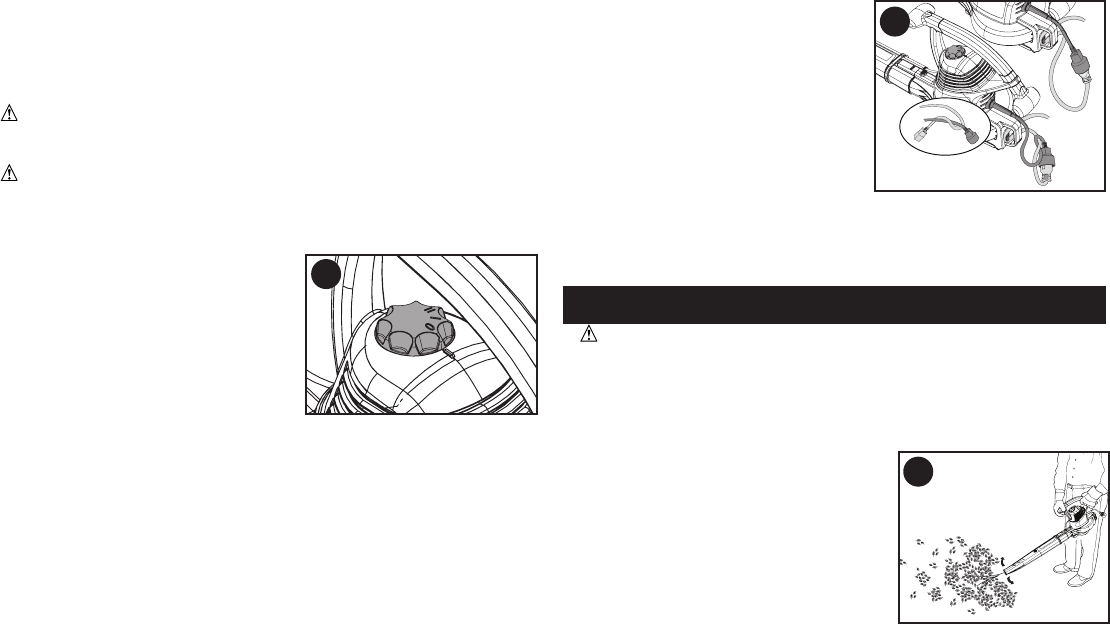
EXTENSION CORD RETAINER (FIGURE F)
A cord retainer is incorporated into the rear of the power head. It
can be used in two different ways:
• To use the cord retainer as shown in
figure F1, insert the extension cord
into the cord retainer housing from
the side. Loop the extension cord
around the retainer so it rests in the
cord retainer. Then plug the cord
from the power head into the
extension cord.
• To use the cord retainer as shown in
figure F2, loop the extension cord
over the power head cord and plug the two ends into each other.
Next, insert the extension cord into the cord retainer housing from
the side. Loop the extension cord around the retainer so it rests in
the cord retainer.
BLOWER OPERATION
CAUTION: Always wear safety glasses. Wear a filter mask if
the operation is dusty. Use of gloves, long pants and substantial
footwear is recommended. Keep long hair and loose clothing away
from openings and moving parts. THIS BLOWER IS FOR
HOUSEHOLD USE ONLY.
NOTE: Ensure the blower is switched off and
disconnected from the power supply before
attaching or removing the blower tubes.
The blower tube must be assembled to the
housing before use.
• Hold the blower with both hands as shown
in figure G and sweep from side to side with
the nozzle several inches above the surface.
Slowly advance keeping the accumulated pile
of debris in front of you.
• The power supply cord has become damaged or entangled.
• You leave blower/vac unattended.
• Clearing a blockage.
• Checking, adjusting, cleaning or working on blower/vac.
Use blower/vac only in daylight or good artificial light.
SWITCHING ON AND OFF (FIGURE E)
WARNING: USE BOTH HANDS TO GRIP THE PRODUCT
FIRMLY WHEN SWITCHING ON.
WARNING:
The tool will continue to run for approximately 5
seconds after it has been switched off. Use both hands to grip the tool
and let the motor come to a complete stop before setting the tool down.
Your blower vac is fitted with a two
speed switch located on the top of
the power head below the handle.
• To use in low speed, rotate on/off
switch (2)
clockwise to Position
“I”
.
To use in high speed, rotate on/off
switch (2)
clockwise to Position
“Il”
.
• To turn tool OFF, rotate on/off
switch
(2)
counterclockwise to the off
position
“0”
.
E
F2
F1
F
G


