


Part No. 510153 Form No. F102802D
Page 9 of 12
Drive Belt
Tools required: 3/8 inch socket, 1/2 inch socket, 3/8" torque
wrench.
1. Follow steps 1 through 5 above to remove the blade drive belt.
2. Set the unit on its side to allow access to both pulley and
the blade.
Note: When tipping the unit on its side, keep the air cleaner
side of engine up. Be sure the gas is drained out to prevent from
spilling before tipping the unit on its side. Never tip the mower
more than 90 degrees and do not leave the mower tipped for
any length of time.
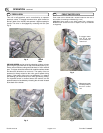
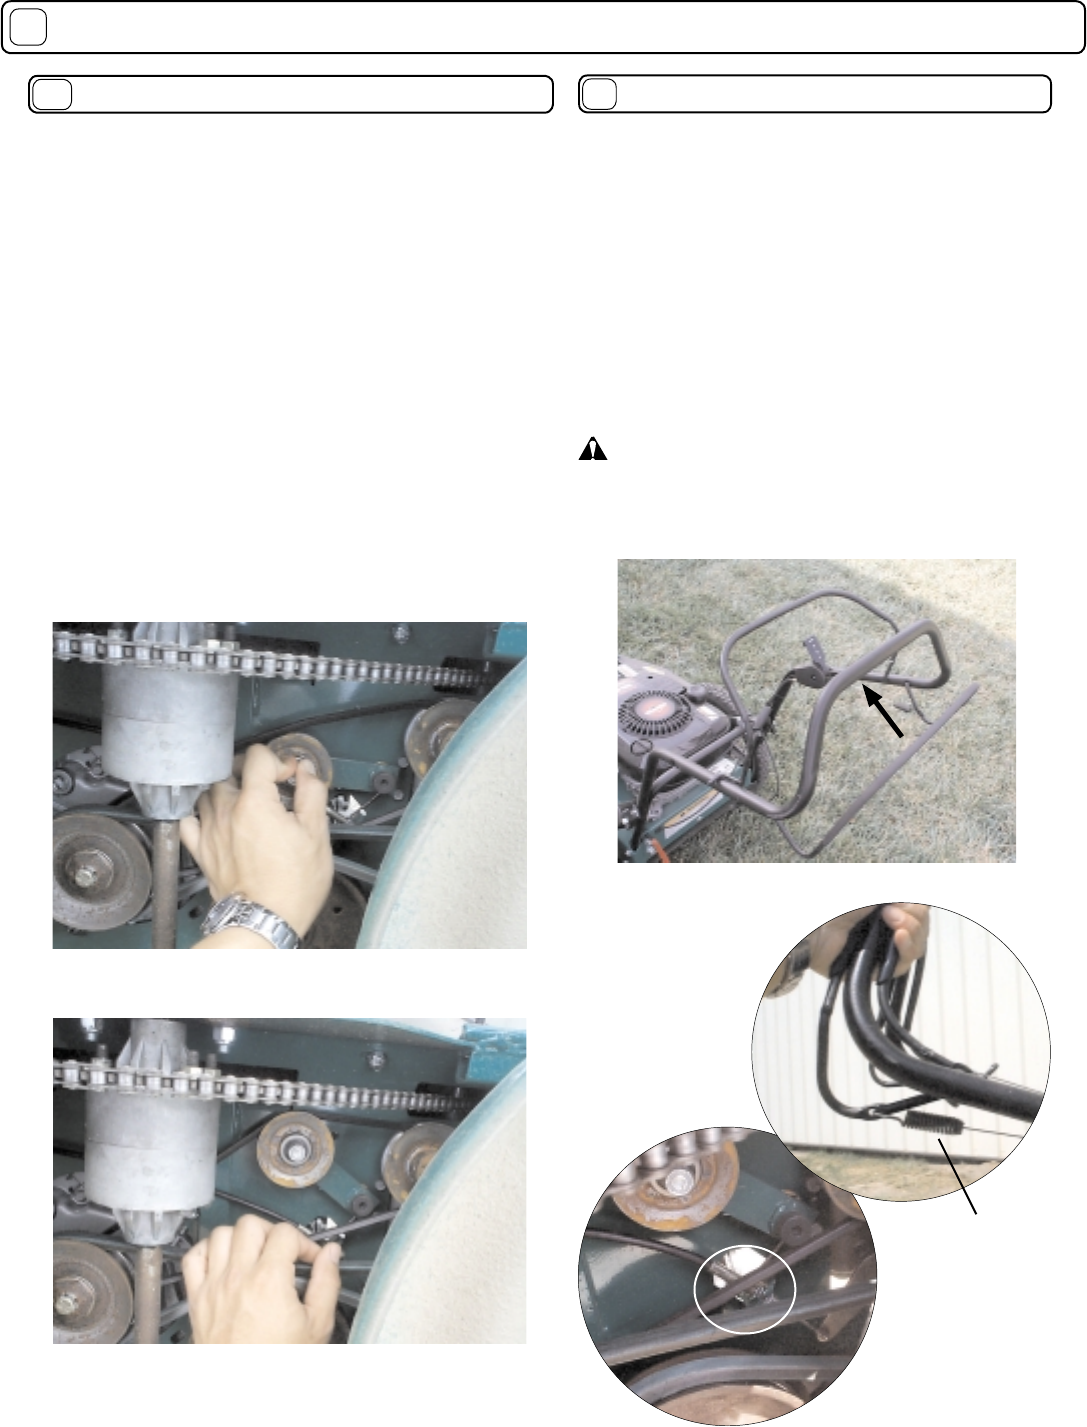
3. Swing over the drive belt idler to release tension on drive belt
then remove it (fi g. 9).
4. Install the new belt (fi g. 10).
Note: Use only O.E.M. approved belt for this machine - B.G.I. Part
no. 510138.
5. Set the unit back down.
6. Follow steps 6 through 8 on previous section to reinstall the
blade belt.
MAINTENANCE continued
17
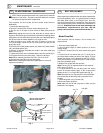
SELF PROPELLED DRIVE ADJUSTMENT
17.3
Tools required: two 1/2 wrenches.
As the clutch wears, adjustments may be required to maintain
proper control cable tension, and clutch engagement (fi g.
11). If the clutch begins slipping or squealing during normal
operation it may require an adjustment to increase the
clutch cable tension. A properly adjusted drive clutch should
require a minimum of 3/8" of spring stretch when drive bail is
engaged.(fig. 12) Adjust by tightening or by loosening
clutch cable adjusting nut as required, located at the
underneath the engine base (fig. 13). Replacement of
cable may be necessary if adjustment will not allow for
proper drive clutch.
WARNING: If the drive clutch begins to squeal or slip,
do not continue to operate your unit until adequate
adjustment or repair has been performed. Improper adjust-
ment can cause drive clutch to slip and overheat, greatly
reducing machine performance and transmission life.
BELT REPLACEMENT continued
17.2
Fig. 9
Fig. 10
Fig. 11
Fig. 13
Fig. 12
3/8" stretch
when engaged