


Part No. 360178 Form No. F012302A
Page 10 of 12
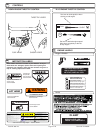
TINE ROW KIT 360197
TINE KIT 360100
Use only a qualified mechanic for
any adjustments, disassembly or
any kind of repair .
DISCONNECT SPARK PLUG WIRE
BEFORE SERVICING UNIT.
WARNING: TO AVOID PERSONAL INJURY, ALWAYS
TURN MACHINE OFF, MAKE SURE ALL MOVING
PARTS COME TO A COMPLETE STOP.
REPLACE ALL GUARDS, BEFORE
STARTING ENGINE.
ENGINE: See engine manufacturer's
service instructions.
USE ONLY BILLY GOAT ORIGINAL
EQUIPMENT PARTS FOR
REPLACEMENT AND REPAIR
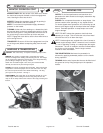
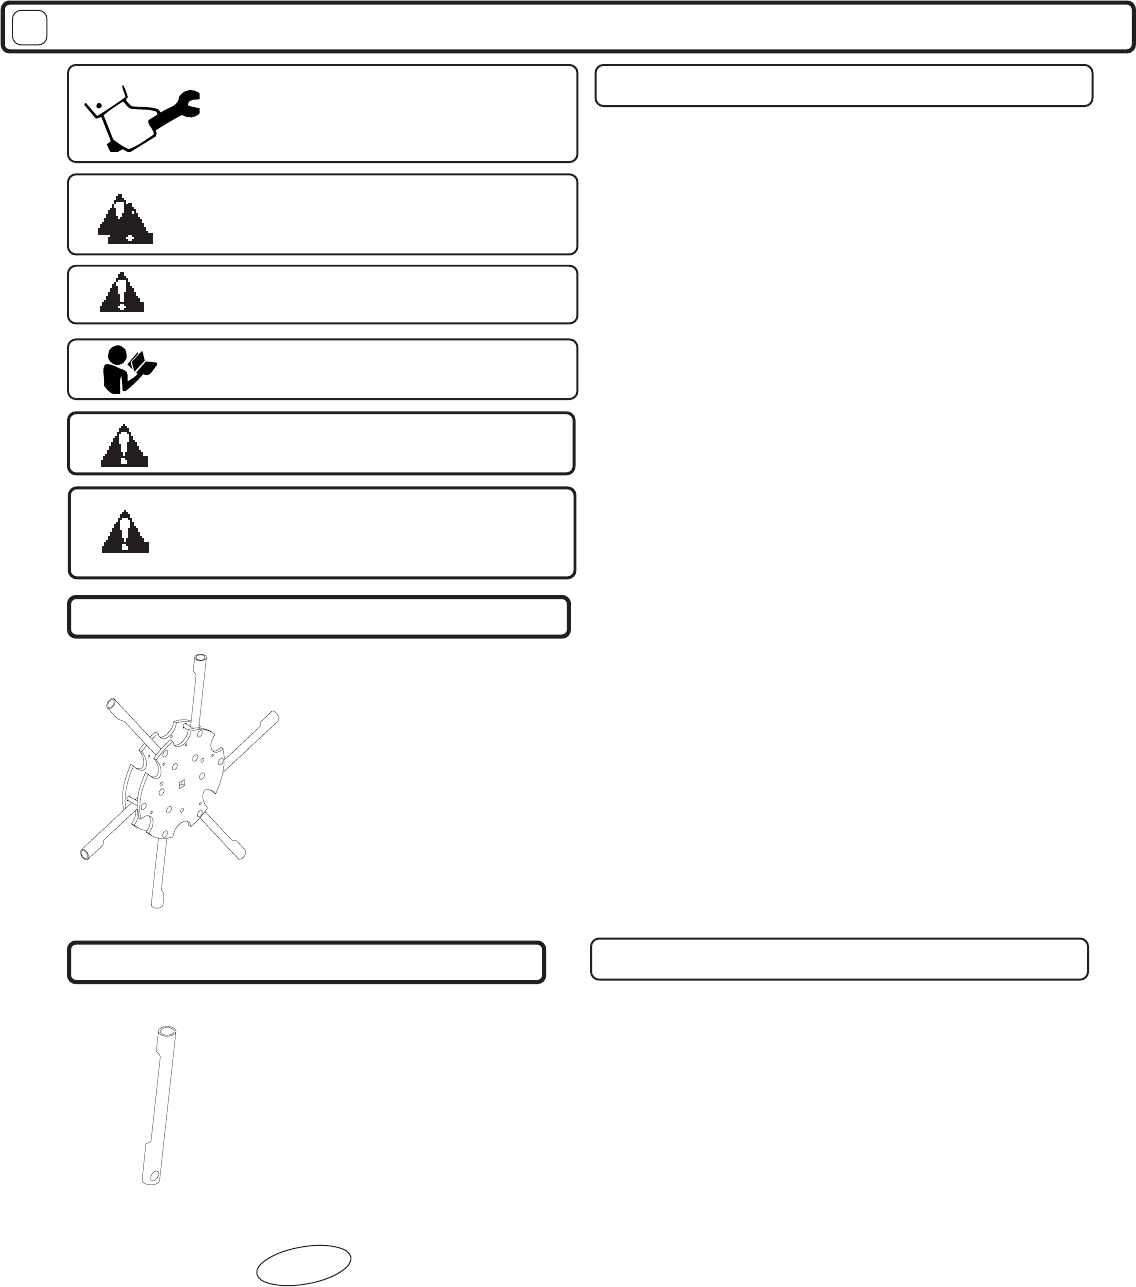
TINE REEL REMOVAL
NOTE: Tine reel removal is only necessary to replace an entire
tine row or for other major unit maintenance. Individual tines
can be replaced by following the TINE REPLACEMENT instruc-
tions.
1. Wait for engine to cool and disconnect spark plug.
2. Remove the top guard by removing the four screws, two on each
side, that secure it to the frame.
3. Release the tension on the chain. See CHAIN TENSION ADJUST-
MENT in this manual.
4. Remove the four bolts and nuts, two on each side, holding the tine
reel bearings in place. BE CAREFUL the tine reel is heavy and
sharp. Take precautions to not allow it to fall when the bearing bolts
are removed.
5. Lift the reel up and to the side to remove it from the drive chain.
6. See TINE ROW REPLACEMENT for instructions on maintenance.
7. To reinstall the reel follow the above steps in reverse.
8. Replace the guard and reinstall the four screws that secure it in
place.
TINE REEL REMOVAL AND TINE ROW REPLACEMENT
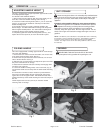
TINE ROW REPLACEMENT
1. Wait for engine to cool and disconnect spark plug.
2. Remove the top guard by removing the four screws, two on each
side, that secure it to the frame.
3. Remove the tine reel per the TINE REEL REMOVAL instructions.
4. Remove the nut at the end of the tine reel shaft that secures the
tine rows in place.
5. Remove the tine rows and spacers as necessary to replace the
defective part. Be sure to note the order in which the spacers were
removed for later reassembly.
6. Reassemble the tine reel in the exact order that it was disas-
sembled.
7. Tighten the nut that secures the tine rows and spacers on the
shaft. Torque the nut to a minimum of 60 ft.lbs. Check that all of the
tine rows are tight by attempting to move them by hand.
8. Reinstall the tine reel per the TINE REEL REMOVAL instructions
above.
9. Re set the tension on the chain.
10. Replace the guard and reinstall the four screws that secure it in
place.
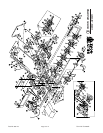
MAINTENANCE
1717
1717
17
Individual coring tine for
replacement of worn or
broken tines.
Complete tine row set for
replacement of one
complete row of tines.
Includes mounting
plates, spacer, and all
hardware.
1. Wait for engine to cool and disconnect spark plug.
2. Loosen but do not remove the outermost nut and carraige bolt that
secure the damaged or worn tine.
3. Loosen and remove the innermost nut and carraige bolt that hold
the tine in the reel.
4. Use a small prybar and push the tine plates apart slightly to slide
out the tine to be replaced.
5. Slide the new tine in place and secure with the innermost nut and
carraige bolt. Tighten completely.
6. Retighten the outermost nut and carraige bolt to completely secure
the new tine.
7. Repeat as required to replace all damaged or worn tines.
NOTE: Tines are a normal wear item and should be inspected
regularly for signs of wear or damage.
REPLACING INDIVIDUAL TINES
T
i
p
!
!
!
Spraying tines with a rust preventing lubricant can
increase tine life and allow for easier replacement of worn
or damaged tines.