


Section 5
Troubleshooting and Maintenance
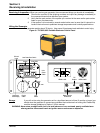
Troubleshooting and Maintenance 5-1MN2403
WARNING: Before cleaning, inspecting, repairing, refueling or performing any maintenance to the generator
set, always be sure the engine has stopped and that all rotating parts have also stopped. After
stopping, certain components are still extremely hot so be careful not to get burned.
WARNING: Before servicing the generator set, be sure to disconnect the spark plug wires to prevent
accidental engine rotation or starting.
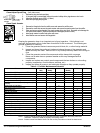
Maintenance
The following are general maintenance recommendations. The engine must be stopped and all
electrical load devices removed from the generator plugs or terminals before any maintenance is
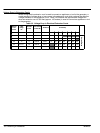
performed. The Maintenance Schedule is given in Table 5-1.
General Checks 1. Inspect the fuel system for leaks. Replace defective components immediately.
2. Inspect and replace any fuel line that shows signs of deterioration.
3. Inspect all fuel clamps to ensure they are tight and no leaks exist.
4. Make sure the fuel cap fits snugly on the fuel tank and that the fuel tank does not leak.
5. Inspect the condition of AC and DC terminals for damage and replace if damaged.
6. Test all GFCI (Ground Fault Circuit Interrupter) receptacles daily by pressing the test
button on the receptacle during operation. Ensure that the GFCI trips and and no
voltage is present at the receptacle. Replace any GFCI receptacle that fails the test.
7. Inspect the external wire cables (extension cords) and connectors used with the
generator set for cuts, frayed insulation, or loose connections. Repair or replace any
problems prior to using the unit.
8. Inspect bolts and nuts for tightness. Vibration can cause nuts or bolts to loosen.
9. Inspect the recoil starting rope for any damage and replace it if necessary.
WARNING: Do not smoke near generator during operation or while refueling. Gasoline and diesel fuel are
flammable and can cause fire, explosions, injury or death. Keep open flames away from unit.
WARNING: Stop engine and allow engine to cool before refueling. Gasoline and diesel fuel are flammable
and can cause fire, explosions, injury or death.
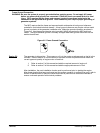
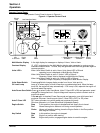
Check Fuel Level
1. Remove fuel filler cap.
2. Fuel level should be at or below the Red" marking at inlet portion of filler neck.
3. If fuel level is low, add unleaded automotive gasoline to just below the Red" marking.
Fuel tank capacity is: PC32Ri 2.8 gallons (10.8 liters); PC43Ri 3.3 gallons (12.8 liters).
4. Install the fuel filler cap. Wipe up any fuel spill.
Red" marking
Check Oil Level (SE or higher grade) SAE 10W−30 or SAE 10W−40 (Left side cover)
1. Remove oil filler cap and check the oil for contaminants (moisture or excessive dirt).
2. Change the oil if contaminated.
3. Clean the dip stick and fully insert it into oil and remove to check the oil level. Do not screw the filler cap in
when checking the oil level.
4. If oil is below lower level on dip stick, add oil to bring oil to the upper level. Check for oil leaks.
5. Install and tighten the oil filler cap.
Upper Level
Lower Level
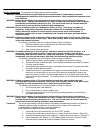
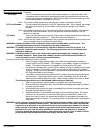
Change Engine Oil (SE or higher grade) SAE 10W−30 or SAE 10W−40 (Left side cover)
1. If the engine is cold, start the engine and let it run for 1 minute. This will warm the oil to make it easier to
drain. If engine is hot, allow it to cool. Hot engine oil can cause severe burns. Always wear protective
clothing and eye protection when working on engine.
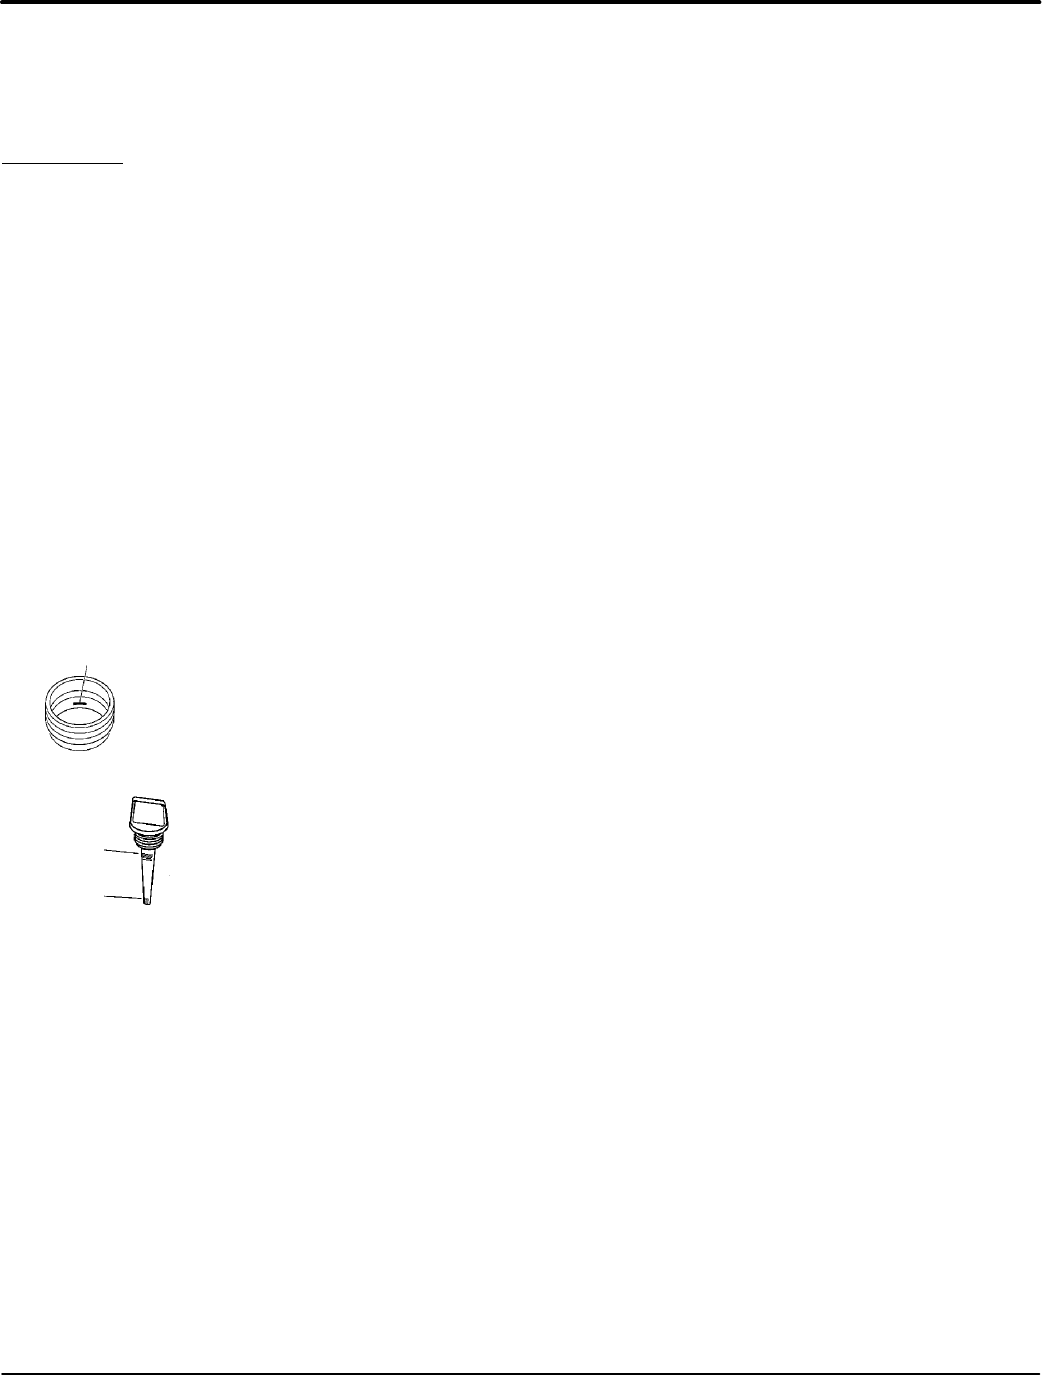
2. Drain oil by removing the drain plug and catch the used oil in a pan or tray. Remove the oil filler cap to let
oil flow out quicker. The generator is shown raised using lumber so the pan can slide under.
3. When oil is drained, install and tighten the drain plug.
4. Fill the crankcase with clean oil until the oil level reaches the upper level on the filler cap.
Oil capacity is: PC32Ri 0.63 quart (0.6 liters); PC43Ri 1.0 quart (1.0 liters).
5. Check for oil leaks.
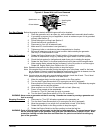
Check Air Cleaner (Left side cover)
1. Unhook the air filter cover and remove the elements.
2. Clean the paper element by gently tapping the element to remove dirt and contaminants. Blow off dust
and remaining dirt from the element. Replace the element if torn or extremely dirty. Replace every 200
hours or once each year.
3. Wash the urethane element with fresh water. Squeeze (do not twist) the water out and let air dry.
4. Install the elements and hook the cover.