


EN - 23
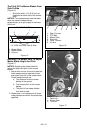
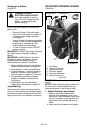
Charging the Battery
(Figure 19)
Follow First Aid directions for contact with
battery fluid.
• External Contact: Flush with water.
• Eyes: Flush with water for at least 15
minutes and get medical attention
immediately!
• Internal Contact: Drink large quantities
of water. Follow with Milk of Magnesia,
beaten egg or vegetable oil. Get
medical attention immediately!
• In case of internal contact, DO NOT
induce vomiting!
IMPORTANT: DO NOT fast charge. Charging
at a higher rate will damage or destroy
battery.
IMPORTANT: ALWAYS follow information
provided on battery and battery charger.
Contact battery and battery charger
manufacturers for detailed instructions.
1. Remove battery from unit (see Battery
Removal and Installation on page 22).
2. Place battery in a well-ventilated area.
3. Connect positive (+) lead of charger to
positive (+) terminal, and negative (–)
lead of charger to negative (–) terminal.
4. Charge battery according to battery
charger and battery manufacturers’
instructions.
5. Install battery on unit (see Battery
Removal and Installation on page 22).
Jump-Starting
Ariens does not recommend jump-starting
your unit. Jump-starting can damage engine
and electrical system components. See your
engine manual for more detailed information.
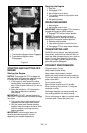
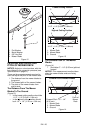
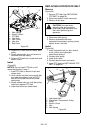
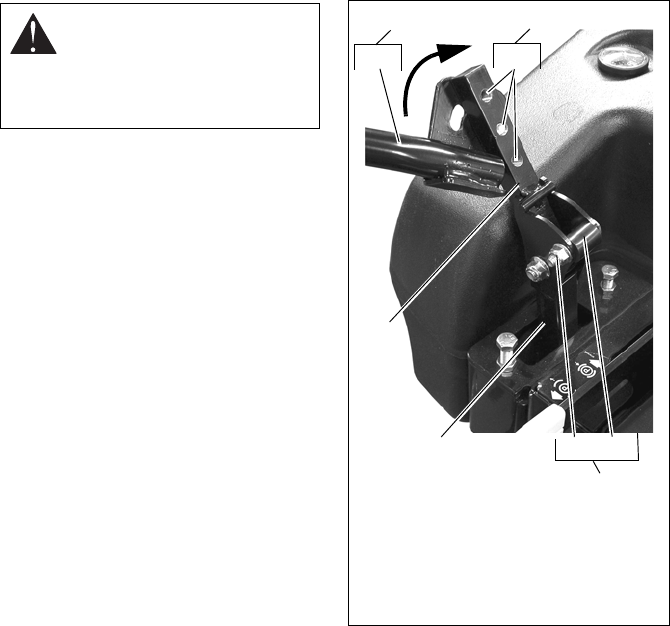
ADJUSTING STEERING LEVERS
(Figure 20)
IMPORTANT: Adjust each steering lever
equally.
NOTICE: When adjusting steering levers for
the first time it is recommended that you
make adjustments in the following order.
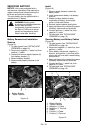
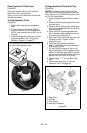
1. Adjust Steering Lever Height
1. Remove mounting hardware that
attaches the handlebars to the upper
control arm. Move handlebar up or down
until the handlebar mounting holes are
aligned with the prefered adjustment
holes.
2. Install mounting hardware and tighten.
WARNING: FROZEN
BATTERIES CAN EXPLODE
and result in death or serious
injury. DO NOT charge a frozen
battery. Let the battery thaw
before charging.
Figure 20
2
3
1
1. Handlebar
2. Upper Control Arm
3. Adjustment Holes
4. Eccentric Spacer
5. Mounting Hardware
6. Lower Control Arm
5
Adjustment 2
Adjustment 1
Adjustment 3
4
6