


EN - 22
SERVICING BATTERY
NOTICE: Unit comes equipped with a
maintenance-free battery that requires no
regular maintenance except cleaning the
terminals and periodic charging.
This style battery can be replaced with a
standard size U1 battery.
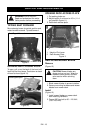
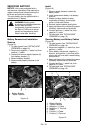
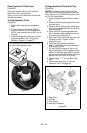
Battery Removal and Installation
Remove
(Figure 18)
1. Tip seat forward (see TIPPING SEAT
FORWARD on page 19).
2. Disconnect negative (–) cable first, then
positive (+) cable.
3. Loosen and remove taptite fastener (2)
from battery bracket (1).
4. Remove battery bracket.
5. Remove and properly dispose of old
battery.
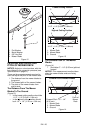
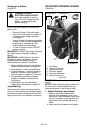
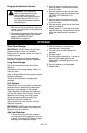
Install
(Figure 19)
1. Remove taptite fastener located by
battery decal.
2. Install replacement battery into battery
channel.
3. Rotate and align battery bracket
lengthwise to battery, ensuring tab
corner is flush with battery.
4. Reinstall taptite fastener and tighten.
5. Apply petroleum jelly or dielectric grease
to battery cable ends and terminals.
6. Connect positive (+) cable first, then
negative (–) cable.
7. Tip seat back (see TIPPING SEAT
FORWARD on page 19).
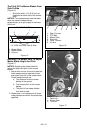
Cleaning Battery and Battery Cables
(Figure 19)
1. Tip seat forward (see TIPPING SEAT
FORWARD on page 19).
2. Disconnect negative (–) cable first, then
positive (+) cable.
3. Clean battery cable ends, negative (–)
terminal, and positive (+) terminal with a
wire brush and rinse with a weak baking
soda solution.
4. Apply petroleum jelly or dielectric grease
to battery cable ends and terminals.
5. Connect positive (+) cable first, then
negative (–) cable.
6. Tip seat back (see TIPPING SEAT
FORWARD on page 19).
WARNING: Battery posts,
terminals and related accessories
contain lead and lead
compounds, chemicals known to
the State of California to cause
cancer and reproductive harm.
Wash hands after handling.
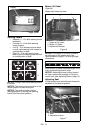
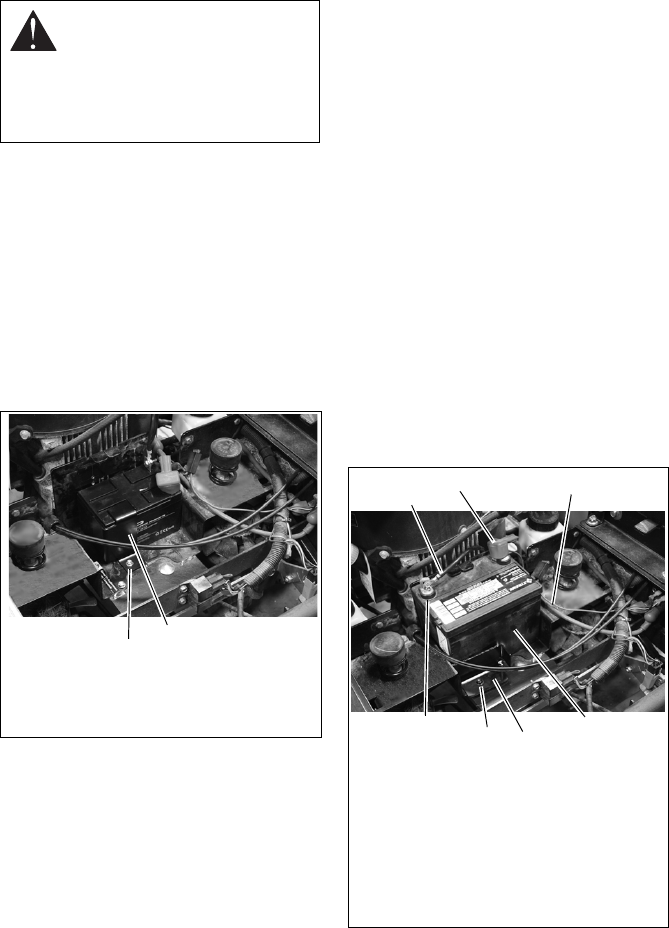
Figure 18
1. Battery Bracket
2. Taptite Fastener
1
2
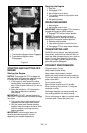
Figure 19
1. Battery Bracket
2. Taptite Fastener
3. Negative (–) Cable
4. Negative (–) Terminal
5. Battery
6. Positive (+) Cable
7. Positive (+) Terminal
1
6
3
5
7
4
2