


Page 3
SQUARE UP THE ARBOR
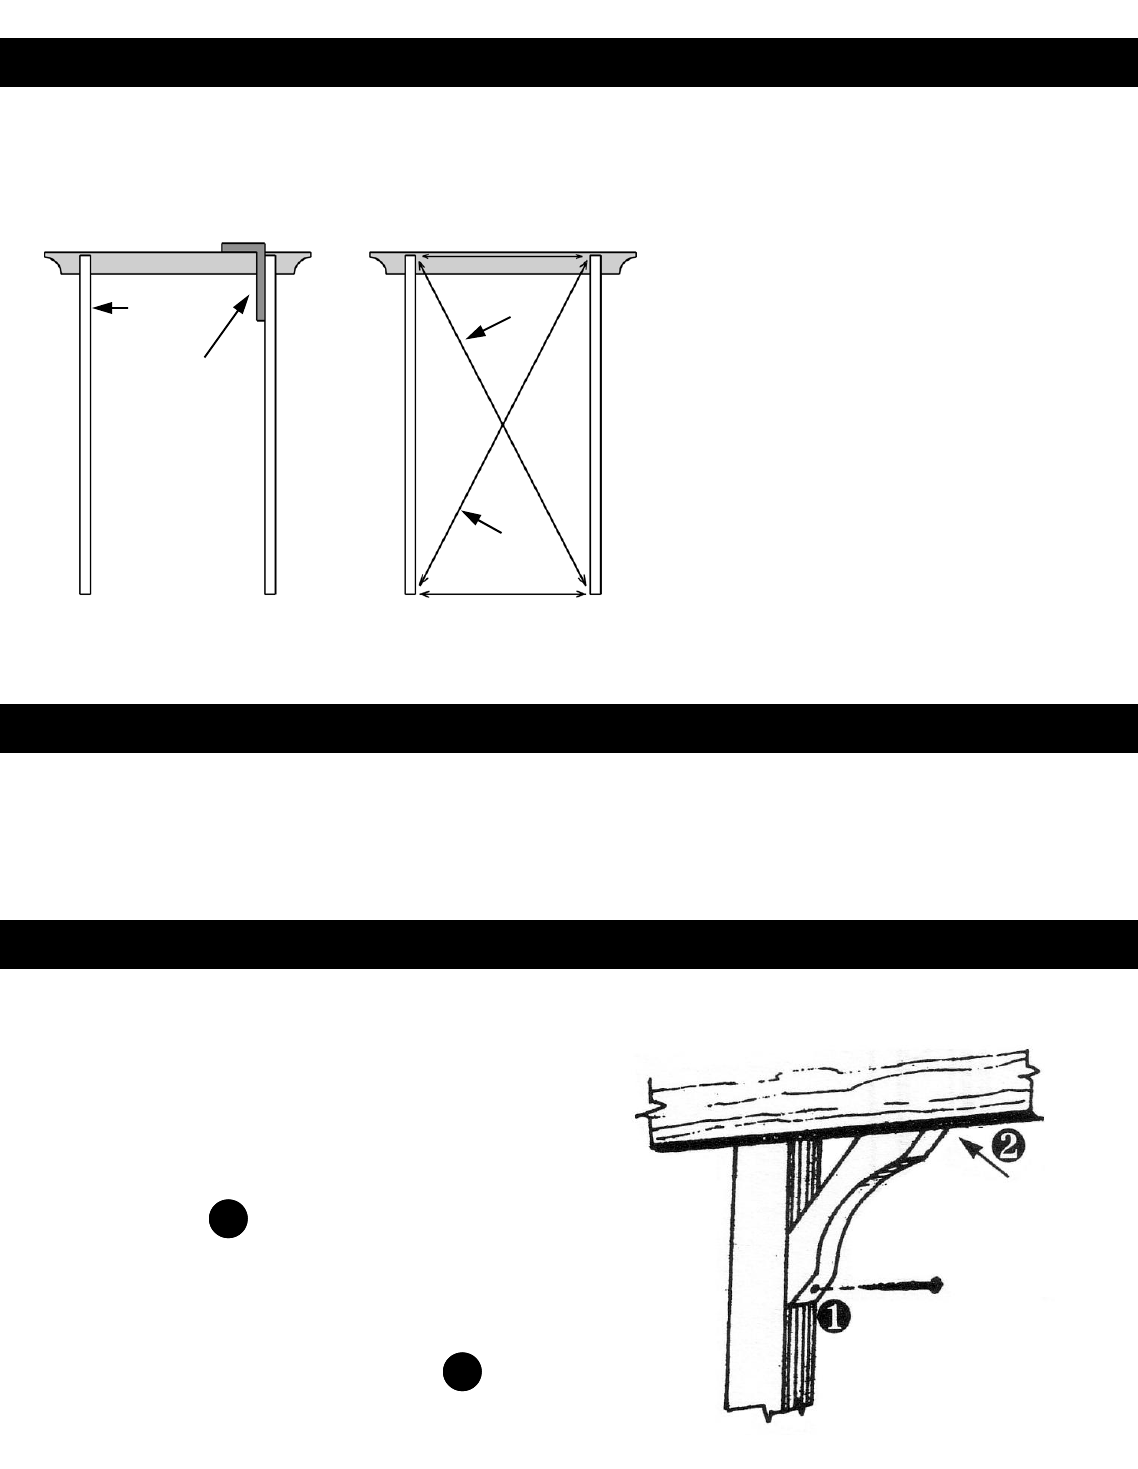
ATTACH THE BRACES TO THE HEADERS AND PANELS
Carefully tip your assembled arbor to the upright position and check
that the side panels are vertical and parallel.
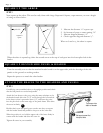
Attach the four braces to the post, using the same technique as for
the header boards: drive the 2 1/2” screw through the bottom hole
in the brace so that it protrudes about 1/2”, and insert the point
into the pilot hole on the inner edge of the panel frame. Then drive
the screw in firmly.
Double-check your side panel posts to make sure they are square
with the header board and parallel to the post on the other side.
When the position is set, hold the upper end of the brace firmly in
contact with the header and drive the screw in.
Tighten all screws in your assembly.
STEP 4
STEP 3
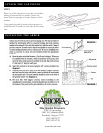
Now square up the arbor. This can be easily done with a large Carpenter’s Square, a tape measure, or even a length
of string as shown below.
SQUARE UP SECOND SIDE PANEL & HEADER
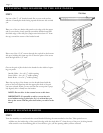
When the arbor is squared up, drive the second screw at the top of each post into the lower pilot hole in the
header.
Set post screw first
into pilot hole
Top screw into
back of header
Turn the assembly over so that the attached header board is on the upper side, with the free edge of the side
panels on the ground or working surface.
Repeat the process to attach the other header.
1. Measure the distance “a” at post tops.
2. Set bottom of posts to same spacing “b”.
3. Measure diagonal distance “x”.
4. Check opposite diagonal distance “y”.
When a=b and x=y, the arbor is square.
pilot hole
carpenter’s
square
“x”
“y”
“a”
“b”
1
2