5
Preparation EN
Safety devices
Locking device on spray gun:
The spray gun features a locking device (9a). When
the pawl is activated, the spray gun cannot be ope-
rated.
Thermal sensor:
A thermal sensor protects the motor against over-
loading. The machine will restart after a few minutes
when the thermal sensor has cooled.
Operating Instructions EN
2.0 Operating Instructions
Højtryk
Lavtryk
2.1 Operating facilities
ON/OFF switch (1).
Spray gun (9) with lock (9A).
2.2 Connection
1. Unwind the high pressure hose and the electrical
cable (5) completely.
NOTE: Only use one extension hose of max. 7 m.
IMPORTANT! To ensure that the unwinding and
winding up of the high pressure hose and the
electrical cable is only done when the machine
is relieved of pressure, only tend the hose and
cable winder when the spray gun is detached and
the cable is unplugged.
2. Check that the fi lter is mounted in the water inlet
pipe (2) and that it is not clocked up.
The inlet fi lter must always be fi tted in the water
inlet pipe to fi lter out sand, limestone and other
impurities, as they will damage the pump valves.
CAUTION: Failure to fi t the fi lter will invalidate the
guarantee.
3. Screw the water inlet connector (2) onto the
water inlet pipe.
4. Make sure that the spray gun is locked in the Off
position by activating the pawl (9a).
5. Press the nipple of the high pressure hose (5)
into the spray gun (9).
6. Mount the nozzle or any other equipment you
want to use.
Note: When attaching to the snap connector, the
pawl on the side of the connector should come
out again. Press the pawl to detach the equip-
ment.
7. Connect the machine to the water and power
supplies.
The pressure washer is now ready for operation.
2.3 Start
1. Check that the machine is in horizontal position.
NOTE: Do not place the machine in high grass!
2. Release the trigger lock (9a).
3. Activate the trigger of the spray gun (9b) and let
the water run until all air has escaped from hoses
and pump.
4. Press the On/Off switch "I" (1).
2.4 Operation
1. The spray lance is affected by a thrust
during operation - therefore always hold
it fi rmly with both hands. IMPORTANT:
Point the nozzle at the ground.
2. Activate the trigger (9b) of the spray gun (9).
3. Always adjust the distance and thus the pres-
sure of the nozzle to the surface, which is to be
cleaned.
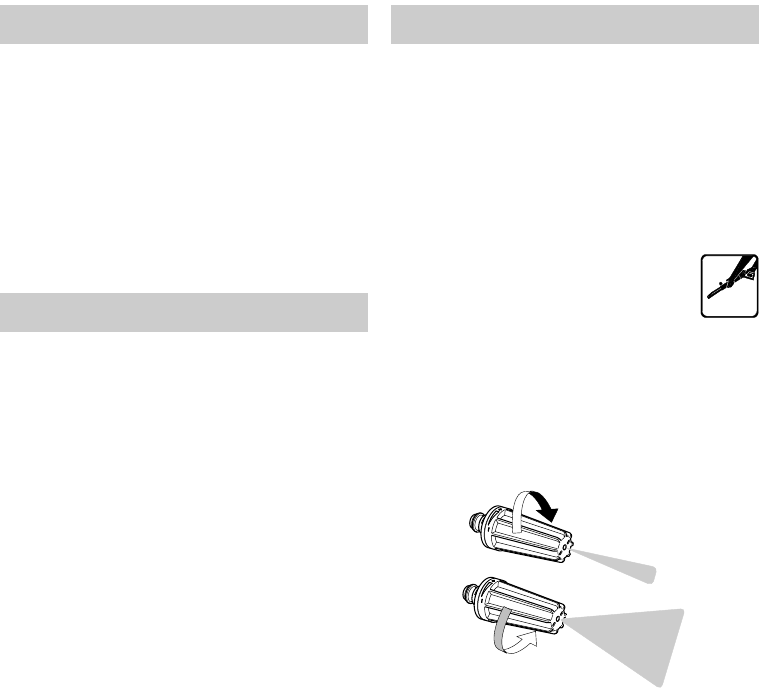
NOTE: The pressure can be adjusted at the TOR-
NADO
®
PR nozzle (7A).
NOTE: Do not cover the machine during operation.
If the machine is left or not used for 5 minutes, it
must be switched off on the start/stop switch (Press
the On/Off switch "O".
2.5 End of operation
1. Press the On/Off switch “O” (1).
2. Disconnect the electrical plug from the socket.
3. Shut off the water supply and activate the trigger
(9b) to relieve the machine of pressure.
4. Detach the spray gun (9).
5. Wind up the hose and the cable (5) leading them
from the left to the right and back again in order
to wind them up in an even layer.
Concerning storage, please refer to section 5.0.
High pressure
Low pressure


