


www.airkinglimited.com
111597006 Rev. A 9-07
2 of 12
INSTALLATION INSTRUCTIONS
CAUTION:
MAKE SURE POWER IS SWITCHED OFF AT SERVICE
PANEL BEFORE STARTING INSTALLATION.
WARNING: THIS BLOWER IS INTENDED FOR USE ONLY IN AIR
KING PROFESSIONAL SERIES RANGE HOOD CANOPIES MARKED
SUITABLE FOR USE WITH THIS BLOWER. DO NOT TO INSTALL IN ANY
OTHER APPLICATION.
SECTION 1
Preparing for installation
NOTE: Before installing blower, make sure range hood canopy is properly
installed and securely in place. See “Range Hood Mounting Instructions”.
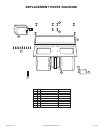
1. Unpack blower from the carton and confirm that all pieces are
present. In addition to the blower you should have:
10 - 8-32 Screws
8 - Washers
1 - Capacitor Cover
2 - #6 Screws
1 - Transformer
1 - Fuse
1 -Instruction/Safety Sheet
2. The installation of the blower is slightly different from one canopy
height to another. For 18" high canopies proceed to Section 2, for
10" high canopies proceed to Section 3.
SECTION 2
Installation into 18" High Canopy
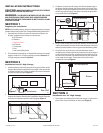
1. Install transformer into hood canopy by lining up the 2 holes on the
flange of the transformer with the 2 screw studs in the top left side
of the hood canopy. Use 2 of the included 8-32 screws to make the
connection and fully tighten (Figure 1).
2. Attach the capacitor to the blower by lining up the two holes on the
flange of the capacitor with the holes on the blower. Use the 2 included
#6 screws to make the connection and fully tighten (Figure 2).
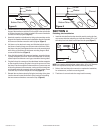
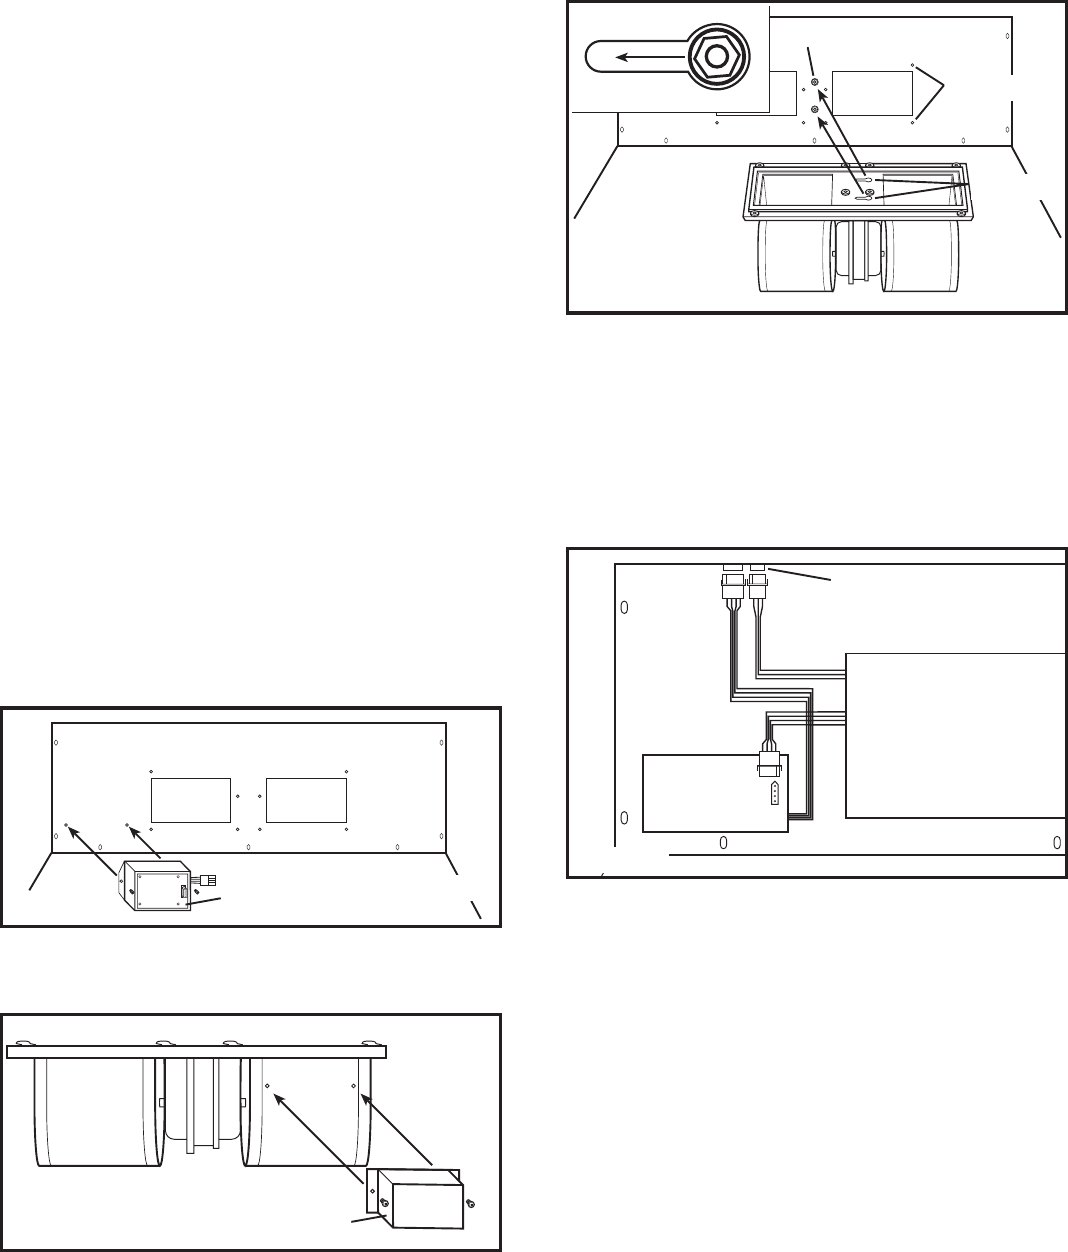
3. Lift blower up into the hood canopy and slide the keyhole slots in
the blower mounting flange over the two studs of the hood. Slide
the blower into place and tighten the hex nuts on the mounting stud
while lining up the 8 holes in the blower mounting flange to the 8
screw studs of the hood (Figure 3).
4. Using 8 of the included 8-32 screws and washers, mount the blower
in place and tighten all screws. Confirm that the blower is securely
seated in place and there are no air gaps around the blower gasket.
5. Plug the 3 wire quick connect cord from the blower into the
receptacle on the range hood canopy. Plug the 4 wire quick connect
cord from the blower into the receptacle on the transformer. Plug
the 4 wire quick connect from the transformer into the receptacle
on the range hood canopy. These cords will only fit into the
receptacles one way (Figure 4).
SECTION 3
Installation into 10" High Canopy
1. Remove the rear bottom plate of the hood canopy. It is secured in
place with a screw and washer on either side (Figure 5).
Figure 1
Figure 2
Figure 3
Keyholes
Stud w/Hex Nuts
Screw Stud
Transformer
Rear Wall
Capacitor
Receptacles
Figure 4
Blower
Transformer