


2
RULES FOR SAFE OPERATION
Any power equipment can cause injury if operated improperly or if the user does not understand how to operate
the equipment. Exercise caution at all times when operating equipment.
LOOK FOR THIS SYMBOL TO POINT OUT IMPORTANT SAFETY PRECAUTIONS. IT
MEANS — ATTENTION! BECOME ALERT! YOUR SAFETY IS INVOLVED.
Read the towing vehicle owners manual and towing •
vehicle safety rules. Know how to operate your tractor
before using the broadcast spreader attachment.
Read the chemical label instructions and cautions for •
handling and applying the chemicals purchased for
spreading.
Wear eye and hand protection when handling and •
when applying lawn or garden chemicals.
Never operate tractor and spreader attachment •
without wearing substantial footwear, and do not allow
anyone to ride or sit on spreader attachment frame.
Never allow children to operate the tractor or spreader •
attachment, and do not allow adults to operate
without proper instructions.
Always begin with the transmission in rst (low) gear •
and with the engine at low speed, and gradually
increase speed as conditions permit. Maximum
towing speed - 6 M.P.H.
When towing broadcast spreader do not drive too •
close to a creek or ditch and be alert for holes and
other hazards which could cause you to loose control
of the broadcast spreader and tractor.
Before operating vehicle on any grade (hill) refer •
to the safety rules in the vehicle owner's manual
concerning safe operation on slopes. Stay off steep
slopes!
Follow maintenance and lubrication instructions as •
outlined in this manual.
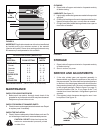
ASSEMBLY INSTRUCTIONS
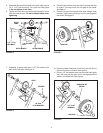
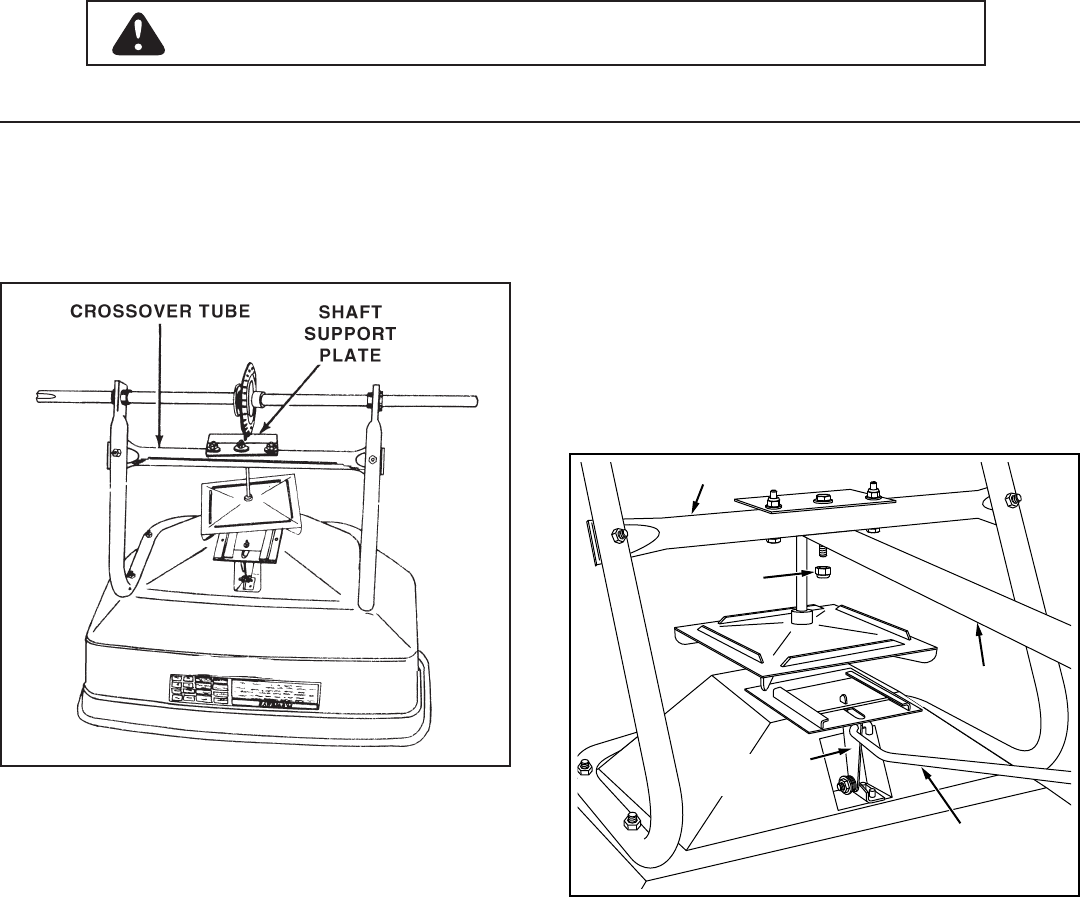
Turn the spreader upside down as shown in gure 1, 1.
so that it rests on the hopper.
FIGURE 1
FIGURE 2
FLOW
CONTROL
ROD
HITCH
TUBE
LOCK NUT
CROSS OVER TUBE
SLIDE GATE
BRACKET
Hook the free end of the ow control rod through the 2.
hole in the slide gate bracket located near the bottom
of the hopper. See gure 2.
Remove the lock nut from the middle bolt in the crossover 3.
tube and shaft support plate. Leave the bolt in place.
See gure 2.
Assemble the hitch tube onto the middle bolt and secure 4.
it with the same lock nut you removed. Do not tighten
at this time. See gure 2.
IMPORTANT: The hitch tube must attach to the side of the
crossover tube opposite the shaft support plate.