


1. Determine approximate square footage of area to
be covered and estimate amount of material re-
quired.
2. With flow control arm in the off position, set flow
rate gauge at the number indicated in flow rate
chart - light or heavy application rate. Also refer
to the bag instructions for manufacturers recom-
mended settings.
3. Break up lumpy fertilizer as you fill hopper.
4. To broadcast, always start tractor in motion be-
fore opening closure plate. Do not allow tractor
to sit stationary with flow control arm in the on
position. If fertilizer is accidentally deposited to
heavily in a small area, soak down thoroughly with
garden hose or sprinkler to prevent burning of
lawn.
IMPORTANT: Application rates (shown on
chart) are affected by humidity and moisture
content of material (granular and pellet); there-
fore, minor setting adjustments may be neces-
sary to compensate for this condition. The
rate chart is calculated for light and heavy
application. The faster you drive, the wider the
broadcast width. A variation in speed will
determine the flow rates and width of broad-
cast.
When broadcasting weed control fer-
tilizers make sure broadcast pattern
does not hit evergreen trees, flowers
or shrubs.
CAUTION
FIGRUE 15
FIGURE 16
MATERIAL TYPE Flow Rate Setting
At 3 M.P.H.
Light Heavy
FERTILIZER Granular 3 5
Pelleted 5 7
GRASS SEED Fine 2 4
Coarse 6 8
ICE MELTER Granular 6 8
Pelleted 6 8
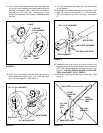
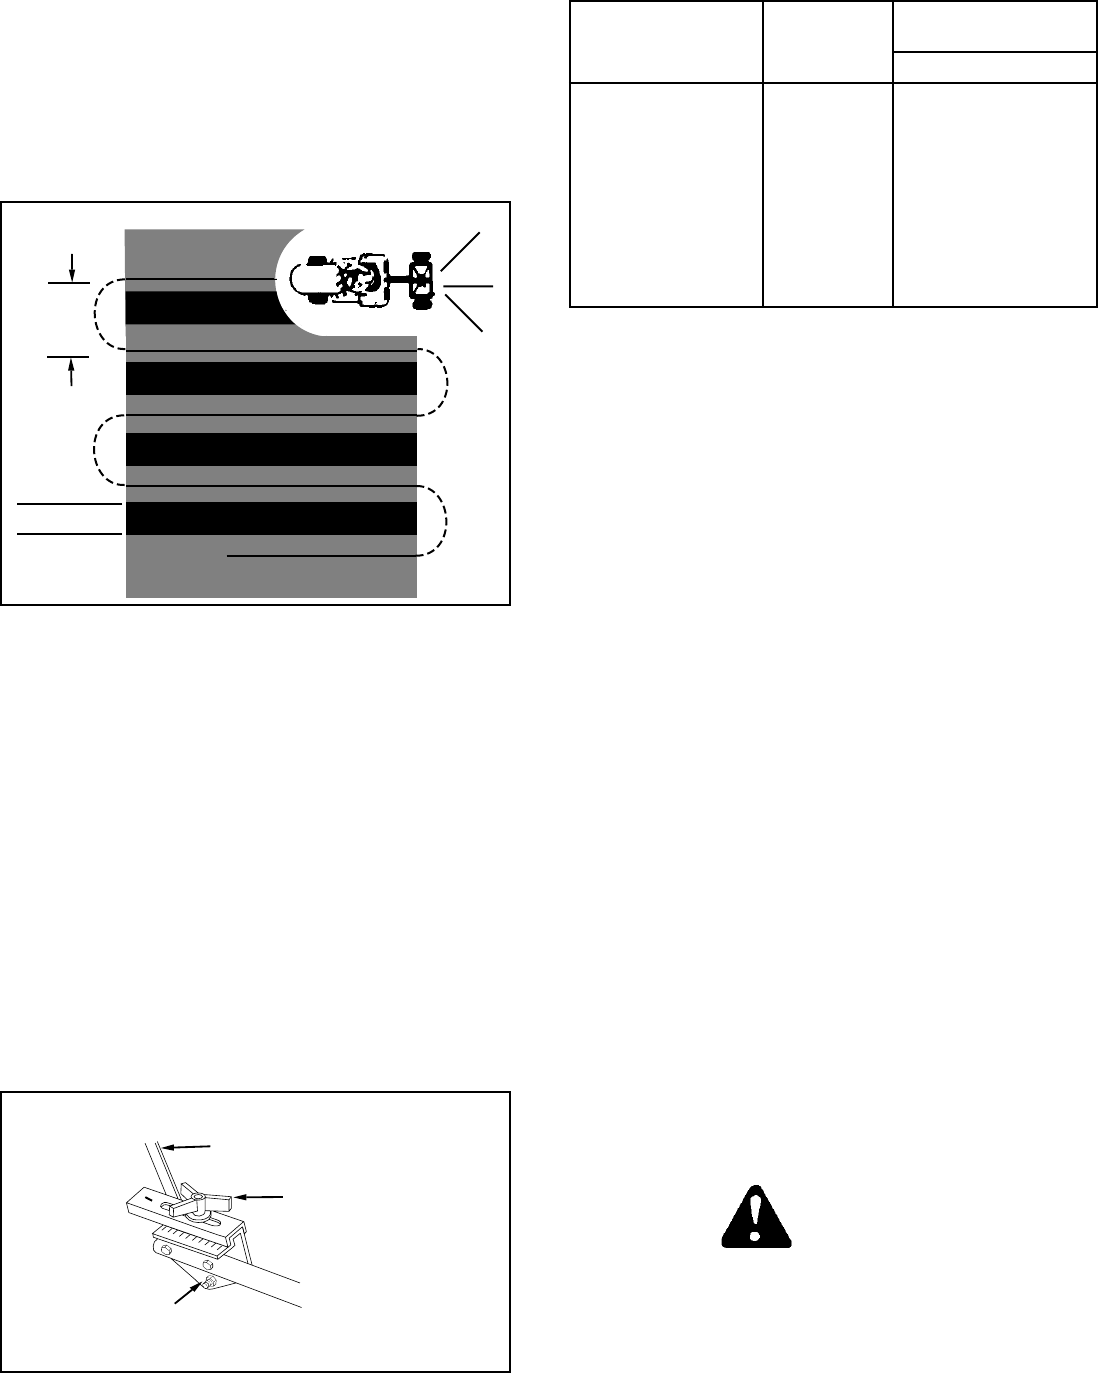
OPERATION
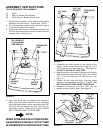
The application spray pattern should overlap to insure
uniform coverage at the edges. The approximate
distance between each pass is shown in the applica-
tion diagram. See figure 15.
APPLICATION DIAGRAM
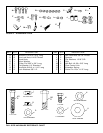
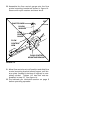
FLOW RATE ADJUSTMENT
(SEE FIGURE 16)
1. Push back on the flow control arm to the off
position and pull forward to the on position. The
higher the number on the flow rate gauge the
larger the opening in the bottom of the hopper.
2. REFER TO FLOW RATE CHART AND INSTRUC-
TIONS ON FERTILIZER BAG TO SELECT
PROPER FLOW RATE SETTING.
3. Loosen the hand knob to set the flow gauge to the
desired flow setting and tighten the hand knob.
4. Always move flow control arm to off position be-
fore stopping or turning spreader.
5. The spreader should be moving before you move
the flow control arm to the on position.
1
2
3
4
5
6
7
8
9
10
OFF
ON
FLOW CONTROL ARM
FLOW RATE GAUGE
HAND KNOB
OVERLAP
8' to
10'