


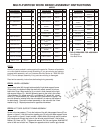
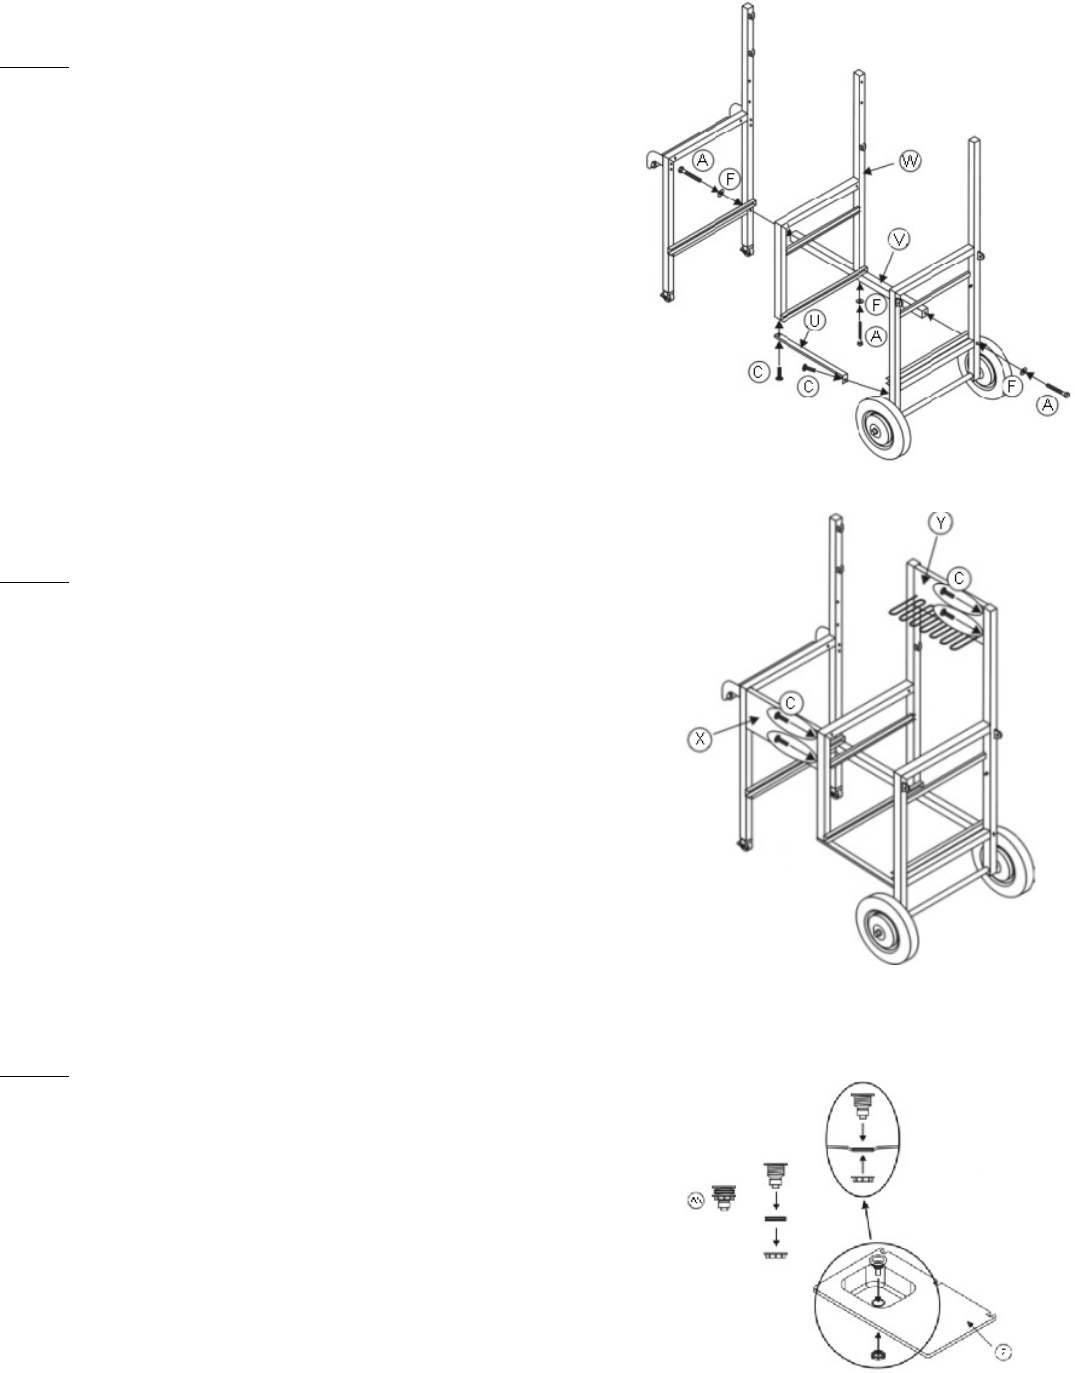
STEP 4 FRAME ASSEMBLY
Connect right side support frame (Q) and left side support frame (R)
using the rear support bar (V). Be sure that the hole in the center of the
rear support bar is facing up. Add a 10mm washer (F) to a M10 x 55
mm bolt (A) and insert through the left side frame support(r) into the
fixed nuts in the rear support bar (V) as shown in figure 3. Repeat for
opposite side. (Q). Attach front support bar to middle support frame as
shown in figure 3 using a M6 x 16mm bolt. Tighten with wrench. Do
not over tighten. With bottom of rear portion of middle support frame
resting on the rear support bar, attach front support bar to right side
support frame (with wheels) using M6x 16mm bolt (C) as shown in
figure 3. Tighten with wrench. Do not over tighten. Attach middle
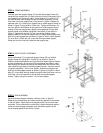
support frame (W) to the rear support bar (V). Align middle support bar
with hole in rear support bar as shown in figure 4. Add a 10mm washer
(F) to an M10 x 55mm bolt (A). Insert bolt through middle support
frame and into the fixed nut inside the rear support bar.
STEP 5 COILED SHELF ASSEMBLY
Attach coiled shelf (Y) to right side support frame (Q) and middle
support frame (W) using M6 x 16 bolts (C) as shown in figure 4.
Position coiled shelf between the right side and middle support frames
so that coiled portion of the panel is acing towards the bottom. Insert
bolts through the holes from behind the coiled shelf and into the fixed
nuts inside the right side and middle support frames. Use hex wrench
to tighten completely. Do not over tighten. Attach front panel to left
side and middle support panels as shown if figure 4 using M6 x 16mm
bolts (C). Insert bolts through holes from behind the front panel into the
fixed nuts in the front portion of the left side and middle support
frames. Tighten using hex wrench. Do not over tighten.
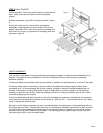
STEP 6 SINK ASSEMBLY
Install sink drain/stopper assembly (AA) as shown in figure 5.
Separate the three pieces and insert the center gasket into the whole
in the sink basin. Insert the funnel-shaped portion into the sink drain
as shown. From underneath the sink basin, attach the bottom portion
of the sink drain/stopper assembly onto the bottom portion of the
funnel shaped piece to hold firmly in place.
Figure 3
Figure 4
Figure 5
PAGE 2